First Run
Goal
This tutorial will take you from zero to running your first buildbot master and slave as quickly as possible, without changing the default configuration.
This tutorial is all about instant gratification and the five minute experience: in five minutes we want to convince you that this project Works, and that you should seriously consider spending some more time learning the system. In this tutorial no configuration or code changes are done.
This tutorial assumes that you are running on Unix, but might be adaptable easily to Windows.
For the quickest way through, you should be able to cut and paste each shell block from this tutorial directly into a terminal.
Getting the code
There are many ways to get the code on your machine. For this tutorial, we will use easy_install to install and run buildbot. While this isn’t the preferred method to install buildbot, it is the simplest one to use for the purposes of this tutorial because it should work on all systems. (The preferred method would be to install buildbot from packages of your distribution.)
- To make this work, you will need the following installed:
- python and the development packages for it
- virtualenv
- git
Preferably, use your package installer to install these.
You will also need a working Internet connection, as virtualenv and easy_install will need to download other projects from the Internet.
Let’s dive in by typing at the terminal:
cd
mkdir -p tmp/buildbot
cd tmp/buildbot
virtualenv --no-site-packages sandbox
source sandbox/bin/activate
easy_install buildbot
Creating a master
At the terminal, type:
cd sandbox
buildbot create-master master
mv master/master.cfg.sample master/master.cfg
Now start it:
buildbot start $VIRTUAL_ENV/master
tail -f $VIRTUAL_ENV/master/twistd.log
You will now see all of the log information from the master in this terminal. You should see lines like this:
2009-07-29 21:01:46+0200 [-] twisted.spread.pb.PBServerFactory starting on 9989
2009-07-29 21:01:46+0200 [-] Starting factory <twisted.spread.pb.PBServerFactory instance at 0x1fc8ab8>
2009-07-29 21:01:46+0200 [-] BuildMaster listening on port tcp:9989
2009-07-29 21:01:46+0200 [-] configuration update started
2009-07-29 21:01:46+0200 [-] configuration update complete
Creating a slave
Open a new terminal, and first enter the same sandbox you created before:
cd
cd tmp/buildbot
source sandbox/bin/activate
Install buildslave command:
easy_install buildbot-slave
Now, create the slave:
cd sandbox
buildslave create-slave slave localhost:9989 example-slave pass
The user:host pair, username, and password should be the same as the ones in master.cfg; please verify this is the case by looking at the section for c[‘slaves’]:
cat $VIRTUAL_ENV/master/master.cfg
Now, start the slave:
buildslave start $VIRTUAL_ENV/slave
Check the slave’s log:
tail -f $VIRTUAL_ENV/slave/twistd.log
You should see lines like the following at the end of the worker log:
2009-07-29 20:59:18+0200 [Broker,client] message from master: attached
2009-07-29 20:59:18+0200 [Broker,client] SlaveBuilder.remote_print(buildbot-full): message from master: attached
2009-07-29 20:59:18+0200 [Broker,client] sending application-level keepalives every 600 seconds
Meanwhile, in the master log, if you tail the log you should see lines like this:
tail -f $VIRTUAL_ENV/master/twistd.log

2011-03-13 18:46:58-0700 [Broker,1,127.0.0.1] slave 'example-slave' attaching from IPv4Address(TCP, '127.0.0.1', 41306)
2011-03-13 18:46:58-0700 [Broker,1,127.0.0.1] Got slaveinfo from 'example-slave'
2011-03-13 18:46:58-0700 [Broker,1,127.0.0.1] bot attached
2011-03-13 18:46:58-0700 [Broker,1,127.0.0.1] Buildslave example-slave attached to runtests
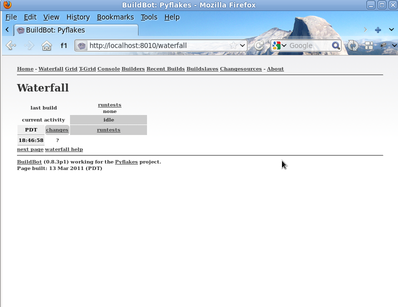
You should now be able to go to http://localhost:8010, where you will see a web page similar to:

Click on the Waterfall Display link and you get this:

That’s the end of the first tutorial. A bit underwhelming, you say ? Well, that was the point! We just wanted to get you to dip your toes in the water. It’s easy to take your first steps, but this is about as far as we can go without touching the configuration.
You’ve got a taste now, but you’re probably curious for more. Let’s step it up a little in the second tutorial by changing the configuration and doing an actual build. Continue on to A Quick Tour