1.1. First Run
1.1.1. Goal
This tutorial will take you from zero to running your first buildbot master and worker as quickly as possible, without changing the default configuration.
This tutorial is all about instant gratification and the five minute experience: in five minutes we want to convince you that this project works, and that you should seriously consider spending time learning the system. In this tutorial no configuration or code changes are done.
This tutorial assumes that you are running Unix, but might be adaptable to Windows.
Thanks to virtualenv, installing buildbot in a standalone environment is very easy. For those more familiar with Docker, there also exists a docker version of these instructions.
You should be able to cut and paste each shell block from this tutorial directly into a terminal.
1.1.2. Getting ready
There are many ways to get the code on your machine.
We will use the easiest one: via pip in a virtualenv.
It has the advantage of not polluting your operating system, as everything will be contained in the virtualenv.
To make this work, you will need the following installed:
- Python and the development packages for it
- virtualenv
Preferably, use your distribution package manager to install these.
You will also need a working Internet connection, as virtualenv and pip will need to download other projects from the Internet.
Note
Buildbot does not require root access. Run the commands in this tutorial as a normal, unprivileged user.
1.1.3. Creating a master
The first necessary step is to create a virtualenv for our master. We will also use a separate directory to demonstrate the distinction between a master and worker:
cd
mkdir tmp
cd tmp
mkdir buildbot
cd buildbot
On Python 2:
virtualenv --no-site-packages sandbox
source sandbox/bin/activate
On Python 3:
python3 -m venv sandbox
source sandbox/bin/activate
Now that we are ready, we need to install buildbot:
pip install --upgrade pip
pip install 'buildbot[bundle]'
Now that buildbot is installed, it's time to create the master:
buildbot create-master master
Buildbot's activity is controlled by a configuration file. We will use the sample configuration file unchanged:
mv master/master.cfg.sample master/master.cfg
Finally, start the master:
buildbot start master
You will now see some log information from the master in this terminal. It should end with lines like these:
2014-11-01 15:52:55+0100 [-] BuildMaster is running
The buildmaster appears to have (re)started correctly.
From now on, feel free to visit the web status page running on the port 8010: http://localhost:8010/
Our master now needs (at least) a worker to execute its commands. For that, head on to the next section!
1.1.4. Creating a worker
The worker will be executing the commands sent by the master. In this tutorial, we are using the pyflakes project as an example. As a consequence of this, your worker will need access to the git command in order to checkout some code. Be sure that it is installed, or the builds will fail.
Same as we did for our master, we will create a virtualenv for our worker next to the other one. It would however be completely ok to do this on another computer - as long as the worker computer is able to connect to the master one:
cd
mkdir tmp/bb-worker
cd tmp/bb-worker
On Python 2:
virtualenv --no-site-packages sandbox
source sandbox/bin/activate
On Python 3:
python3 -m venv sandbox
source sandbox/bin/activate
Install the buildbot-worker command:
pip install buildbot-worker
# required for `runtests` build
pip install setuptools-trial
Now, create the worker:
buildbot-worker create-worker worker localhost example-worker pass
Note
If you decided to create this from another computer, you should replace localhost with the name of the computer where your master is running.
The username (example-worker), and password (pass) should be the same as those in master/master.cfg; verify this is the case by looking at the section for c['workers']:
cat ../bb-master/master/master.cfg
And finally, start the worker:
buildbot-worker start worker
Check the worker's output. It should end with lines like these:
2014-11-01 15:56:51+0100 [-] Connecting to localhost:9989
2014-11-01 15:56:51+0100 [Broker,client] message from master: attached
The worker appears to have (re)started correctly.
Meanwhile, from the other terminal, in the master log (twisted.log in the master directory), you should see lines like these:
2014-11-01 15:56:51+0100 [Broker,1,127.0.0.1] worker 'example-worker' attaching from IPv4Address(TCP, '127.0.0.1', 54015)
2014-11-01 15:56:51+0100 [Broker,1,127.0.0.1] Got workerinfo from 'example-worker'
2014-11-01 15:56:51+0100 [-] bot attached
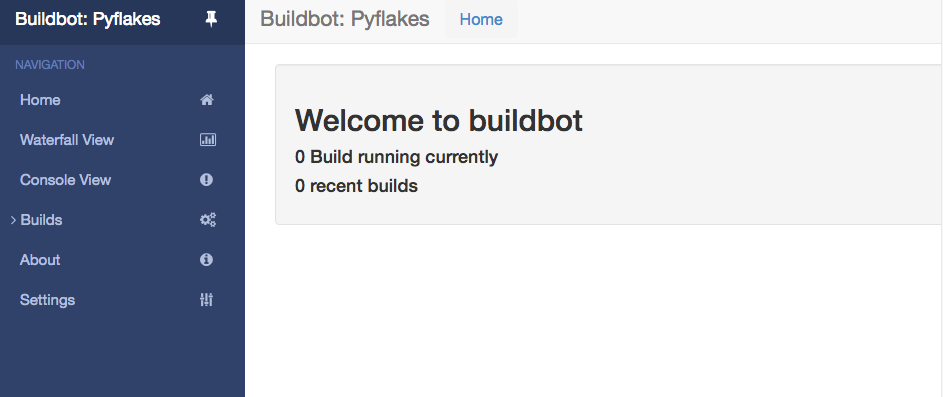
You should now be able to go to http://localhost:8010, where you will see a web page similar to:
Click on the Waterfall Display link and you get this:

Your master is now quietly waiting for new commits to Pyflakes. This doesn't happen very often though. In the next section, we'll see how to manually start a build.
We just wanted to get you to dip your toes in the water. It's easy to take your first steps, but this is about as far as we can go without touching the configuration.
You've got a taste now, but you're probably curious for more. Let's step it up a little in the second tutorial by changing the configuration and doing an actual build. Continue on to A Quick Tour.