This is the BuildBot documentation for Buildbot version 0.8.8.
If you are evaluating Buildbot and would like to get started quickly, start with the Tutorial. Regular users of Buildbot should consult the Manual, and those wishing to modify Buildbot directly will want to be familiar with the Developer's Documentation.
Table Of Contents
Buildbot Tutorial
Contents:
First Run
Goal
This tutorial will take you from zero to running your first buildbot master and slave as quickly as possible, without changing the default configuration.
This tutorial is all about instant gratification and the five minute experience: in five minutes we want to convince you that this project Works, and that you should seriously consider spending some more time learning the system. In this tutorial no configuration or code changes are done.
This tutorial assumes that you are running on Unix, but might be adaptable easily to Windows.
For the quickest way through, you should be able to cut and paste each shell block from this tutorial directly into a terminal.
Getting the code
There are many ways to get the code on your machine. For this tutorial, we will use easy_install to install and run buildbot. While this isn't the preferred method to install buildbot, it is the simplest one to use for the purposes of this tutorial because it should work on all systems. (The preferred method would be to install buildbot from packages of your distribution.)
- To make this work, you will need the following installed:
- Python and the development packages for it
- virtualenv
- Git
Preferably, use your package installer to install these.
You will also need a working Internet connection, as virtualenv and easy_install will need to download other projects from the Internet.
Note
Buildbot does not require root access. Run the commands in this tutorial as a normal, unprivileged user.
Let's dive in by typing at the terminal:
cd
mkdir -p tmp/buildbot
cd tmp/buildbot
virtualenv --no-site-packages sandbox
source sandbox/bin/activate
easy_install sqlalchemy==0.7.10
easy_install buildbot
Note
The requirement to install SQLAlchemy-0.7.10 is due to a conflict between newer versions of SQLAlchemy and SQLAlchemy-Migrate.
Creating a master
At the terminal, type:
buildbot create-master master
mv master/master.cfg.sample master/master.cfg
Now start it:
buildbot start master
tail -f master/twistd.log
You will now see all of the log information from the master in this terminal. You should see lines like this:
2011-12-04 10:04:40-0600 [-] Starting factory <buildbot.status.web.baseweb.RotateLogSite instance at 0x2e36638>
2011-12-04 10:04:40-0600 [-] Setting up http.log rotating 10 files of 10000000 bytes each
2011-12-04 10:04:40-0600 [-] WebStatus using (/home/dustin/tmp/buildbot/master/public_html)
2011-12-04 10:04:40-0600 [-] removing 0 old schedulers, updating 0, and adding 1
2011-12-04 10:04:40-0600 [-] adding 1 new changesources, removing 0
2011-12-04 10:04:40-0600 [-] gitpoller: using workdir '/home/dustin/tmp/buildbot/master/gitpoller-workdir'
2011-12-04 10:04:40-0600 [-] gitpoller: initializing working dir from git://github.com/buildbot/pyflakes.git
2011-12-04 10:04:40-0600 [-] configuration update complete
2011-12-04 10:04:41-0600 [-] gitpoller: checking out master
2011-12-04 10:04:41-0600 [-] gitpoller: finished initializing working dir from git://github.com/buildbot/pyflakes.git at rev 1a4af6ec1dbb724b884ea14f439b272f30439e4d
Creating a slave
Open a new terminal, and first enter the same sandbox you created before:
cd
cd tmp/buildbot
source sandbox/bin/activate
Install buildslave command:
easy_install buildbot-slave
Now, create the slave:
buildslave create-slave slave localhost:9989 example-slave pass
The user:host pair, username, and password should be the same as the ones in master.cfg; verify this is the case by looking at the section for c['slaves'] and c['slavePortnum']:
cat master/master.cfg
Now, start the slave:
buildslave start slave
Check the slave's log:
tail -f slave/twistd.log
You should see lines like the following at the end of the worker log:
2009-07-29 20:59:18+0200 [Broker,client] message from master: attached
2009-07-29 20:59:18+0200 [Broker,client] SlaveBuilder.remote_print(buildbot-full): message from master: attached
2009-07-29 20:59:18+0200 [Broker,client] sending application-level keepalives every 600 seconds
Meanwhile, in the other terminal, in the master log, if you tail the log you should see lines like this:
2011-03-13 18:46:58-0700 [Broker,1,127.0.0.1] slave 'example-slave' attaching from IPv4Address(TCP, '127.0.0.1', 41306)
2011-03-13 18:46:58-0700 [Broker,1,127.0.0.1] Got slaveinfo from 'example-slave'
2011-03-13 18:46:58-0700 [Broker,1,127.0.0.1] bot attached
2011-03-13 18:46:58-0700 [Broker,1,127.0.0.1] Buildslave example-slave attached to runtests
You should now be able to go to http://localhost:8010, where you will see a web page similar to:
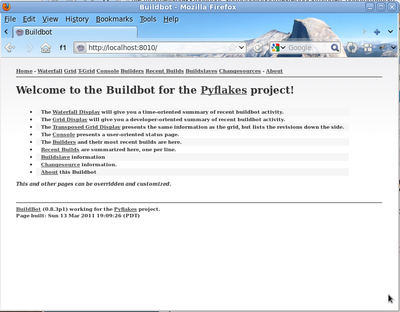
Click on the Waterfall Display link and you get this:

That's the end of the first tutorial. A bit underwhelming, you say? Well, that was the point! We just wanted to get you to dip your toes in the water. It's easy to take your first steps, but this is about as far as we can go without touching the configuration.
You've got a taste now, but you're probably curious for more. Let's step it up a little in the second tutorial by changing the configuration and doing an actual build. Continue on to A Quick Tour
A Quick Tour
Goal
This tutorial will expand on the First Run tutorial by taking a quick tour around some of the features of buildbot that are hinted at in the comments in the sample configuration. We will simply change parts of the default configuration and explain the activated features.
As a part of this tutorial, we will make buildbot do a few actual builds.
- This section will teach you how to:
- make simple configuration changes and activate them
- deal with configuration errors
- force builds
- enable and control the IRC bot
- enable ssh debugging
- add a 'try' scheduler
Setting Project Name and URL
Let's start simple by looking at where you would customize the buildbot's project name and URL.
We continue where we left off in the First Run tutorial.
Open a new terminal, and first enter the same sandbox you created before (where $EDITOR is your editor of choice like vim, gedit, or emacs):
cd
cd tmp/buildbot
source sandbox/bin/activate
$EDITOR master/master.cfg
Now, look for the section marked PROJECT IDENTITY which reads:
####### PROJECT IDENTITY

# the 'title' string will appear at the top of this buildbot
# installation's html.WebStatus home page (linked to the
# 'titleURL') and is embedded in the title of the waterfall HTML page.

c['title'] = "Pyflakes"
c['titleURL'] = "http://divmod.org/trac/wiki/DivmodPyflakes"
If you want, you can change either of these links to anything you want to see what happens when you change them.
After making a change go into the terminal and type:
buildbot reconfig master
You will see a handful of lines of output from the master log, much like this:
2011-12-04 10:11:09-0600 [-] loading configuration from /home/dustin/tmp/buildbot/master/master.cfg
2011-12-04 10:11:09-0600 [-] configuration update started
2011-12-04 10:11:09-0600 [-] builder runtests is unchanged
2011-12-04 10:11:09-0600 [-] removing IStatusReceiver <WebStatus on port tcp:8010 at 0x2aee368>
2011-12-04 10:11:09-0600 [-] (TCP Port 8010 Closed)
2011-12-04 10:11:09-0600 [-] Stopping factory <buildbot.status.web.baseweb.RotateLogSite instance at 0x2e36638>
2011-12-04 10:11:09-0600 [-] adding IStatusReceiver <WebStatus on port tcp:8010 at 0x2c2d950>
2011-12-04 10:11:09-0600 [-] RotateLogSite starting on 8010
2011-12-04 10:11:09-0600 [-] Starting factory <buildbot.status.web.baseweb.RotateLogSite instance at 0x2e36e18>
2011-12-04 10:11:09-0600 [-] Setting up http.log rotating 10 files of 10000000 bytes each
2011-12-04 10:11:09-0600 [-] WebStatus using (/home/dustin/tmp/buildbot/master/public_html)
2011-12-04 10:11:09-0600 [-] removing 0 old schedulers, updating 0, and adding 0
2011-12-04 10:11:09-0600 [-] adding 1 new changesources, removing 1
2011-12-04 10:11:09-0600 [-] gitpoller: using workdir '/home/dustin/tmp/buildbot/master/gitpoller-workdir'
2011-12-04 10:11:09-0600 [-] GitPoller repository already exists
2011-12-04 10:11:09-0600 [-] configuration update complete

Reconfiguration appears to have completed successfully.
The important lines are the ones telling you that it is loading the new configuration at the top, and the one at the bottom saying that the update is complete.
Now, if you go back to the waterfall page, you will see that the project's name is whatever you may have changed it to and when you click on the URL of the project name at the bottom of the page it should take you to the link you put in the configuration.
Configuration Errors
It is very common to make a mistake when configuring buildbot, so you might as well see now what happens in that case and what you can do to fix the error.
Open up the config again and introduce a syntax error by removing the first single quote in the two lines you changed, so they read:
c[title'] = "Pyflakes"
c['titleURL'] = "http://divmod.org/trac/wiki/DivmodPyflakes"
This creates a Python SyntaxError. Now go ahead and reconfig the buildmaster:
buildbot reconfig master
This time, the output looks like:
2011-12-04 10:12:28-0600 [-] loading configuration from /home/dustin/tmp/buildbot/master/master.cfg
2011-12-04 10:12:28-0600 [-] configuration update started
2011-12-04 10:12:28-0600 [-] error while parsing config file
2011-12-04 10:12:28-0600 [-] Unhandled Error
        Traceback (most recent call last):
        File "/home/dustin/tmp/buildbot/sandbox/lib/python2.7/site-packages/buildbot-0.8.5-py2.7.egg/buildbot/master.py", line 197, in loadTheConfigFile
            d = self.loadConfig(f)
        File "/home/dustin/tmp/buildbot/sandbox/lib/python2.7/site-packages/buildbot-0.8.5-py2.7.egg/buildbot/master.py", line 579, in loadConfig
            d.addCallback(do_load)
        File "/home/dustin/tmp/buildbot/sandbox/lib/python2.7/site-packages/Twisted-11.1.0-py2.7-linux-x86_64.egg/twisted/internet/defer.py", line 298, in addCallback
            callbackKeywords=kw)
        File "/home/dustin/tmp/buildbot/sandbox/lib/python2.7/site-packages/Twisted-11.1.0-py2.7-linux-x86_64.egg/twisted/internet/defer.py", line 287, in addCallbacks
            self._runCallbacks()
        --- <exception caught here> ---
        File "/home/dustin/tmp/buildbot/sandbox/lib/python2.7/site-packages/Twisted-11.1.0-py2.7-linux-x86_64.egg/twisted/internet/defer.py", line 545, in _runCallbacks
            current.result = callback(current.result, *args, **kw)
        File "/home/dustin/tmp/buildbot/sandbox/lib/python2.7/site-packages/buildbot-0.8.5-py2.7.egg/buildbot/master.py", line 226, in do_load
            exec f in localDict
        exceptions.SyntaxError: EOL while scanning string literal (master.cfg, line 17)

Never saw reconfiguration finish.
This time, it's clear that there was a mistake. in the configuration. Luckily, the buildbot master will ignore the wrong configuration and keep running with the previous configuration.
The message is clear enough, so open the configuration again, fix the error, and reconfig the master.
Your First Build
By now you're probably thinking: "All this time spent and still not done a single build ? What was the name of this project again ?"
On the waterfall. page, click on the runtests link. You'll see a builder page, and in the upper-right corner is a box where you can login. The default username and password are both "pyflakes". Once you've logged in, you will see some new options that allow you to force a build:
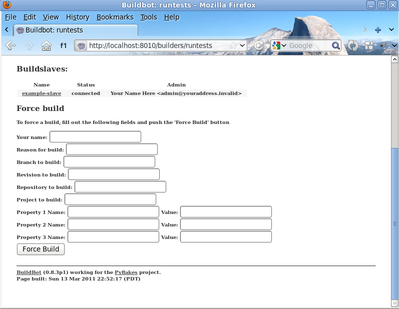
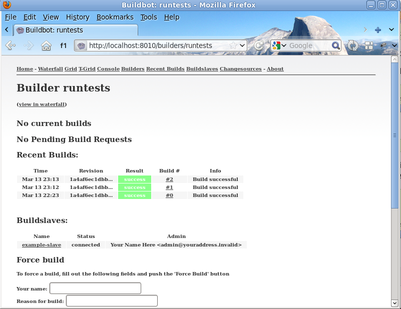
Click Force Build - there's no need to fill in any of the fields in this case. Next, click on view in waterfall.
You will now see:

Enabling the IRC Bot
Buildbot includes an IRC bot that you can tell to join a channel and control to report on the status of buildbot.
First, start an IRC client of your choice, connect to irc.freenode.org and join an empty channel. In this example we will use #buildbot-test, so go join that channel. (Note: please do not join the main buildbot channel!)
Edit the config and look for the STATUS TARGETS section. Enter these lines below the WebStatus line in master.cfg:
c['status'].append(html.WebStatus(http_port=8010, authz=authz_cfg))

from buildbot.status import words
c['status'].append(words.IRC(host="irc.freenode.org", nick="bbtest",
                             channels=["#buildbot-test"]))
Reconfigure the build master then do:
cat master/twistd.log | grep IRC
The log output should contain a line like this:
2009-08-01 15:35:20+0200 [-] adding IStatusReceiver <buildbot.status.words.IRC instance at 0x300d290>
You should see the bot now joining in your IRC client. In your IRC channel, type:
bbtest: commands
to get a list of the commands the bot supports.
Let's tell the bot to notify certain events, to learn which EVENTS we can notify on:
bbtest: help notify
Now let's set some event notifications:
bbtest: notify on started
bbtest: notify on finished
bbtest: notify on failure
The bot should have responded to each of the commands:
<@lsblakk> bbtest: notify on started
<bbtest> The following events are being notified: ['started']
<@lsblakk> bbtest: notify on finished
<bbtest> The following events are being notified: ['started', 'finished']
<@lsblakk> bbtest: notify on failure
<bbtest> The following events are being notified: ['started', 'failure', 'finished']
Now, go back to the web interface and force another build.
Notice how the bot tells you about the start and finish of this build:
< bbtest> build #1 of runtests started, including []
< bbtest> build #1 of runtests is complete: Success [build successful]  Build details are at http://localhost:8010/builders/runtests/builds/1
You can also use the bot to force a build:
bbtest: force build runtests test build
But to allow this, you'll need to have allowForce in the IRC configuration:
c['status'].append(words.IRC(host="irc.freenode.org", nick="bbtest",
                             allowForce=True,
                             channels=["#buildbot-test"]))
This time, the bot is giving you more output, as it's specifically responding to your direct request to force a build, and explicitly tells you when the build finishes:
<@lsblakk> bbtest: force build runtests test build
< bbtest> build #2 of runtests started, including []
< bbtest> build forced [ETA 0 seconds]
< bbtest> I'll give a shout when the build finishes
< bbtest> build #2 of runtests is complete: Success [build successful]  Build details are at http://localhost:8010/builders/runtests/builds/2
You can also see the new builds in the web interface.
Setting Authorized Web Users
Further down, look for the WebStatus configuration:
c['status'] = []

from buildbot.status import html
from buildbot.status.web import authz, auth

authz_cfg=authz.Authz(
    # change any of these to True to enable; see the manual for more
    # options
    auth=auth.BasicAuth([("pyflakes","pyflakes")]),
    gracefulShutdown = False,
    forceBuild = 'auth', # use this to test your slave once it is set up
    forceAllBuilds = False,
    pingBuilder = False,
    stopBuild = False,
    stopAllBuilds = False,
    cancelPendingBuild = False,
)
c['status'].append(html.WebStatus(http_port=8010, authz=authz_cfg))
The auth.BasicAuth() define authorized users and their passwords. You can change these or add new ones. See WebStatus for more about the WebStatus configuration.
Debugging with Manhole
You can do some debugging by using manhole, an interactive Python shell. It exposes full access to the buildmaster's account (including the ability to modify and delete files), so it should not be enabled with a weak or easily guessable password.
To use this you will need to install an additional package or two to your virtualenv:
cd
cd tmp/buildbot
source sandbox/bin/activate
easy_install pycrypto
easy_install pyasn1
In your master.cfg find:
c = BuildmasterConfig = {}
Insert the following to enable debugging mode with manhole:
####### DEBUGGING
from buildbot import manhole
c['manhole'] = manhole.PasswordManhole("tcp:1234:interface=127.0.0.1","admin","passwd")
After restarting the master, you can ssh into the master and get an interactive Python shell:
ssh -p1234 admin@127.0.0.1
# enter passwd at prompt
Note
The pyasn1-0.1.1 release has a bug which results in an exception similar to this on startup:
exceptions.TypeError: argument 2 must be long, not int
If you see this, the temporary solution is to install the previous version of pyasn1:
pip install pyasn1-0.0.13b
If you wanted to check which slaves are connected and what builders those slaves are assigned to you could do:
>>> master.botmaster.slaves
{'example-slave': <BuildSlave 'example-slave', current builders: runtests>}
Objects can be explored in more depth using dir(x) or the helper function show(x).
Adding a 'try' scheduler
Buildbot includes a way for developers to submit patches for testing without committing them to the source code control system. (This is really handy for projects that support several operating systems or architectures.)
To set this up, add the following lines to master.cfg:
from buildbot.scheduler import Try_Userpass
c['schedulers'].append(Try_Userpass(
                                    name='try',
                                    builderNames=['runtests'],
                                    port=5555,
                                    userpass=[('sampleuser','samplepass')]))
Then you can submit changes using the try command.
Let's try this out by making a one-line change to pyflakes, say, to make it trace the tree by default:
git clone git://github.com/buildbot/pyflakes.git pyflakes-git
cd pyflakes-git/pyflakes
$EDITOR checker.py
# change "traceTree = False" on line 185 to "traceTree = True"
Then run buildbot's try command as follows:
source ~/tmp/buildbot/sandbox/bin/activate
buildbot try --connect=pb --master=127.0.0.1:5555 --username=sampleuser --passwd=samplepass --vc=git
This will do "git diff" for you and send the resulting patch to the server for build and test against the latest sources from Git.
Now go back to the waterfall page, click on the runtests link, and scroll down. You should see that another build has been started with your change (and stdout for the tests should be chock-full of parse trees as a result). The "Reason" for the job will be listed as "'try' job", and the blamelist will be empty.
To make yourself show up as the author of the change, use the --who=emailaddr option on 'buildbot try' to pass your email address.
To make a description of the change show up, use the --properties=comment="this is a comment" option on 'buildbot try'.
To use ssh instead of a private username/password database, see Try_Jobdir.
Further Reading
See the following user-contributed tutorials for other highlights and ideas:
Buildbot in 5 minutes - a user-contributed tutorial
(Ok, maybe 10.)
Buildbot is really an excellent piece of software, however it can be a bit confusing for a newcomer (like me when I first started looking at it). Typically, at first sight it looks like a bunch of complicated concepts that make no sense and whose relationships with each other are unclear. After some time and some reread, it all slowly starts to be more and more meaningful, until you finally say "oh!" and things start to make sense. Once you get there, you realize that the documentation is great, but only if you already know what it's about.
This is what happened to me, at least. Here I'm going to (try to) explain things in a way that would have helped me more as a newcomer. The approach I'm taking is more or less the reverse of that used by the documentation, that is, I'm going to start from the components that do the actual work (the builders) and go up the chain from there up to change sources. I hope purists will forgive this unorthodoxy. Here I'm trying to clarify the concepts only, and will not go into the details of each object or property; the documentation explains those quite well.
Installation
I won't cover the installation; both buildbot master and slave are available as packages for the major distributions, and in any case the instructions in the official documentation are fine. This document will refer to buildbot 0.8.5 which was current at the time of writing, but hopefully the concepts are not too different in other versions. All the code shown is of course python code, and has to be included in the master.cfg master configuration file.
We won't cover the basic things such as how to define the slaves, project names, or other administrative information that is contained in that file; for that, again the official documentation is fine.
Builders: the workhorses
Since buildbot is a tool whose goal is the automation of software builds, it makes sense to me to start from where we tell buildbot how to build our software: the builder (or builders, since there can be more than one).
Simply put, a builder is an element that is in charge of performing some action or sequence of actions, normally something related to building software (for example, checking out the source, or "make all"), but it can also run arbitrary commands.
A builder is configured with a list of slaves that it can use to carry out its task. The other fundamental piece of information that a builder needs is, of course, the list of things it has to do (which will normally run on the chosen slave). In buildbot, this list of things is represented as a BuildFactory object, which is essentially a sequence of steps, each one defining a certain operation or command.
Enough talk, let's see an example. For this example, we are going to assume that our super software project can be built using a simple "make all", and there is another target "make packages" that creates rpm, deb and tgz packages of the binaries. In the real world things are usually more complex (for example there may be a "configure" step, or multiple targets), but the concepts are the same; it will just be a matter of adding more steps to a builder, or creating multiple builders, although sometimes the resulting builders can be quite complex.
So to perform a manual build of our project we would type this from the command line (assuming we are at the root of the local copy of the repository):
$ make clean    # clean remnants of previous builds
...
$ svn update
...
$ make all
...
$ make packages
...
# optional but included in the example: copy packages to some central machine
$ scp packages/*.rpm packages/*.deb packages/*.tgz someuser@somehost:/repository
...
Here we're assuming the repository is SVN, but again the concepts are the same with git, mercurial or any other VCS.
Now, to automate this, we create a builder where each step is one of the commands we typed above. A step can be a shell command object, or a dedicated object that checks out the source code (there are various types for different repositories, see the docs for more info), or yet something else:
from buildbot.process.factory import BuildFactory
from buildbot.steps.source import SVN
from buildbot.steps.shell import ShellCommand

# first, let's create the individual step objects

# step 1: make clean; this fails if the slave has no local copy, but
# is harmless and will only happen the first time
makeclean = ShellCommand(name = "make clean",
                         command = ["make", "clean"],
                         description = "make clean")

# step 2: svn update (here updates trunk, see the docs for more
# on how to update a branch, or make it more generic).
checkout = SVN(baseURL = 'svn://myrepo/projects/coolproject/trunk',
               mode = "update",
               username = "foo",
               password = "bar",
               haltOnFailure = True )

# step 3: make all
makeall = ShellCommand(name = "make all",
                       command = ["make", "all"],
                       haltOnFailure = True,
                       description = "make all")

# step 4: make packages
makepackages = ShellCommand(name = "make packages",
                            command = ["make", "packages"],
                            haltOnFailure = True,
                            description = "make packages")

# step 5: upload packages to central server. This needs passwordless ssh
# from the slave to the server (set it up in advance as part of slave setup)
uploadpackages = ShellCommand(name = "upload packages",
                              description = "upload packages",
                              command = "scp packages/*.rpm packages/*.deb packages/*.tgz someuser@somehost:/repository",
                              haltOnFailure = True)

# create the build factory and add the steps to it
f_simplebuild = BuildFactory()
f_simplebuild.addStep(makeclean)
f_simplebuild.addStep(checkout)
f_simplebuild.addStep(makeall)
f_simplebuild.addStep(makepackages)
f_simplebuild.addStep(uploadpackages)

# finally, declare the list of builders. In this case, we only have one builder
c['builders'] = [
    BuilderConfig(name = "simplebuild", slavenames = ['slave1', 'slave2', 'slave3'], factory = f_simplebuild)
]
So our builder is called "simplebuild" and can run on either of slave1, slave2 and slave3. If our repository has other branches besides trunk, we could create another one or more builders to build them; in the example, only the checkout step would be different, in that it would need to check out the specific branch. Depending on how exactly those branches have to be built, the shell commands may be recycled, or new ones would have to be created if they are different in the branch. You get the idea. The important thing is that all the builders be named differently and all be added to the c['builders'] value (as can be seen above, it is a list of BuilderConfig objects).
Of course the type and number of steps will vary depending on the goal; for example, to just check that a commit doesn't break the build, we could include just up to the "make all" step. Or we could have a builder that performs a more thorough test by also doing "make test" or other targets. You get the idea. Note that at each step except the very first we use haltOnFailure = True because it would not make sense to execute a step if the previous one failed (ok, it wouldn't be needed for the last step, but it's harmless and protects us if one day we add another step after it).
Schedulers
Now this is all nice and dandy, but who tells the builder (or builders) to run, and when? This is the job of the scheduler, which is a fancy name for an element that waits for some event to happen, and when it does, based on that information decides whether and when to run a builder (and which one or ones). There can be more than one scheduler. I'm being purposely vague here because the possibilities are almost endless and highly dependent on the actual setup, build purposes, source repository layout and other elements.
So a scheduler needs to be configured with two main pieces of information: on one hand, which events to react to, and on the other hand, which builder or builders to trigger when those events are detected. (It's more complex than that, but if you understand this, you can get the rest of the details from the docs).
A simple type of scheduler may be a periodic scheduler: when a configurable amount of time has passed, run a certain builder (or builders). In our example, that's how we would trigger a build every hour:
from buildbot.schedulers.timed import Periodic

# define the periodic scheduler
hourlyscheduler = Periodic(name = "hourly",
                           builderNames = ["simplebuild"],
                           periodicBuildTimer = 3600)

# define the available schedulers
c['schedulers'] = [ hourlyscheduler ]
That's it. Every hour this "hourly" scheduler will run the "simplebuild" builder. If we have more than one builder that we want to run every hour, we can just add them to the builderNames list when defining the scheduler and they will all be run. Or since multiple scheduler are allowed, other schedulers can be defined and added to c['schedulers'] in the same way.
Other types of schedulers exist; in particular, there are schedulers that can be more dynamic than the periodic one. The typical dynamic scheduler is one that learns about changes in a source repository (generally because some developer checks in some change), and triggers one or more builders in response to those changes. Let's assume for now that the scheduler "magically" learns about changes in the repository (more about this later); here's how we would define it:
from buildbot.schedulers.basic import SingleBranchScheduler
from buildbot.changes import filter

# define the dynamic scheduler
trunkchanged = SingleBranchScheduler(name = "trunkchanged",
                                     change_filter = filter.ChangeFilter(branch = None),
                                     treeStableTimer = 300,
                                     builderNames = ["simplebuild"])

# define the available schedulers
c['schedulers'] = [ trunkchanged ]
This scheduler receives changes happening to the repository, and among all of them, pays attention to those happening in "trunk" (that's what branch = None means). In other words, it filters the changes to react only to those it's interested in. When such changes are detected, and the tree has been quiet for 5 minutes (300 seconds), it runs the "simplebuild" builder. The treeStableTimer helps in those situations where commits tend to happen in bursts, which would otherwise result in multiple build requests queuing up.
What if we want to act on two branches (say, trunk and 7.2)? First we create two builders, one for each branch (see the builders paragraph above), then we create two dynamic schedulers:
from buildbot.schedulers.basic import SingleBranchScheduler
from buildbot.changes import filter

# define the dynamic scheduler for trunk
trunkchanged = SingleBranchScheduler(name = "trunkchanged",
                                     change_filter = filter.ChangeFilter(branch = None),
                                     treeStableTimer = 300,
                                     builderNames = ["simplebuild-trunk"])

# define the dynamic scheduler for the 7.2 branch
branch72changed = SingleBranchScheduler(name = "branch72changed",
                                        change_filter = filter.ChangeFilter(branch = 'branches/7.2'),
                                        treeStableTimer = 300,
                                        builderNames = ["simplebuild-72"])

# define the available schedulers
c['schedulers'] = [ trunkchanged, branch72changed ]
The syntax of the change filter is VCS-dependent (above is for SVN), but again once the idea is clear, the documentation has all the details. Another feature of the scheduler is that is can be told which changes, within those it's paying attention to, are important and which are not. For example, there may be a documentation directory in the branch the scheduler is watching, but changes under that directory should not trigger a build of the binary. This finer filtering is implemented by means of the fileIsImportant argument to the scheduler (full details in the docs and - alas - in the sources).
Change sources
Earlier we said that a dynamic scheduler "magically" learns about changes; the final piece of the puzzle are change sources, which are precisely the elements in buildbot whose task is to detect changes in the repository and communicate them to the schedulers. Note that periodic schedulers don't need a change source, since they only depend on elapsed time; dynamic schedulers, on the other hand, do need a change source.
A change source is generally configured with information about a source repository (which is where changes happen); a change source can watch changes at different levels in the hierarchy of the repository, so for example it is possible to watch the whole repository or a subset of it, or just a single branch. This determines the extent of the information that is passed down to the schedulers.
There are many ways a change source can learn about changes; it can periodically poll the repository for changes, or the VCS can be configured (for example through hook scripts triggered by commits) to push changes into the change source. While these two methods are probably the most common, they are not the only possibilities; it is possible for example to have a change source detect changes by parsing some email sent to a mailing list when a commit happen, and yet other methods exist. The manual again has the details.
To complete our example, here's a change source that polls a SVN repository every 2 minutes:
from buildbot.changes.svnpoller import SVNPoller, split_file_branches

svnpoller = SVNPoller(svnurl = "svn://myrepo/projects/coolproject",
                      svnuser = "foo",
                      svnpasswd = "bar",
                      pollinterval = 120,
                      split_file = split_file_branches)

c['change_source'] = svnpoller
This poller watches the whole "coolproject" section of the repository, so it will detect changes in all the branches. We could have said
svnurl = "svn://myrepo/projects/coolproject/trunk"
or
svnurl = "svn://myrepo/projects/coolproject/branches/7.2"
to watch only a specific branch.
To watch another project, you need to create another change source -- and you need to filter changes by project. For instance, when you add a changesource watching project 'superproject' to the above example, you need to change:
trunkchanged = SingleBranchScheduler(name = "trunkchanged",
                                     change_filter = filter.ChangeFilter(branch = None),
...
to e.g.:
trunkchanged = SingleBranchScheduler(name = "trunkchanged",
                                     change_filter = filter.ChangeFilter(project = "coolproject", branch = None),
...
else coolproject will be built when there's a change in superproject.
Since we're watching more than one branch, we need a method to tell in which branch the change occurred when we detect one. This is what the split_file argument does, it takes a callable that buildbot will call to do the job. The split_file_branches function, which comes with buildbot, is designed for exactly this purpose so that's what the example above uses.
And of course this is all SVN-specific, but there are pollers for all the popular VCSs.
But note: if you have many projects, branches, and builders it probably pays to not hardcode all the schedulers and builders in the configuration, but generate them dynamically starting from list of all projects, branches, targets etc. and using loops to generate all possible combinations (or only the needed ones, depending on the specific setup), as explained in the documentation chapter about Customization.
Status targets
Now that the basics are in place, let's go back to the builders, which is where the real work happens. Status targets are simply the means buildbot uses to inform the world about what's happening, that is, how builders are doing. There are many status target: a web interface, a mail notifier, an IRC notifier, and others. They are described fairly well in the manual.
One thing I've found useful is the ability to pass a domain name as the lookup argument to a mailNotifier, which allows to take an unqualified username as it appears in the SVN change and create a valid email address by appending the given domain name to it:
from buildbot.status import mail

# if jsmith commits a change, mail for the build is sent to jsmith@example.org
notifier = mail.MailNotifier(fromaddr = "buildbot@example.org",
                             sendToInterestedUsers = True,
                             lookup = "example.org")
c['status'].append(notifier)
The mail notifier can be customized at will by means of the messageFormatter argument, which is a function that buildbot calls to format the body of the email, and to which it makes available lots of information about the build. Here all the details.
Conclusion
Please note that this article has just scratched the surface; given the complexity of the task of build automation, the possiblities are almost endless. So there's much, much more to say about buildbot. However, hopefully this is a preparation step before reading the official manual. Had I found an explanation as the one above when I was approaching buildbot, I'd have had to read the manual just once, rather than multiple times. Hope this can help someone else.
(Thanks to Davide Brini for permission to include this tutorial, derived from one he originally posted at http://backreference.org )
This is the BuildBot manual for Buildbot version 0.8.8.
Buildbot Manual
Introduction
BuildBot is a system to automate the compile/test cycle required by most software projects to validate code changes. By automatically rebuilding and testing the tree each time something has changed, build problems are pinpointed quickly, before other developers are inconvenienced by the failure. The guilty developer can be identified and harassed without human intervention. By running the builds on a variety of platforms, developers who do not have the facilities to test their changes everywhere before checkin will at least know shortly afterwards whether they have broken the build or not. Warning counts, lint checks, image size, compile time, and other build parameters can be tracked over time, are more visible, and are therefore easier to improve.
The overall goal is to reduce tree breakage and provide a platform to run tests or code-quality checks that are too annoying or pedantic for any human to waste their time with. Developers get immediate (and potentially public) feedback about their changes, encouraging them to be more careful about testing before checkin.
Features:
- run builds on a variety of slave platforms
- arbitrary build process: handles projects using C, Python, whatever
- minimal host requirements: Python and Twisted
- slaves can be behind a firewall if they can still do checkout
- status delivery through web page, email, IRC, other protocols
- track builds in progress, provide estimated completion time
- flexible configuration by subclassing generic build process classes
- debug tools to force a new build, submit fake Changes, query slave status
- released under the GPL
History and Philosophy
The Buildbot was inspired by a similar project built for a development team writing a cross-platform embedded system. The various components of the project were supposed to compile and run on several flavors of unix (linux, solaris, BSD), but individual developers had their own preferences and tended to stick to a single platform. From time to time, incompatibilities would sneak in (some unix platforms want to use string.h, some prefer strings.h), and then the tree would compile for some developers but not others. The buildbot was written to automate the human process of walking into the office, updating a tree, compiling (and discovering the breakage), finding the developer at fault, and complaining to them about the problem they had introduced. With multiple platforms it was difficult for developers to do the right thing (compile their potential change on all platforms); the buildbot offered a way to help.
Another problem was when programmers would change the behavior of a library without warning its users, or change internal aspects that other code was (unfortunately) depending upon. Adding unit tests to the codebase helps here: if an application's unit tests pass despite changes in the libraries it uses, you can have more confidence that the library changes haven't broken anything. Many developers complained that the unit tests were inconvenient or took too long to run: having the buildbot run them reduces the developer's workload to a minimum.
In general, having more visibility into the project is always good, and automation makes it easier for developers to do the right thing. When everyone can see the status of the project, developers are encouraged to keep the tree in good working order. Unit tests that aren't run on a regular basis tend to suffer from bitrot just like code does: exercising them on a regular basis helps to keep them functioning and useful.
The current version of the Buildbot is additionally targeted at distributed free-software projects, where resources and platforms are only available when provided by interested volunteers. The buildslaves are designed to require an absolute minimum of configuration, reducing the effort a potential volunteer needs to expend to be able to contribute a new test environment to the project. The goal is for anyone who wishes that a given project would run on their favorite platform should be able to offer that project a buildslave, running on that platform, where they can verify that their portability code works, and keeps working.
System Architecture
The Buildbot consists of a single buildmaster and one or more buildslaves, connected in a star topology. The buildmaster makes all decisions about what, when, and how to build. It sends commands to be run on the build slaves, which simply execute the commands and return the results. (certain steps involve more local decision making, where the overhead of sending a lot of commands back and forth would be inappropriate, but in general the buildmaster is responsible for everything).
The buildmaster is usually fed Changes by some sort of version control system (Change Sources), which may cause builds to be run. As the builds are performed, various status messages are produced, which are then sent to any registered Status Targets.

The buildmaster is configured and maintained by the buildmaster admin, who is generally the project team member responsible for build process issues. Each buildslave is maintained by a buildslave admin, who do not need to be quite as involved. Generally slaves are run by anyone who has an interest in seeing the project work well on their favorite platform.
BuildSlave Connections
The buildslaves are typically run on a variety of separate machines, at least one per platform of interest. These machines connect to the buildmaster over a TCP connection to a publically-visible port. As a result, the buildslaves can live behind a NAT box or similar firewalls, as long as they can get to buildmaster. The TCP connections are initiated by the buildslave and accepted by the buildmaster, but commands and results travel both ways within this connection. The buildmaster is always in charge, so all commands travel exclusively from the buildmaster to the buildslave.
To perform builds, the buildslaves must typically obtain source code from a CVS/SVN/etc repository. Therefore they must also be able to reach the repository. The buildmaster provides instructions for performing builds, but does not provide the source code itself.

Buildmaster Architecture
The buildmaster consists of several pieces:

- Change Sources
- Which create a Change object each time something is modified in the VC repository. Most ChangeSources listen for messages from a hook script of some sort. Some sources actively poll the repository on a regular basis. All Changes are fed to the Schedulers.
- Schedulers
- Which decide when builds should be performed. They collect Changes into BuildRequests, which are then queued for delivery to Builders until a buildslave is available.
- Builders
- Which control exactly how each build is performed (with a series of BuildSteps, configured in a BuildFactory). Each Build is run on a single buildslave.
- Status plugins
- Which deliver information about the build results through protocols like HTTP, mail, and IRC.
Each Builder is configured with a list of BuildSlaves that it will use for its builds. These buildslaves are expected to behave identically: the only reason to use multiple BuildSlaves for a single Builder is to provide a measure of load-balancing.
Within a single BuildSlave, each Builder creates its own SlaveBuilder instance. These SlaveBuilders operate independently from each other. Each gets its own base directory to work in. It is quite common to have many Builders sharing the same buildslave. For example, there might be two buildslaves: one for i386, and a second for PowerPC. There may then be a pair of Builders that do a full compile/test run, one for each architecture, and a lone Builder that creates snapshot source tarballs if the full builders complete successfully. The full builders would each run on a single buildslave, whereas the tarball creation step might run on either buildslave (since the platform doesn't matter when creating source tarballs). In this case, the mapping would look like:
Builder(full-i386)  ->  BuildSlaves(slave-i386)
Builder(full-ppc)   ->  BuildSlaves(slave-ppc)
Builder(source-tarball) -> BuildSlaves(slave-i386, slave-ppc)
and each BuildSlave would have two SlaveBuilders inside it, one for a full builder, and a second for the source-tarball builder.
Once a SlaveBuilder is available, the Builder pulls one or more BuildRequests off its incoming queue. (It may pull more than one if it determines that it can merge the requests together; for example, there may be multiple requests to build the current HEAD revision). These requests are merged into a single Build instance, which includes the SourceStamp that describes what exact version of the source code should be used for the build. The Build is then randomly assigned to a free SlaveBuilder and the build begins.
The behaviour when BuildRequests are merged can be customized, Merging Build Requests.
Status Delivery Architecture
The buildmaster maintains a central Status object, to which various status plugins are connected. Through this Status object, a full hierarchy of build status objects can be obtained.

The configuration file controls which status plugins are active. Each status plugin gets a reference to the top-level Status object. From there they can request information on each Builder, Build, Step, and LogFile. This query-on-demand interface is used by the html.Waterfall plugin to create the main status page each time a web browser hits the main URL.
The status plugins can also subscribe to hear about new Builds as they occur: this is used by the MailNotifier to create new email messages for each recently-completed Build.
The Status object records the status of old builds on disk in the buildmaster's base directory. This allows it to return information about historical builds.
There are also status objects that correspond to Schedulers and BuildSlaves. These allow status plugins to report information about upcoming builds, and the online/offline status of each buildslave.
Control Flow
A day in the life of the buildbot:
- A developer commits some source code changes to the repository. A hook script or commit trigger of some sort sends information about this change to the buildmaster through one of its configured Change Sources. This notification might arrive via email, or over a network connection (either initiated by the buildmaster as it subscribes to changes, or by the commit trigger as it pushes Changes towards the buildmaster). The Change contains information about who made the change, what files were modified, which revision contains the change, and any checkin comments.
- The buildmaster distributes this change to all of its configured Schedulers. Any important changes cause the tree-stable-timer to be started, and the Change is added to a list of those that will go into a new Build. When the timer expires, a Build is started on each of a set of configured Builders, all compiling/testing the same source code. Unless configured otherwise, all Builds run in parallel on the various buildslaves.
- The Build consists of a series of Steps. Each Step causes some number of commands to be invoked on the remote buildslave associated with that Builder. The first step is almost always to perform a checkout of the appropriate revision from the same VC system that produced the Change. The rest generally perform a compile and run unit tests. As each Step runs, the buildslave reports back command output and return status to the buildmaster.
- As the Build runs, status messages like "Build Started", "Step Started", "Build Finished", etc, are published to a collection of Status Targets. One of these targets is usually the HTML Waterfall display, which shows a chronological list of events, and summarizes the results of the most recent build at the top of each column. Developers can periodically check this page to see how their changes have fared. If they see red, they know that they've made a mistake and need to fix it. If they see green, they know that they've done their duty and don't need to worry about their change breaking anything.
- If a MailNotifier status target is active, the completion of a build will cause email to be sent to any developers whose Changes were incorporated into this Build. The MailNotifier can be configured to only send mail upon failing builds, or for builds which have just transitioned from passing to failing. Other status targets can provide similar real-time notification via different communication channels, like IRC.
Installation
Buildbot Components
Buildbot is shipped in two components: the buildmaster (called buildbot for legacy reasons) and the buildslave. The buildslave component has far fewer requirements, and is more broadly compatible than the buildmaster. You will need to carefully pick the environment in which to run your buildmaster, but the buildslave should be able to run just about anywhere.
It is possible to install the buildmaster and buildslave on the same system, although for anything but the smallest installation this arrangement will not be very efficient.
Requirements
Common Requirements
At a bare minimum, you'll need the following for both the buildmaster and a buildslave:
Python: http://www.python.org
Buildbot requires Python-2.5 or later on the master, although Python-2.7 is recommended. The slave run on Python-2.4.
Twisted: http://twistedmatrix.com
Buildbot requires Twisted-9.0.0 or later on the master, and Twisted-8.1.0 on the slave. As always, the most recent version is recommended.
In some cases, Twisted is delivered as a collection of subpackages. You'll need at least "Twisted" (the core package), and you'll also want TwistedMail, TwistedWeb, and TwistedWords (for sending email, serving a web status page, and delivering build status via IRC, respectively). You might also want TwistedConch (for the encrypted Manhole debug port). Note that Twisted requires ZopeInterface to be installed as well.
Of course, your project's build process will impose additional requirements on the buildslaves. These hosts must have all the tools necessary to compile and test your project's source code.
Windows Support
Buildbot - both master and slave - runs well natively on Windows. The slave runs well on Cygwin, but because of problems with SQLite on Cygwin, the master does not.
Buildbot's windows testing is limited to the most recent Twisted and Python versions. For best results, use the most recent available versions of these libraries on Windows.
Pywin32: http://sourceforge.net/projects/pywin32/
Twisted requires PyWin32 in order to spawn processes on Windows.
Buildmaster Requirements
sqlite3: http://www.sqlite.org
Buildbot requires SQLite to store its state. Version 3.7.0 or higher is recommended, although Buildbot will run against earlier versions -- at the risk of "Database is locked" errors. The minimum version is 3.4.0, below which parallel database queries and schema introspection fail.
pysqlite: http://pypi.python.org/pypi/pysqlite
The SQLite Python package is required for Python-2.5 and earlier (it is already included in Python-2.5 and later, but the version in Python-2.5 has nasty bugs)
simplejson: http://pypi.python.org/pypi/simplejson
The simplejson package is required for Python-2.5 and earlier (it is already included as json in Python-2.6 and later)
Jinja2: http://jinja.pocoo.org/
Buildbot requires Jinja version 2.1 or higher.
Jinja2 is a general purpose templating language and is used by Buildbot to generate the HTML output.
SQLAlchemy: http://www.sqlalchemy.org/
Buildbot requires SQLAlchemy 0.6.0 or higher. SQLAlchemy allows Buildbot to build database schemas and queries for a wide variety of database systems.
SQLAlchemy-Migrate: http://code.google.com/p/sqlalchemy-migrate/
Buildbot requires one of the following SQLAlchemy-Migrate versions: 0.6.1, 0.7.0, and 0.7.1. Sadly, Migrate's inter-version compatibility is not good, so other versions - newer or older - are unlikely to work correctly. Buildbot uses SQLAlchemy-Migrate to manage schema upgrades from version to version.
Python-Dateutil: http://labix.org/python-dateutil
The Nightly scheduler requires Python-Dateutil version 1.5 (the last version to support Python-2.x). This is a small, pure-python library. Buildbot will function properly without it if the Nightlys scheduler is not used.
Installing the code
The Distribution Package
Buildbot comes in two parts: buildbot (the master) and buildbot-slave (the slave). The two can be installed individually or together.
Installation From PyPI
The easiest way to install Buildbot is using 'pip'. For the master:
pip install buildbot
and for the slave:
pip install buildbot-slave
Installation From Tarballs
Buildbot and Buildslave are installed using the standard Python distutils process. For either component, after unpacking the tarball, the process is:
python setup.py build
python setup.py install
where the install step may need to be done as root. This will put the bulk of the code in somewhere like /usr/lib/pythonx.y/site-packages/buildbot. It will also install the buildbot command-line tool in /usr/bin/buildbot.
If the environment variable $NO_INSTALL_REQS is set to 1, then setup.py will not try to install Buildbot's requirements. This is usually only useful when building a Buildbot package.
To test this, shift to a different directory (like /tmp), and run:
buildbot --version
# or
buildslave --version
If it shows you the versions of Buildbot and Twisted, the install went ok. If it says "no such command" or it gets an ImportError when it tries to load the libraries, then something went wrong. pydoc buildbot is another useful diagnostic tool.
Windows users will find these files in other places. You will need to make sure that Python can find the libraries, and will probably find it convenient to have buildbot on your PATH.
Installation in a Virtualenv
If you cannot or do not wish to install the buildbot into a site-wide location like /usr or /usr/local, you can also install it into the account's home directory or any other location using a tool like virtualenv.
Running Buildbot's Tests (optional)
If you wish, you can run the buildbot unit test suite. First, ensure you have the mock Python module installed from PyPi. This module is not required for ordinary Buildbot operation - only to run the tests. Note that this is not the same as the Fedora mock package! You can check with
python -mmock
Then, run the tests:
PYTHONPATH=. trial buildbot.test
# or
PYTHONPATH=. trial buildslave.test
Nothing should fail, although a few might be skipped.
If any of the tests fail for reasons other than a missing mock, you should stop and investigate the cause before continuing the installation process, as it will probably be easier to track down the bug early. In most cases, the problem is incorrectly installed Python modules or a badly configured PYTHONPATH. This may be a good time to contact the Buildbot developers for help.
Creating a buildmaster
As you learned earlier (System Architecture), the buildmaster runs on a central host (usually one that is publicly visible, so everybody can check on the status of the project), and controls all aspects of the buildbot system
You will probably wish to create a separate user account for the buildmaster, perhaps named buildmaster. Do not run the buildmaster as root!
You need to choose a directory for the buildmaster, called the basedir. This directory will be owned by the buildmaster. It will contain configuration, the database, and status information - including logfiles. On a large buildmaster this directory will see a lot of activity, so it should be on a disk with adequate space and speed.
Once you've picked a directory, use the buildbot create-master command to create the directory and populate it with startup files:
buildbot create-master -r basedir
You will need to create a configuration file before starting the buildmaster. Most of the rest of this manual is dedicated to explaining how to do this. A sample configuration file is placed in the working directory, named master.cfg.sample, which can be copied to master.cfg and edited to suit your purposes.
(Internal details: This command creates a file named buildbot.tac that contains all the state necessary to create the buildmaster. Twisted has a tool called twistd which can use this .tac file to create and launch a buildmaster instance. twistd takes care of logging and daemonization (running the program in the background). /usr/bin/buildbot is a front end which runs twistd for you.)
Using A Database Server
If you want to use a database server (e.g., MySQL or Postgres) as the database backend for your Buildbot, add the --db option to the create-master invocation to specify the connection string for the database, and make sure that the same URL appears in the db_url of the db parameter in your configuration file.
Additional Requirements
Depending on the selected database, further Python packages will be required. Consult the SQLAlchemy dialect list for a full description. The most common choice for MySQL is
MySQL-python: http://mysql-python.sourceforge.net/
To communicate with MySQL, SQLAlchemy requires MySQL-python. Any reasonably recent version of MySQL-python should suffice.
The most common choice for Postgres is
Psycopg: http://initd.org/psycopg/
SQLAlchemy uses Psycopg to communicate with Postgres. Any reasonably recent version should suffice.
Buildmaster Options
This section lists options to the create-master command. You can also type buildbot create-master --help for an up-to-the-moment summary.
--force
With this option, @command{create-master} will re-use an existing master directory.
--no-logrotate
This disables internal buildslave log management mechanism. With this option buildslave does not override the default logfile name and its behaviour giving a possibility to control those with command-line options of twistd daemon.
--relocatable
This creates a "relocatable" buildbot.tac, which uses relative paths instead of absolute paths, so that the buildmaster directory can be moved about.
--config
The name of the configuration file to use. This configuration file need not reside in the buildmaster directory.
--log-size
This is the size in bytes when to rotate the Twisted log files. The default is 10MiB.
--log-count
This is the number of log rotations to keep around. You can either specify a number or @code{None} to keep all @file{twistd.log} files around. The default is 10.
--db
The database that the Buildmaster should use. Note that the same value must be added to the configuration file.
Upgrading an Existing Buildmaster
If you have just installed a new version of the Buildbot code, and you have buildmasters that were created using an older version, you'll need to upgrade these buildmasters before you can use them. The upgrade process adds and modifies files in the buildmaster's base directory to make it compatible with the new code.
buildbot upgrade-master basedir
This command will also scan your master.cfg file for incompatibilities (by loading it and printing any errors or deprecation warnings that occur). Each buildbot release tries to be compatible with configurations that worked cleanly (i.e. without deprecation warnings) on the previous release: any functions or classes that are to be removed will first be deprecated in a release, to give you a chance to start using the replacement.
The upgrade-master command is idempotent. It is safe to run it multiple times. After each upgrade of the buildbot code, you should use upgrade-master on all your buildmasters.
In general, Buildbot slaves and masters can be upgraded independently, although some new features will not be available, depending on the master and slave versions.
Beyond this general information, read all of the sections below that apply to versions through which you are upgrading.
Version-specific Notes
Upgrading a Buildmaster to Buildbot-0.7.6
The 0.7.6 release introduced the public_html/ directory, which contains index.html and other files served by the WebStatus and Waterfall status displays. The upgrade-master command will create these files if they do not already exist. It will not modify existing copies, but it will write a new copy in e.g. index.html.new if the new version differs from the version that already exists.
Upgrading a Buildmaster to Buildbot-0.8.0
Buildbot-0.8.0 introduces a database backend, which is SQLite by default. The upgrade-master command will automatically create and populate this database with the changes the buildmaster has seen. Note that, as of this release, build history is not contained in the database, and is thus not migrated.
The upgrade process renames the Changes pickle ($basedir/changes.pck) to changes.pck.old once the upgrade is complete. To reverse the upgrade, simply downgrade Buildbot and move this file back to its original name. You may also wish to delete the state database (state.sqlite).
Upgrading into a non-SQLite database
If you are not using sqlite, you will need to add an entry into your master.cfg to reflect the database version you are using. The upgrade process does not edit your master.cfg for you. So something like:
# for using mysql:
c['db_url'] = 'mysql://bbuser:<password>@localhost/buildbot'
Once the parameter has been added, invoke upgrade-master. This will extract the DB url from your configuration file.
buildbot upgrade-master
See Database Specification for more options to specify a database.
The upgrade process assumes that strings in your Changes pickle are encoded in UTF-8 (or plain ASCII). If this is not the case, and if there are non-UTF-8 characters in the pickle, the upgrade will fail with a suitable error message. If this occurs, you have two options. If the change history is not important to your purpose, you can simply delete changes.pck.
If you would like to keep the change history, then you will need to figure out which encoding is in use, and use contrib/fix_changes_pickle_encoding.py (Contrib Scripts) to rewrite the changes pickle into Unicode before upgrading the master. A typical invocation (with Mac-Roman encoding) might look like:
$ python $buildbot/contrib/fix_changes_pickle_encoding.py changes.pck macroman
decoding bytestrings in changes.pck using macroman
converted 11392 strings
backing up changes.pck to changes.pck.old
If your Changes pickle uses multiple encodings, you're on your own, but the script in contrib may provide a good starting point for the fix.
Upgrading a Buildmaster to Later Versions
Up to Buildbot version 0.8.8, no further steps beyond those described above are required.
Creating a buildslave
Typically, you will be adding a buildslave to an existing buildmaster, to provide additional architecture coverage. The buildbot administrator will give you several pieces of information necessary to connect to the buildmaster. You should also be somewhat familiar with the project being tested, so you can troubleshoot build problems locally.
The buildbot exists to make sure that the project's stated how to build it process actually works. To this end, the buildslave should run in an environment just like that of your regular developers. Typically the project build process is documented somewhere (README, INSTALL, etc), in a document that should mention all library dependencies and contain a basic set of build instructions. This document will be useful as you configure the host and account in which the buildslave runs.
Here's a good checklist for setting up a buildslave:
- Set up the account
It is recommended (although not mandatory) to set up a separate user account for the buildslave. This account is frequently named buildbot or buildslave. This serves to isolate your personal working environment from that of the slave's, and helps to minimize the security threat posed by letting possibly-unknown contributors run arbitrary code on your system. The account should have a minimum of fancy init scripts.
- Install the buildbot code
Follow the instructions given earlier (Installing the code). If you use a separate buildslave account, and you didn't install the buildbot code to a shared location, then you will need to install it with --home=~ for each account that needs it.
- Set up the host
Make sure the host can actually reach the buildmaster. Usually the buildmaster is running a status webserver on the same machine, so simply point your web browser at it and see if you can get there. Install whatever additional packages or libraries the project's INSTALL document advises. (or not: if your buildslave is supposed to make sure that building without optional libraries still works, then don't install those libraries).
Again, these libraries don't necessarily have to be installed to a site-wide shared location, but they must be available to your build process. Accomplishing this is usually very specific to the build process, so installing them to /usr or /usr/local is usually the best approach.
- Test the build process
Follow the instructions in the INSTALL document, in the buildslave's account. Perform a full CVS (or whatever) checkout, configure, make, run tests, etc. Confirm that the build works without manual fussing. If it doesn't work when you do it by hand, it will be unlikely to work when the buildbot attempts to do it in an automated fashion.
- Choose a base directory
This should be somewhere in the buildslave's account, typically named after the project which is being tested. The buildslave will not touch any file outside of this directory. Something like ~/Buildbot or ~/Buildslaves/fooproject is appropriate.
- Get the buildmaster host/port, botname, and password
When the buildbot admin configures the buildmaster to accept and use your buildslave, they will provide you with the following pieces of information:
- your buildslave's name
- the password assigned to your buildslave
- the hostname and port number of the buildmaster, i.e. buildbot.example.org:8007
- Create the buildslave
Now run the 'buildslave' command as follows:
buildslave create-slave BASEDIR MASTERHOST:PORT SLAVENAME PASSWORDThis will create the base directory and a collection of files inside, including the buildbot.tac file that contains all the information you passed to the buildbot command.
- Fill in the hostinfo files
When it first connects, the buildslave will send a few files up to the buildmaster which describe the host that it is running on. These files are presented on the web status display so that developers have more information to reproduce any test failures that are witnessed by the buildbot. There are sample files in the info subdirectory of the buildbot's base directory. You should edit these to correctly describe you and your host.
BASEDIR/info/admin should contain your name and email address. This is the buildslave admin address, and will be visible from the build status page (so you may wish to munge it a bit if address-harvesting spambots are a concern).
BASEDIR/info/host should be filled with a brief description of the host: OS, version, memory size, CPU speed, versions of relevant libraries installed, and finally the version of the buildbot code which is running the buildslave.
The optional BASEDIR/info/access_uri can specify a URI which will connect a user to the machine. Many systems accept ssh://hostname URIs for this purpose.
If you run many buildslaves, you may want to create a single ~buildslave/info file and share it among all the buildslaves with symlinks.
Buildslave Options
There are a handful of options you might want to use when creating the buildslave with the buildslave create-slave <options> DIR <params> command. You can type buildslave create-slave --help for a summary. To use these, just include them on the buildslave create-slave command line, like this
buildslave create-slave --umask=022 ~/buildslave buildmaster.example.org:42012 {myslavename} {mypasswd}
- --no-logrotate
This disables internal buildslave log management mechanism. With this option buildslave does not override the default logfile name and its behaviour giving a possibility to control those with command-line options of twistd daemon.
- --usepty
This is a boolean flag that tells the buildslave whether to launch child processes in a PTY or with regular pipes (the default) when the master does not specify. This option is deprecated, as this particular parameter is better specified on the master.
- --umask
This is a string (generally an octal representation of an integer) which will cause the buildslave process' umask value to be set shortly after initialization. The twistd daemonization utility forces the umask to 077 at startup (which means that all files created by the buildslave or its child processes will be unreadable by any user other than the buildslave account). If you want build products to be readable by other accounts, you can add --umask=022 to tell the buildslave to fix the umask after twistd clobbers it. If you want build products to be writable by other accounts too, use --umask=000, but this is likely to be a security problem.
- --keepalive
This is a number that indicates how frequently keepalive messages should be sent from the buildslave to the buildmaster, expressed in seconds. The default (600) causes a message to be sent to the buildmaster at least once every 10 minutes. To set this to a lower value, use e.g. --keepalive=120.
If the buildslave is behind a NAT box or stateful firewall, these messages may help to keep the connection alive: some NAT boxes tend to forget about a connection if it has not been used in a while. When this happens, the buildmaster will think that the buildslave has disappeared, and builds will time out. Meanwhile the buildslave will not realize than anything is wrong.
- --maxdelay
This is a number that indicates the maximum amount of time the buildslave will wait between connection attempts, expressed in seconds. The default (300) causes the buildslave to wait at most 5 minutes before trying to connect to the buildmaster again.
- --log-size
This is the size in bytes when to rotate the Twisted log files.
- --log-count
This is the number of log rotations to keep around. You can either specify a number or None to keep all twistd.log files around. The default is 10.
- --allow-shutdown
- Can also be passed directly to the BuildSlave constructor in buildbot.tac. If
- set, it allows the buildslave to initiate a graceful shutdown, meaning that it
- will ask the master to shut down the slave when the current build, if any, is
- complete.
Setting allow_shutdown to file will cause the buildslave to watch shutdown.stamp in basedir for updates to its mtime. When the mtime changes, the slave will request a graceful shutdown from the master. The file does not need to exist prior to starting the slave.
Setting allow_shutdown to signal will set up a SIGHUP handler to start a graceful shutdown. When the signal is received, the slave will request a graceful shutdown from the master.
The default value is None, in which case this feature will be disabled.
Both master and slave must be at least version 0.8.3 for this feature to work.
Other Buildslave Configuration
- unicode_encoding
This represents the encoding that buildbot should use when converting unicode commandline arguments into byte strings in order to pass to the operating system when spawning new processes.
The default value is what Python's sys.getfilesystemencoding returns, which on Windows is 'mbcs', on Mac OSX is 'utf-8', and on Unix depends on your locale settings.
If you need a different encoding, this can be changed in your build slave's buildbot.tac file by adding a unicode_encoding argument to the BuildSlave constructor.
s = BuildSlave(buildmaster_host, port, slavename, passwd, basedir,
               keepalive, usepty, umask=umask, maxdelay=maxdelay,
               unicode_encoding='utf-8', allow_shutdown='signal')
Upgrading an Existing Buildslave
If you have just installed a new version of Buildbot-slave, you may need to take some steps to upgrade it. If you are upgrading to version 0.8.2 or later, you can run
buildslave upgrade-slave /path/to/buildslave/dir
Version-specific Notes
Upgrading a Buildslave to Buildbot-slave-0.8.1
Before Buildbot version 0.8.1, the Buildbot master and slave were part of the same distribution. As of version 0.8.1, the buildslave is a separate distribution.
As of this release, you will need to install buildbot-slave to run a slave.
Any automatic startup scripts that had run buildbot start for previous versions should be changed to run buildslave start instead.
If you are running a version later than 0.8.1, then you can skip the remainder of this section: the `upgrade-slave command will take care of this. If you are upgrading directly to 0.8.1, read on.
The existing buildbot.tac for any buildslaves running older versions will need to be edited or replaced. If the loss of cached buildslave state (e.g., for Source steps in copy mode) is not problematic, the easiest solution is to simply delete the slave directory and re-run buildslave create-slave.
If deleting the slave directory is problematic, the change to buildbot.tac is simple. On line 3, replace
from buildbot.slave.bot import BuildSlave
with
from buildslave.bot import BuildSlave
After this change, the buildslave should start as usual.
Launching the daemons
Both the buildmaster and the buildslave run as daemon programs. To launch them, pass the working directory to the buildbot and buildslave commands, as appropriate:
# start a master
buildbot start [ BASEDIR ]
# start a slave
buildslave start [ SLAVE_BASEDIR ]
The BASEDIR is option and can be omitted if the current directory contains the buildbot configuration (the buildbot.tac file).
buildbot start
This command will start the daemon and then return, so normally it will not produce any output. To verify that the programs are indeed running, look for a pair of files named twistd.log and twistd.pid that should be created in the working directory. twistd.pid contains the process ID of the newly-spawned daemon.
When the buildslave connects to the buildmaster, new directories will start appearing in its base directory. The buildmaster tells the slave to create a directory for each Builder which will be using that slave. All build operations are performed within these directories: CVS checkouts, compiles, and tests.
Once you get everything running, you will want to arrange for the buildbot daemons to be started at boot time. One way is to use cron, by putting them in a @reboot crontab entry [1]
@reboot buildbot start [ BASEDIR ]
When you run crontab to set this up, remember to do it as the buildmaster or buildslave account! If you add this to your crontab when running as your regular account (or worse yet, root), then the daemon will run as the wrong user, quite possibly as one with more authority than you intended to provide.
It is important to remember that the environment provided to cron jobs and init scripts can be quite different that your normal runtime. There may be fewer environment variables specified, and the PATH may be shorter than usual. It is a good idea to test out this method of launching the buildslave by using a cron job with a time in the near future, with the same command, and then check twistd.log to make sure the slave actually started correctly. Common problems here are for /usr/local or ~/bin to not be on your PATH, or for PYTHONPATH to not be set correctly. Sometimes HOME is messed up too.
Some distributions may include conveniences to make starting buildbot at boot time easy. For instance, with the default buildbot package in Debian-based distributions, you may only need to modify /etc/default/buildbot (see also /etc/init.d/buildbot, which reads the configuration in /etc/default/buildbot).
Buildbot also comes with its own init scripts that provide support for controlling multi-slave and multi-master setups (mostly because they are based on the init script from the Debian package). With a little modification these scripts can be used both on Debian and RHEL-based distributions and may thus prove helpful to package maintainers who are working on buildbot (or those that haven't yet split buildbot into master and slave packages).
# install as /etc/default/buildslave
#         or /etc/sysconfig/buildslave
master/contrib/init-scripts/buildslave.default

# install as /etc/default/buildmaster
#         or /etc/sysconfig/buildmaster
master/contrib/init-scripts/buildmaster.default

# install as /etc/init.d/buildslave
slave/contrib/init-scripts/buildslave.init.sh

# install as /etc/init.d/buildmaster
slave/contrib/init-scripts/buildmaster.init.sh

# ... and tell sysvinit about them
chkconfig buildmaster reset
# ... or
update-rc.d buildmaster defaults
Logfiles
While a buildbot daemon runs, it emits text to a logfile, named twistd.log. A command like tail -f twistd.log is useful to watch the command output as it runs.
The buildmaster will announce any errors with its configuration file in the logfile, so it is a good idea to look at the log at startup time to check for any problems. Most buildmaster activities will cause lines to be added to the log.
Shutdown
To stop a buildmaster or buildslave manually, use:
buildbot stop [ BASEDIR ]
# or
buildslave stop [ SLAVE_BASEDIR ]
This simply looks for the twistd.pid file and kills whatever process is identified within.
At system shutdown, all processes are sent a SIGKILL. The buildmaster and buildslave will respond to this by shutting down normally.
The buildmaster will respond to a SIGHUP by re-reading its config file. Of course, this only works on Unix-like systems with signal support, and won't work on Windows. The following shortcut is available:
buildbot reconfig [ BASEDIR ]
When you update the Buildbot code to a new release, you will need to restart the buildmaster and/or buildslave before it can take advantage of the new code. You can do a buildbot stop BASEDIR and buildbot start BASEDIR in quick succession, or you can use the restart shortcut, which does both steps for you:
buildbot restart [ BASEDIR ]
Buildslaves can similarly be restarted with:
buildslave restart [ BASEDIR ]
There are certain configuration changes that are not handled cleanly by buildbot reconfig. If this occurs, buildbot restart is a more robust tool to fully switch over to the new configuration.
buildbot restart may also be used to start a stopped Buildbot instance. This behaviour is useful when writing scripts that stop, start and restart Buildbot.
A buildslave may also be gracefully shutdown from the WebStatus status plugin. This is useful to shutdown a buildslave without interrupting any current builds. The buildmaster will wait until the buildslave is finished all its current builds, and will then tell the buildslave to shutdown.
Maintenance
The buildmaster can be configured to send out email notifications when a slave has been offline for a while. Be sure to configure the buildmaster with a contact email address for each slave so these notifications are sent to someone who can bring it back online.
If you find you can no longer provide a buildslave to the project, please let the project admins know, so they can put out a call for a replacement.
The Buildbot records status and logs output continually, each time a build is performed. The status tends to be small, but the build logs can become quite large. Each build and log are recorded in a separate file, arranged hierarchically under the buildmaster's base directory. To prevent these files from growing without bound, you should periodically delete old build logs. A simple cron job to delete anything older than, say, two weeks should do the job. The only trick is to leave the buildbot.tac and other support files alone, for which find's -mindepth argument helps skip everything in the top directory. You can use something like the following:
@weekly cd BASEDIR && find . -mindepth 2 i-path './public_html/*' \
    -prune -o -type f -mtime +14 -exec rm {} \;
@weekly cd BASEDIR && find twistd.log* -mtime +14 -exec rm {} \;
Alternatively, you can configure a maximum number of old logs to be kept using the --log-count command line option when running buildslave create-slave or buildbot create-master.
Troubleshooting
Here are a few hints on diagnosing common problems.
Starting the buildslave
Cron jobs are typically run with a minimal shell (/bin/sh, not /bin/bash), and tilde expansion is not always performed in such commands. You may want to use explicit paths, because the PATH is usually quite short and doesn't include anything set by your shell's startup scripts (.profile, .bashrc, etc). If you've installed buildbot (or other Python libraries) to an unusual location, you may need to add a PYTHONPATH specification (note that Python will do tilde-expansion on PYTHONPATH elements by itself). Sometimes it is safer to fully-specify everything:
@reboot PYTHONPATH=~/lib/python /usr/local/bin/buildbot \
    start /usr/home/buildbot/basedir
Take the time to get the @reboot job set up. Otherwise, things will work fine for a while, but the first power outage or system reboot you have will stop the buildslave with nothing but the cries of sorrowful developers to remind you that it has gone away.
Connecting to the buildmaster
If the buildslave cannot connect to the buildmaster, the reason should be described in the twistd.log logfile. Some common problems are an incorrect master hostname or port number, or a mistyped bot name or password. If the buildslave loses the connection to the master, it is supposed to attempt to reconnect with an exponentially-increasing backoff. Each attempt (and the time of the next attempt) will be logged. If you get impatient, just manually stop and re-start the buildslave.
When the buildmaster is restarted, all slaves will be disconnected, and will attempt to reconnect as usual. The reconnect time will depend upon how long the buildmaster is offline (i.e. how far up the exponential backoff curve the slaves have travelled). Again, buildslave restart BASEDIR will speed up the process.
| [1] | This @reboot syntax is understood by Vixie cron, which is the flavor usually provided with Linux systems. Other unices may have a cron that doesn't understand @reboot: |
Contrib Scripts
While some features of Buildbot are included in the distribution, others are only available in contrib/ in the source directory. The latest versions of such scripts are available at http://github.com/buildbot/buildbot/tree/master/master/contrib.
Concepts
This chapter defines some of the basic concepts that the Buildbot uses. You'll need to understand how the Buildbot sees the world to configure it properly.
Source Stamps
Source code comes from repositories, provided by version control systems. Repositories are generally identified by URLs, e.g., git://github.com/buildbot/buildbot.git.
In these days of distributed version control systems, the same codebase may appear in multiple repositories. For example, https://github.com/mozilla/mozilla-central and http://hg.mozilla.org/mozilla-release both contain the Firefox codebase, although not exactly the same code.
Many projects are built from multiple codebases. For example, a company may build several applications based on the same core library. The "app" codebase and the "core" codebase are in separate repositories, but are compiled together and constitute a single project. Changes to either codebase should cause a rebuild of the application.
Most version control systems define some sort of revision that can be used (sometimes in combination with a branch) to uniquely specify a particular version of the source code.
To build a project, Buildbot needs to know exactly which version of each codebase it should build. It uses a source stamp to do so for each codebase; the collection of sourcestamps required for a project is called a source stamp set.
Version Control Systems
Buildbot supports a significant number of version control systems, so it treats them abstractly.
For purposes of deciding when to perform builds, Buildbot's change sources monitor repositories, and represent any updates to those repositories as changes. These change sources fall broadly into two categories: pollers which periodically check the repository for updates; and hooks, where the repository is configured to notify Buildbot whenever an update occurs.
This concept does not map perfectly to every version control system. For example, for CVS Buildbot must guess that version updates made to multiple files within a short time represent a single change; for DVCS's like Git, Buildbot records a change when a commit is pushed to the monitored repository, not when it is initially committed. We assume that the Changes arrive at the master in the same order in which they are committed to the repository.
When it comes time to actually perform a build, a scheduler prepares a source stamp set, as described above, based on its configuration. When the build begins, one or more source steps use the information in the source stamp set to actually check out the source code, using the normal VCS commands.
Tree Stability
Changes tend to arrive at a buildmaster in bursts. In many cases, these bursts of changes are meant to be taken together. For example, a developer may have pushed multiple commits to a DVCS that comprise the same new feature or bugfix. To avoid trying to build every change, Buildbot supports the notion of tree stability, by waiting for a burst of changes to finish before starting to schedule builds. This is implemented as a timer, with builds not scheduled until no changes have occurred for the duration of the timer.
How Different VC Systems Specify Sources
For CVS, the static specifications are repository and module. In addition to those, each build uses a timestamp (or omits the timestamp to mean the latest) and branch tag (which defaults to HEAD). These parameters collectively specify a set of sources from which a build may be performed.
Subversion, combines the repository, module, and branch into a single Subversion URL parameter. Within that scope, source checkouts can be specified by a numeric revision number (a repository-wide monotonically-increasing marker, such that each transaction that changes the repository is indexed by a different revision number), or a revision timestamp. When branches are used, the repository and module form a static baseURL, while each build has a revision number and a branch (which defaults to a statically-specified defaultBranch). The baseURL and branch are simply concatenated together to derive the svnurl to use for the checkout.
Perforce is similar. The server is specified through a P4PORT parameter. Module and branch are specified in a single depot path, and revisions are depot-wide. When branches are used, the p4base and defaultBranch are concatenated together to produce the depot path.
Bzr (which is a descendant of Arch/Bazaar, and is frequently referred to as "Bazaar") has the same sort of repository-vs-workspace model as Arch, but the repository data can either be stored inside the working directory or kept elsewhere (either on the same machine or on an entirely different machine). For the purposes of Buildbot (which never commits changes), the repository is specified with a URL and a revision number.
The most common way to obtain read-only access to a bzr tree is via HTTP, simply by making the repository visible through a web server like Apache. Bzr can also use FTP and SFTP servers, if the buildslave process has sufficient privileges to access them. Higher performance can be obtained by running a special Bazaar-specific server. None of these matter to the buildbot: the repository URL just has to match the kind of server being used. The repoURL argument provides the location of the repository.
Branches are expressed as subdirectories of the main central repository, which means that if branches are being used, the BZR step is given a baseURL and defaultBranch instead of getting the repoURL argument.
Darcs doesn't really have the notion of a single master repository. Nor does it really have branches. In Darcs, each working directory is also a repository, and there are operations to push and pull patches from one of these repositories to another. For the Buildbot's purposes, all you need to do is specify the URL of a repository that you want to build from. The build slave will then pull the latest patches from that repository and build them. Multiple branches are implemented by using multiple repositories (possibly living on the same server).
Builders which use Darcs therefore have a static repourl which specifies the location of the repository. If branches are being used, the source Step is instead configured with a baseURL and a defaultBranch, and the two strings are simply concatenated together to obtain the repository's URL. Each build then has a specific branch which replaces defaultBranch, or just uses the default one. Instead of a revision number, each build can have a context, which is a string that records all the patches that are present in a given tree (this is the output of darcs changes --context, and is considerably less concise than, e.g. Subversion's revision number, but the patch-reordering flexibility of Darcs makes it impossible to provide a shorter useful specification).
Mercurial is like Darcs, in that each branch is stored in a separate repository. The repourl, baseURL, and defaultBranch arguments are all handled the same way as with Darcs. The revision, however, is the hash identifier returned by hg identify.
Git also follows a decentralized model, and each repository can have several branches and tags. The source Step is configured with a static repourl which specifies the location of the repository. In addition, an optional branch parameter can be specified to check out code from a specific branch instead of the default master branch. The revision is specified as a SHA1 hash as returned by e.g. git rev-parse. No attempt is made to ensure that the specified revision is actually a subset of the specified branch.
Monotone is another that follows a decentralized model where each repository can have several branches and tags. The source Step is configured with static repourl and branch parameters, which specifies the location of the repository and the branch to use. The revision is specified as a SHA1 hash as returned by e.g. mtn automate select w:. No attempt is made to ensure that the specified revision is actually a subset of the specified branch.
Changes
Who
Each Change has a who attribute, which specifies which developer is responsible for the change. This is a string which comes from a namespace controlled by the VC repository. Frequently this means it is a username on the host which runs the repository, but not all VC systems require this. Each StatusNotifier will map the who attribute into something appropriate for their particular means of communication: an email address, an IRC handle, etc.
This who attribute is also parsed and stored into Buildbot's database (see User Objects). Currently, only who attributes in Changes from git repositories are translated into user objects, but in the future all incoming Changes will have their who parsed and stored.
Files
It also has a list of files, which are just the tree-relative filenames of any files that were added, deleted, or modified for this Change. These filenames are used by the fileIsImportant function (in the Scheduler) to decide whether it is worth triggering a new build or not, e.g. the function could use the following function to only run a build if a C file were checked in:
def has_C_files(change):
    for name in change.files:
        if name.endswith(".c"):
            return True
    return False
Certain BuildSteps can also use the list of changed files to run a more targeted series of tests, e.g. the python_twisted.Trial step can run just the unit tests that provide coverage for the modified .py files instead of running the full test suite.
Comments
The Change also has a comments attribute, which is a string containing any checkin comments.
Project
The project attribute of a change or source stamp describes the project to which it corresponds, as a short human-readable string. This is useful in cases where multiple independent projects are built on the same buildmaster. In such cases, it can be used to control which builds are scheduled for a given commit, and to limit status displays to only one project.
Repository
This attribute specifies the repository in which this change occurred. In the case of DVCS's, this information may be required to check out the committed source code. However, using the repository from a change has security risks: if Buildbot is configured to blindly trust this information, then it may easily be tricked into building arbitrary source code, potentially compromising the buildslaves and the integrity of subsequent builds.
Codebase
This attribute specifies the codebase to which this change was made. As described above, multiple repositories may contain the same codebase. A change's codebase is usually determined by the codebaseGenerator configuration. By default the codebase is ''; this value is used automatically for single-codebase configurations.
Revision
Each Change can have a revision attribute, which describes how to get a tree with a specific state: a tree which includes this Change (and all that came before it) but none that come after it. If this information is unavailable, the revision attribute will be None. These revisions are provided by the ChangeSource.
Revisions are always strings.
- CVS
- revision is the seconds since the epoch as an integer.
- SVN
- revision is the revision number
- Darcs
- revision is a large string, the output of darcs changes --context
- Mercurial
- revision is a short string (a hash ID), the output of hg identify
- P4
- revision is the transaction number
- Git
- revision is a short string (a SHA1 hash), the output of e.g. git rev-parse
Branches
The Change might also have a branch attribute. This indicates that all of the Change's files are in the same named branch. The Schedulers get to decide whether the branch should be built or not.
For VC systems like CVS, Git and Monotone the branch name is unrelated to the filename. (that is, the branch name and the filename inhabit unrelated namespaces). For SVN, branches are expressed as subdirectories of the repository, so the file's svnurl is a combination of some base URL, the branch name, and the filename within the branch. (In a sense, the branch name and the filename inhabit the same namespace). Darcs branches are subdirectories of a base URL just like SVN. Mercurial branches are the same as Darcs.
- CVS
- branch='warner-newfeature', files=['src/foo.c']
- SVN
- branch='branches/warner-newfeature', files=['src/foo.c']
- Darcs
- branch='warner-newfeature', files=['src/foo.c']
- Mercurial
- branch='warner-newfeature', files=['src/foo.c']
- Git
- branch='warner-newfeature', files=['src/foo.c']
- Monotone
- branch='warner-newfeature', files=['src/foo.c']
Change Properties
A Change may have one or more properties attached to it, usually specified through the Force Build form or sendchange. Properties are discussed in detail in the Build Properties section.
Scheduling Builds
Each Buildmaster has a set of Scheduler objects, each of which gets a copy of every incoming Change. The Schedulers are responsible for deciding when Builds should be run. Some Buildbot installations might have a single Scheduler, while others may have several, each for a different purpose.
For example, a quick scheduler might exist to give immediate feedback to developers, hoping to catch obvious problems in the code that can be detected quickly. These typically do not run the full test suite, nor do they run on a wide variety of platforms. They also usually do a VC update rather than performing a brand-new checkout each time.
A separate full scheduler might run more comprehensive tests, to catch more subtle problems. configured to run after the quick scheduler, to give developers time to commit fixes to bugs caught by the quick scheduler before running the comprehensive tests. This scheduler would also feed multiple Builders.
Many schedulers can be configured to wait a while after seeing a source-code change - this is the tree stable timer. The timer allows multiple commits to be "batched" together. This is particularly useful in distributed version control systems, where a developer may push a long sequence of changes all at once. To save resources, it's often desirable only to test the most recent change.
Schedulers can also filter out the changes they are interested in, based on a number of criteria. For example, a scheduler that only builds documentation might skip any changes that do not affect the documentation. Schedulers can also filter on the branch to which a commit was made.
There is some support for configuring dependencies between builds - for example, you may want to build packages only for revisions which pass all of the unit tests. This support is under active development in Buildbot, and is referred to as "build coordination".
Periodic builds (those which are run every N seconds rather than after new Changes arrive) are triggered by a special Periodic Scheduler subclass.
Each Scheduler creates and submits BuildSet objects to the BuildMaster, which is then responsible for making sure the individual BuildRequests are delivered to the target Builders.
Scheduler instances are activated by placing them in the c['schedulers'] list in the buildmaster config file. Each Scheduler has a unique name.
BuildSets
A BuildSet is the name given to a set of Builds that all compile/test the same version of the tree on multiple Builders. In general, all these component Builds will perform the same sequence of Steps, using the same source code, but on different platforms or against a different set of libraries.
The BuildSet is tracked as a single unit, which fails if any of the component Builds have failed, and therefore can succeed only if all of the component Builds have succeeded. There are two kinds of status notification messages that can be emitted for a BuildSet: the firstFailure type (which fires as soon as we know the BuildSet will fail), and the Finished type (which fires once the BuildSet has completely finished, regardless of whether the overall set passed or failed).
A BuildSet is created with set of one or more source stamp tuples of (branch, revision, changes, patch), some of which may be None, and a list of Builders on which it is to be run. They are then given to the BuildMaster, which is responsible for creating a separate BuildRequest for each Builder.
There are a couple of different likely values for the SourceStamp:
- (revision=None, changes=CHANGES, patch=None)
- This is a SourceStamp used when a series of Changes have triggered a build. The VC step will attempt to check out a tree that contains CHANGES (and any changes that occurred before CHANGES, but not any that occurred after them.)
- (revision=None, changes=None, patch=None)
- This builds the most recent code on the default branch. This is the sort of SourceStamp that would be used on a Build that was triggered by a user request, or a Periodic scheduler. It is also possible to configure the VC Source Step to always check out the latest sources rather than paying attention to the Changes in the SourceStamp, which will result in same behavior as this.
- (branch=BRANCH, revision=None, changes=None, patch=None)
- This builds the most recent code on the given BRANCH. Again, this is generally triggered by a user request or Periodic build.
- (revision=REV, changes=None, patch=(LEVEL, DIFF, SUBDIR_ROOT))
- This checks out the tree at the given revision REV, then applies a patch (using patch -pLEVEL <DIFF) from inside the relative directory SUBDIR_ROOT. Item SUBDIR_ROOT is optional and defaults to the builder working directory. The try command creates this kind of SourceStamp. If patch is None, the patching step is bypassed.
The buildmaster is responsible for turning the BuildSet into a set of BuildRequest objects and queueing them on the appropriate Builders.
BuildRequests
A BuildRequest is a request to build a specific set of source code (specified by one ore more source stamps) on a single Builder. Each Builder runs the BuildRequest as soon as it can (i.e. when an associated buildslave becomes free). BuildRequests are prioritized from oldest to newest, so when a buildslave becomes free, the Builder with the oldest BuildRequest is run.
The BuildRequest contains one SourceStamp specification per codebase. The actual process of running the build (the series of Steps that will be executed) is implemented by the Build object. In this future this might be changed, to have the Build define what gets built, and a separate BuildProcess (provided by the Builder) to define how it gets built.
The BuildRequest may be mergeable with other compatible BuildRequests. Builds that are triggered by incoming Changes will generally be mergeable. Builds that are triggered by user requests are generally not, unless they are multiple requests to build the latest sources of the same branch. A merge of buildrequests is performed per codebase, thus on changes having the same codebase.
Builders
The Buildmaster runs a collection of Builders, each of which handles a single type of build (e.g. full versus quick), on one or more build slaves. Builders serve as a kind of queue for a particular type of build. Each Builder gets a separate column in the waterfall display. In general, each Builder runs independently (although various kinds of interlocks can cause one Builder to have an effect on another).
Each builder is a long-lived object which controls a sequence of Builds. Each Builder is created when the config file is first parsed, and lives forever (or rather until it is removed from the config file). It mediates the connections to the buildslaves that do all the work, and is responsible for creating the Build objects - Builds.
Each builder gets a unique name, and the path name of a directory where it gets to do all its work (there is a buildmaster-side directory for keeping status information, as well as a buildslave-side directory where the actual checkout/compile/test commands are executed).
Build Factories
A builder also has a BuildFactory, which is responsible for creating new Build instances: because the Build instance is what actually performs each build, choosing the BuildFactory is the way to specify what happens each time a build is done (Builds).
Build Slaves
Each builder is associated with one of more BuildSlaves. A builder which is used to perform Mac OS X builds (as opposed to Linux or Solaris builds) should naturally be associated with a Mac buildslave.
If multiple buildslaves are available for any given builder, you will have some measure of redundancy: in case one slave goes offline, the others can still keep the Builder working. In addition, multiple buildslaves will allow multiple simultaneous builds for the same Builder, which might be useful if you have a lot of forced or try builds taking place.
If you use this feature, it is important to make sure that the buildslaves are all, in fact, capable of running the given build. The slave hosts should be configured similarly, otherwise you will spend a lot of time trying (unsuccessfully) to reproduce a failure that only occurs on some of the buildslaves and not the others. Different platforms, operating systems, versions of major programs or libraries, all these things mean you should use separate Builders.
Builds
A build is a single compile or test run of a particular version of the source code, and is comprised of a series of steps. It is ultimately up to you what constitutes a build, but for compiled software it is generally the checkout, configure, make, and make check sequence. For interpreted projects like Python modules, a build is generally a checkout followed by an invocation of the bundled test suite.
A BuildFactory describes the steps a build will perform. The builder which starts a build uses its configured build factory to determine the build's steps.
Users
Buildbot has a somewhat limited awareness of users. It assumes the world consists of a set of developers, each of whom can be described by a couple of simple attributes. These developers make changes to the source code, causing builds which may succeed or fail.
Users also may have different levels of authorization when issuing Buildbot commands, such as forcing a build from the web interface or from an IRC channel (see WebStatus and IRC).
Each developer is primarily known through the source control system. Each Change object that arrives is tagged with a who field that typically gives the account name (on the repository machine) of the user responsible for that change. This string is displayed on the HTML status pages and in each Build's blamelist.
To do more with the User than just refer to them, this username needs to be mapped into an address of some sort. The responsibility for this mapping is left up to the status module which needs the address. In the future, the responsibility for managing users will be transferred to User Objects.
The who fields in git Changes are used to create User Objects, which allows for more control and flexibility in how Buildbot manages users.
User Objects
User Objects allow Buildbot to better manage users throughout its various interactions with users (see Change Sources and Status Targets). The User Objects are stored in the Buildbot database and correlate the various attributes that a user might have: irc, Git, etc.
Changes
Incoming Changes all have a who attribute attached to them that specifies which developer is responsible for that Change. When a Change is first rendered, the who attribute is parsed and added to the database if it doesn't exist or checked against an existing user. The who attribute is formatted in different ways depending on the version control system that the Change came from.
- git
- who attributes take the form Full Name <Email>.
- svn
- who attributes are of the form Username.
- hg
- who attributes are free-form strings, but usually adhere to similar conventions as git attributes (Full Name <Email>).
- cvs
- who attributes are of the form Username.
- darcs
- who attributes contain an Email and may also include a Full Name like git attributes.
- bzr
- who attributes are free-form strings like hg, and can include a Username, Email, and/or Full Name.
Tools
For managing users manually, use the buildbot user command, which allows you to add, remove, update, and show various attributes of users in the Buildbot database (see Command-line Tool).
To show all of the users in the database in a more pretty manner, use the users page in the WebStatus.
Uses
Correlating the various bits and pieces that Buildbot views as users also means that one attribute of a user can be translated into another. This provides a more complete view of users throughout Buildbot.
One such use is being able to find email addresses based on a set of Builds to notify users through the MailNotifier. This process is explained more clearly in :ref:Email-Addresses.
Another way to utilize User Objects is through UsersAuth for web authentication (see WebStatus). To use UsersAuth, you need to set a bb_username and bb_password via the buildbot user command line tool to check against. The password will be encrypted before storing in the database along with other user attributes.
Doing Things With Users
Each change has a single user who is responsible for it. Most builds have a set of changes: the build generally represents the first time these changes have been built and tested by the Buildbot. The build has a blamelist that is the union of the users responsible for all the build's changes. If the build was created by a Try Schedulers this list will include the submitter of the try job, if known.
The build provides a list of users who are interested in the build -- the interested users. Usually this is equal to the blamelist, but may also be expanded, e.g., to include the current build sherrif or a module's maintainer.
If desired, the buildbot can notify the interested users until the problem is resolved.
Email Addresses
The MailNotifier is a status target which can send email about the results of each build. It accepts a static list of email addresses to which each message should be delivered, but it can also be configured to send mail to the Build's Interested Users. To do this, it needs a way to convert User names into email addresses.
For many VC systems, the User Name is actually an account name on the system which hosts the repository. As such, turning the name into an email address is a simple matter of appending @repositoryhost.com. Some projects use other kinds of mappings (for example the preferred email address may be at project.org despite the repository host being named cvs.project.org), and some VC systems have full separation between the concept of a user and that of an account on the repository host (like Perforce). Some systems (like Git) put a full contact email address in every change.
To convert these names to addresses, the MailNotifier uses an EmailLookup object. This provides a getAddress method which accepts a name and (eventually) returns an address. The default MailNotifier module provides an EmailLookup which simply appends a static string, configurable when the notifier is created. To create more complex behaviors (perhaps using an LDAP lookup, or using finger on a central host to determine a preferred address for the developer), provide a different object as the lookup argument.
If an EmailLookup object isn't given to the MailNotifier, the MailNotifier will try to find emails through User Objects. This will work the same as if an EmailLookup object was used if every user in the Build's Interested Users list has an email in the database for them. If a user whose change led to a Build doesn't have an email attribute, that user will not receive an email. If extraRecipients is given, those users are still sent mail when the EmailLookup object is not specified.
In the future, when the Problem mechanism has been set up, the Buildbot will need to send mail to arbitrary Users. It will do this by locating a MailNotifier-like object among all the buildmaster's status targets, and asking it to send messages to various Users. This means the User-to-address mapping only has to be set up once, in your MailNotifier, and every email message the buildbot emits will take advantage of it.
IRC Nicknames
Like MailNotifier, the buildbot.status.words.IRC class provides a status target which can announce the results of each build. It also provides an interactive interface by responding to online queries posted in the channel or sent as private messages.
In the future, the buildbot can be configured map User names to IRC nicknames, to watch for the recent presence of these nicknames, and to deliver build status messages to the interested parties. Like MailNotifier does for email addresses, the IRC object will have an IRCLookup which is responsible for nicknames. The mapping can be set up statically, or it can be updated by online users themselves (by claiming a username with some kind of buildbot: i am user warner commands).
Once the mapping is established, the rest of the buildbot can ask the IRC object to send messages to various users. It can report on the likelihood that the user saw the given message (based upon how long the user has been inactive on the channel), which might prompt the Problem Hassler logic to send them an email message instead.
These operations and authentication of commands issued by particular nicknames will be implemented in User Objects.
Live Status Clients
The Buildbot also offers a desktop status client interface which can display real-time build status in a GUI panel on the developer's desktop.
Build Properties
Each build has a set of Build Properties, which can be used by its build steps to modify their actions. These properties, in the form of key-value pairs, provide a general framework for dynamically altering the behavior of a build based on its circumstances.
Properties form a simple kind of variable in a build. Some properties are set when the build starts, and properties can be changed as a build progresses -- properties set or changed in one step may be accessed in subsequent steps. Property values can be numbers, strings, lists, or dictionaries - basically, anything that can be represented in JSON.
Properties are very flexible, and can be used to implement all manner of functionality. Here are some examples:
Most Source steps record the revision that they checked out in the got_revision property. A later step could use this property to specify the name of a fully-built tarball, dropped in an easily-accessible directory for later testing.
Note
In builds with more than one codebase, the got_revision property is a dictionary, keyed by codebase.
Some projects want to perform nightly builds as well as building in response to committed changes. Such a project would run two schedulers, both pointing to the same set of builders, but could provide an is_nightly property so that steps can distinguish the nightly builds, perhaps to run more resource-intensive tests.
Some projects have different build processes on different systems. Rather than create a build factory for each slave, the steps can use buildslave properties to identify the unique aspects of each slave and adapt the build process dynamically.
Multiple-Codebase Builds
What if an end-product is composed of code from several codebases? Changes may arrive from different repositories within the tree-stable-timer period. Buildbot will not only use the source-trees that contain changes but also needs the remaining source-trees to build the complete product.
For this reason a Scheduler can be configured to base a build on a set of several source-trees that can (partly) be overridden by the information from incoming Changes.
As described above, the source for each codebase is identified by a source stamp, containing its repository, branch and revision. A full build set will specify a source stamp set describing the source to use for each codebase.
Configuring all of this takes a coordinated approach. A complete multiple repository configuration consists of:
a codebase generator
Every relevant change arriving from a VC must contain a codebase. This is done by a codebaseGenerator that is defined in the configuration. Most generators examine the repository of a change to determine its codebase, using project-specific rules.
some schedulers
Each scheduler has to be configured with a set of all required codebases to build a product. These codebases indicate the set of required source-trees. In order for the scheduler to be able to produce a complete set for each build, the configuration can give a default repository, branch, and revision for each codebase. When a scheduler must generate a source stamp for a codebase that has received no changes, it applies these default values.
multiple source steps - one for each codebase
A Builders's build factory must include a source step for each codebase. Each of the source steps has a codebase attribute which is used to select an appropriate source stamp from the source stamp set for a build. This information comes from the arrived changes or from the scheduler's configured default values.
Note
Each source step has to have its own workdir set in order for the checkout to be done for each codebase in its own directory.
Note
Ensure you specify the codebase within your source step's Interpolate() calls (ex. http://.../svn/%(src:codebase:branch)s). See Interpolate for details.
Warning
Defining a codebaseGenerator that returns non-empty (not '') codebases will change the behavior of all the schedulers.
Configuration
The following sections describe the configuration of the various Buildbot components. The information available here is sufficient to create basic build and test configurations, and does not assume great familiarity with Python.
In more advanced Buildbot configurations, Buildbot acts as a framework for a continuous-integration application. The next section, Customization, describes this approach, with frequent references into the development documentation.
Configuring Buildbot
The buildbot's behavior is defined by the config file, which normally lives in the master.cfg file in the buildmaster's base directory (but this can be changed with an option to the buildbot create-master command). This file completely specifies which Builders are to be run, which slaves they should use, how Changes should be tracked, and where the status information is to be sent. The buildmaster's buildbot.tac file names the base directory; everything else comes from the config file.
A sample config file was installed for you when you created the buildmaster, but you will need to edit it before your buildbot will do anything useful.
This chapter gives an overview of the format of this file and the various sections in it. You will need to read the later chapters to understand how to fill in each section properly.
Config File Format
The config file is, fundamentally, just a piece of Python code which defines a dictionary named BuildmasterConfig, with a number of keys that are treated specially. You don't need to know Python to do basic configuration, though, you can just copy the syntax of the sample file. If you are comfortable writing Python code, however, you can use all the power of a full programming language to achieve more complicated configurations.
The BuildmasterConfig name is the only one which matters: all other names defined during the execution of the file are discarded. When parsing the config file, the Buildmaster generally compares the old configuration with the new one and performs the minimum set of actions necessary to bring the buildbot up to date: Builders which are not changed are left untouched, and Builders which are modified get to keep their old event history.
The beginning of the master.cfg file typically starts with something like:
BuildmasterConfig = c = {}
Therefore a config key like change_source will usually appear in master.cfg as c['change_source'].
See Buildmaster Configuration Index for a full list of BuildMasterConfig keys.
Basic Python Syntax
The master configuration file is interpreted as Python, allowing the full flexibility of the language. For the configurations described in this section, a detailed knowledge of Python is not required, but the basic syntax is easily described.
Python comments start with a hash character #, tuples are defined with (parenthesis, pairs), and lists (arrays) are defined with [square, brackets]. Tuples and lists are mostly interchangeable. Dictionaries (data structures which map keys to values) are defined with curly braces: {'key1': value1, 'key2': value2}. Function calls (and object instantiation) can use named parameters, like w = html.Waterfall(http_port=8010).
The config file starts with a series of import statements, which make various kinds of Steps and Status targets available for later use. The main BuildmasterConfig dictionary is created, then it is populated with a variety of keys, described section-by-section in subsequent chapters.
Predefined Config File Symbols
The following symbols are automatically available for use in the configuration file.
- basedir
the base directory for the buildmaster. This string has not been expanded, so it may start with a tilde. It needs to be expanded before use. The config file is located in
os.path.expanduser(os.path.join(basedir, 'master.cfg'))
- __file__
- the absolute path of the config file. The config file's directory is located in os.path.dirname(__file__).
Testing the Config File
To verify that the config file is well-formed and contains no deprecated or invalid elements, use the checkconfig command, passing it either a master directory or a config file.
% buildbot checkconfig master.cfg
Config file is good!
# or
% buildbot checkconfig /tmp/masterdir
Config file is good!
If the config file has deprecated features (perhaps because you've upgraded the buildmaster and need to update the config file to match), they will be announced by checkconfig. In this case, the config file will work, but you should really remove the deprecated items and use the recommended replacements instead:
% buildbot checkconfig master.cfg
/usr/lib/python2.4/site-packages/buildbot/master.py:559: DeprecationWarning: c['sources'] is
deprecated as of 0.7.6 and will be removed by 0.8.0 . Please use c['change_source'] instead.
Config file is good!
If you have errors in your configuration file, checkconfig will let you know:
% buildbot checkconfig master.cfg
Configuration Errors:
c['slaves'] must be a list of BuildSlave instances
no slaves are configured
builder 'smoketest' uses unknown slaves 'linux-002'
If the config file is simply broken, that will be caught too:
% buildbot checkconfig master.cfg
error while parsing config file:
Traceback (most recent call last):
File "/home/buildbot/master/bin/buildbot", line 4, in <module>
    runner.run()
File "/home/buildbot/master/buildbot/scripts/runner.py", line 1358, in run
    if not doCheckConfig(so):
File "/home/buildbot/master/buildbot/scripts/runner.py", line 1079, in doCheckConfig
    return cl.load(quiet=quiet)
File "/home/buildbot/master/buildbot/scripts/checkconfig.py", line 29, in load
    self.basedir, self.configFileName)
--- <exception caught here> ---
File "/home/buildbot/master/buildbot/config.py", line 147, in loadConfig
    exec f in localDict
exceptions.SyntaxError: invalid syntax (master.cfg, line 52)
Configuration Errors:
error while parsing config file: invalid syntax (master.cfg, line 52) (traceback in logfile)
Loading the Config File
The config file is only read at specific points in time. It is first read when the buildmaster is launched.
Reloading the Config File (reconfig)
If you are on the system hosting the buildmaster, you can send a SIGHUP signal to it: the buildbot tool has a shortcut for this:
buildbot reconfig BASEDIR
This command will show you all of the lines from twistd.log that relate to the reconfiguration. If there are any problems during the config-file reload, they will be displayed in these lines.
When reloading the config file, the buildmaster will endeavor to change as little as possible about the running system. For example, although old status targets may be shut down and new ones started up, any status targets that were not changed since the last time the config file was read will be left running and untouched. Likewise any Builders which have not been changed will be left running. If a Builder is modified (say, the build process is changed) while a Build is currently running, that Build will keep running with the old process until it completes. Any previously queued Builds (or Builds which get queued after the reconfig) will use the new process.
Warning
Buildbot's reconfiguration system is fragile for a few difficult-to-fix reasons:
- Any modules imported by the configuration file are not automatically reloaded. Python modules such as http://pypi.python.org/pypi/lazy-reload may help here, but reloading modules is fraught with subtleties and difficult-to-decipher failure cases.
- During the reconfiguration, active internal objects are divorced from the service hierarchy, leading to tracebacks in the web interface and other components. These are ordinarily transient, but with HTTP connection caching (either by the browser or an intervening proxy) they can last for a long time.
- If the new configuration file is invalid, it is possible for Buildbot's internal state to be corrupted, leading to undefined results. When this occurs, it is best to restart the master.
- For more advanced configurations, it is impossible for Buildbot to tell if the configuration for a Builder or Scheduler has changed, and thus the Builder or Scheduler will always be reloaded. This occurs most commonly when a callable is passed as a configuration parameter.
The bbproto project (at https://github.com/dabrahams/bbproto) may help to construct large (multi-file) configurations which can be effectively reloaded and reconfigured.
Reconfig by Debug Client
The debug tool (buildbot debugclient --master HOST:PORT) has a Reload .cfg button which will also trigger a reload.
Global Configuration
The keys in this section affect the operations of the buildmaster globally.
Database Specification
Buildbot requires a connection to a database to maintain certain state information, such as tracking pending build requests. In the default configuration Buildbot uses a file-based SQLite database, stored in the state.sqlite file of the master's base directory. Override this configuration with the db_url parameter.
Buildbot accepts a database configuration in a dictionary named db. All keys are optional:
c['db'] = {
    'db_url' : 'sqlite:///state.sqlite',
    'db_poll_interval' : 30,
}
The db_url key indicates the database engine to use. The format of this parameter is completely documented at http://www.sqlalchemy.org/docs/dialects/, but is generally of the form:
driver://[username:password@]host:port/database[?args]
The optional db_poll_interval specifies the interval, in seconds, between checks for pending tasks in the database. This parameter is generally only useful in multi-master mode. See Multi-master mode.
These parameters can be specified directly in the configuration dictionary, as c['db_url'] and c['db_poll_interval'], although this method is deprecated.
The following sections give additional information for particular database backends:
SQLite
For sqlite databases, since there is no host and port, relative paths are specified with sqlite:/// and absolute paths with sqlite:////. Examples:
c['db_url'] = "sqlite:///state.sqlite"
SQLite requires no special configuration.
If Buildbot produces "database is locked" exceptions, try adding serialize_access=1 to the DB URL as a workaround:
c['db_url'] = "sqlite:///state.sqlite?serialize_access=1"
and please file a bug at http://trac.buildbot.net.
MySQL
c['db_url'] = "mysql://user:pass@somehost.com/database_name?max_idle=300"
The max_idle argument for MySQL connections is unique to Buildbot, and should be set to something less than the wait_timeout configured for your server. This controls the SQLAlchemy pool_recycle parameter, which defaults to no timeout. Setting this parameter ensures that connections are closed and re-opened after the configured amount of idle time. If you see errors such as _mysql_exceptions.OperationalError: (2006, 'MySQL server has gone away'), this means your max_idle setting is probably too high. show global variables like 'wait_timeout'; will show what the currently configured wait_timeout is on your MySQL server.
Buildbot requires use_unique=True and charset=utf8, and will add them automatically, so they do not need to be specified in db_url.
MySQL defaults to the MyISAM storage engine, but this can be overridden with the storage_engine URL argument.
Note that, because of InnoDB's extremely short key length limitations, it cannot be used to run Buildbot. See http://bugs.mysql.com/bug.php?id=4541 for more information.
Buildbot uses temporary tables internally to manage large transactions.
MySQL has trouble doing replication with temporary tables, so if you are using a replicated MySQL installation, you may need to handle this situation carefully. The MySQL documentation (http://dev.mysql.com/doc/refman/5.5/en/replication-features-temptables.html) recommends using --replicate-wild-ignore-table to ignore temporary tables that should not be replicated. All Buildbot temporary tables begin with bbtmp_, so an option such as --replicate-wild-ignore-table=bbtmp_.* may help.
Postgres
c['db_url'] = "postgresql://username@hostname/dbname"
PosgreSQL requires no special configuration.
Multi-master mode
Normally buildbot operates using a single master process that uses the configured database to save state.
It is possible to configure buildbot to have multiple master processes that share state in the same database. This has been well tested using a MySQL database. There are several benefits of Multi-master mode:
- You can have large numbers of build slaves handling the same queue of build requests. A single master can only handle so many slaves (the number is based on a number of factors including type of builds, number of builds, and master and slave IO and CPU capacity--there is no fixed formula). By adding another master which shares the queue of build requests, you can attach more slaves to this additional master, and increase your build throughput.
- You can shut one master down to do maintenance, and other masters will continue to do builds.
State that is shared in the database includes:
- List of changes
- Scheduler names and internal state
- Build requests, including the builder name
Because of this shared state, you are strongly encouraged to:
- Ensure that each named scheduler runs on only one master. If the same scheduler runs on multiple masters, it will trigger duplicate builds and may produce other undesirable behaviors.
- Ensure builder names are unique for a given build factory implementation. You can have the same builder name configured on many masters, but if the build factories differ, you will get different results depending on which master claims the build.
One suggested configuration is to have one buildbot master configured with just the scheduler and change sources; and then other masters configured with just the builders.
To enable multi-master mode in this configuration, you will need to set the multiMaster option so that buildbot doesn't warn about missing schedulers or builders. You will also need to set db_poll_interval to specify the interval (in seconds) at which masters should poll the database for tasks.
# Enable multiMaster mode; disables warnings about unknown builders and
# schedulers
c['multiMaster'] = True
# Check for new build requests every 60 seconds
c['db'] = {
    'db_url' : 'mysql://...',
    'db_poll_interval' : 30,
}
Site Definitions
Three basic settings describe the buildmaster in status reports:
c['title'] = "Buildbot"
c['titleURL'] = "http://buildbot.sourceforge.net/"
c['buildbotURL'] = "http://localhost:8010/"
title is a short string that will appear at the top of this buildbot installation's html.WebStatus home page (linked to the titleURL), and is embedded in the title of the waterfall HTML page.
titleURL is a URL string that must end with a slash (/). HTML status displays will show title as a link to titleURL. This URL is often used to provide a link from buildbot HTML pages to your project's home page.
The buildbotURL string should point to the location where the buildbot's internal web server is visible. This URL must end with a slash (/). This typically uses the port number set for the web status (WebStatus): the buildbot needs your help to figure out a suitable externally-visible host URL.
When status notices are sent to users (either by email or over IRC), buildbotURL will be used to create a URL to the specific build or problem that they are being notified about. It will also be made available to queriers (over IRC) who want to find out where to get more information about this buildbot.
Log Handling
c['logCompressionLimit'] = 16384
c['logCompressionMethod'] = 'gz'
c['logMaxSize'] = 1024*1024 # 1M
c['logMaxTailSize'] = 32768
The logCompressionLimit enables compression of build logs on disk for logs that are bigger than the given size, or disables that completely if set to False. The default value is 4096, which should be a reasonable default on most file systems. This setting has no impact on status plugins, and merely affects the required disk space on the master for build logs.
The logCompressionMethod controls what type of compression is used for build logs. The default is 'bz2', and the other valid option is 'gz'. 'bz2' offers better compression at the expense of more CPU time.
The logMaxSize parameter sets an upper limit (in bytes) to how large logs from an individual build step can be. The default value is None, meaning no upper limit to the log size. Any output exceeding logMaxSize will be truncated, and a message to this effect will be added to the log's HEADER channel.
If logMaxSize is set, and the output from a step exceeds the maximum, the logMaxTailSize parameter controls how much of the end of the build log will be kept. The effect of setting this parameter is that the log will contain the first logMaxSize bytes and the last logMaxTailSize bytes of output. Don't set this value too high, as the the tail of the log is kept in memory.
Data Lifetime
Horizons
c['changeHorizon'] = 200
c['buildHorizon'] = 100
c['eventHorizon'] = 50
c['logHorizon'] = 40
c['buildCacheSize'] = 15
Buildbot stores historical information on disk in the form of "Pickle" files and compressed logfiles. In a large installation, these can quickly consume disk space, yet in many cases developers never consult this historical information.
The changeHorizon key determines how many changes the master will keep a record of. One place these changes are displayed is on the waterfall page. This parameter defaults to 0, which means keep all changes indefinitely.
The buildHorizon specifies the minimum number of builds for each builder which should be kept on disk. The eventHorizon specifies the minimum number of events to keep--events mostly describe connections and disconnections of slaves, and are seldom helpful to developers. The logHorizon gives the minimum number of builds for which logs should be maintained; this parameter must be less than or equal to buildHorizon. Builds older than logHorizon but not older than buildHorizon will maintain their overall status and the status of each step, but the logfiles will be deleted.
Caches
c['caches'] = {
    'Changes' : 100,     # formerly c['changeCacheSize']
    'Builds' : 500,      # formerly c['buildCacheSize']
    'chdicts' : 100,
    'BuildRequests' : 10,
    'SourceStamps' : 20,
    'ssdicts' : 20,
    'objectids' : 10,
    'usdicts' : 100,
}
The caches configuration key contains the configuration for Buildbot's in-memory caches. These caches keep frequently-used objects in memory to avoid unnecessary trips to the database or to pickle files. Caches are divided by object type, and each has a configurable maximum size.
The default size for each cache is 1, except where noted below. A value of 1 allows Buildbot to make a number of optimizations without consuming much memory. Larger, busier installations will likely want to increase these values.
The available caches are:
- Changes
the number of change objects to cache in memory. This should be larger than the number of changes that typically arrive in the span of a few minutes, otherwise your schedulers will be reloading changes from the database every time they run. For distributed version control systems, like Git or Hg, several thousand changes may arrive at once, so setting this parameter to something like 10000 isn't unreasonable.
This parameter is the same as the deprecated global parameter changeCacheSize. Its default value is 10.
- Builds
The buildCacheSize parameter gives the number of builds for each builder which are cached in memory. This number should be larger than the number of builds required for commonly-used status displays (the waterfall or grid views), so that those displays do not miss the cache on a refresh.
This parameter is the same as the deprecated global parameter buildCacheSize. Its default value is 15.
- chdicts
- The number of rows from the changes table to cache in memory. This value should be similar to the value for Changes.
- BuildRequests
- The number of BuildRequest objects kept in memory. This number should be higher than the typical number of outstanding build requests. If the master ordinarily finds jobs for BuildRequests immediately, you may set a lower value.
- SourceStamps
- the number of SourceStamp objects kept in memory. This number should generally be similar to the number BuildRequesets.
- ssdicts
- The number of rows from the sourcestamps table to cache in memory. This value should be similar to the value for SourceStamps.
- objectids
- The number of object IDs - a means to correlate an object in the Buildbot configuration with an identity in the database--to cache. In this version, object IDs are not looked up often during runtime, so a relatively low value such as 10 is fine.
- usdicts
The number of rows from the users table to cache in memory. Note that for a given user there will be a row for each attribute that user has.
c['buildCacheSize'] = 15
Merging Build Requests
c['mergeRequests'] = True
This is a global default value for builders' mergeRequests parameter, and controls the merging of build requests.
This parameter can be overridden on a per-builder basis. See Merging Build Requests for the allowed values for this parameter.
Prioritizing Builders
def prioritizeBuilders(buildmaster, builders):
    # ...
c['prioritizeBuilders'] = prioritizeBuilders
By default, buildbot will attempt to start builds on builders in order, beginning with the builder with the oldest pending request. Customize this behavior with the prioritizeBuilders configuration key, which takes a callable. See Builder Priority Functions for details on this callable.
This parameter controls the order that the build master can start builds, and is useful in situations where there is resource contention between builders, e.g., for a test database. It does not affect the order in which a builder processes the build requests in its queue. For that purpose, see Prioritizing Builds.
Setting the PB Port for Slaves
c['slavePortnum'] = 10000
The buildmaster will listen on a TCP port of your choosing for connections from buildslaves. It can also use this port for connections from remote Change Sources, status clients, and debug tools. This port should be visible to the outside world, and you'll need to tell your buildslave admins about your choice.
It does not matter which port you pick, as long it is externally visible; however, you should probably use something larger than 1024, since most operating systems don't allow non-root processes to bind to low-numbered ports. If your buildmaster is behind a firewall or a NAT box of some sort, you may have to configure your firewall to permit inbound connections to this port.
slavePortnum is a strports specification string, defined in the twisted.application.strports module (try pydoc twisted.application.strports to get documentation on the format).
This means that you can have the buildmaster listen on a localhost-only port by doing:
c['slavePortnum'] = "tcp:10000:interface=127.0.0.1"
This might be useful if you only run buildslaves on the same machine, and they are all configured to contact the buildmaster at localhost:10000.
Defining Global Properties
The properties configuration key defines a dictionary of properties that will be available to all builds started by the buildmaster:
c['properties'] = {
    'Widget-version' : '1.2',
    'release-stage' : 'alpha'
}
Debug Options
If you set debugPassword, then you can connect to the buildmaster with the diagnostic tool launched by buildbot debugclient MASTER:PORT. From this tool, you can reload the config file, manually force builds, and inject changes, which may be useful for testing your buildmaster without actually committing changes to your repository (or before you have the Change Sources configured.)
The debug tool uses the same port number as the slaves, slavePortnum, and you may configure its authentication credentials as follows:
c['debugPassword'] = "debugpassword"
Manhole
If you set manhole to an instance of one of the classes in buildbot.manhole, you can telnet or ssh into the buildmaster and get an interactive Python shell, which may be useful for debugging buildbot internals. It is probably only useful for buildbot developers. It exposes full access to the buildmaster's account (including the ability to modify and delete files), so it should not be enabled with a weak or easily guessable password.
There are three separate Manhole classes. Two of them use SSH, one uses unencrypted telnet. Two of them use a username+password combination to grant access, one of them uses an SSH-style authorized_keys file which contains a list of ssh public keys.
Note
Using any Manhole requires that pycrypto and pyasn1 be installed. These are not part of the normal Buildbot dependencies.
- manhole.AuthorizedKeysManhole
- You construct this with the name of a file that contains one SSH public key per line, just like ~/.ssh/authorized_keys. If you provide a non-absolute filename, it will be interpreted relative to the buildmaster's base directory.
- manhole.PasswordManhole
- This one accepts SSH connections but asks for a username and password when authenticating. It accepts only one such pair.
- manhole.TelnetManhole
- This accepts regular unencrypted telnet connections, and asks for a username/password pair before providing access. Because this username/password is transmitted in the clear, and because Manhole access to the buildmaster is equivalent to granting full shell privileges to both the buildmaster and all the buildslaves (and to all accounts which then run code produced by the buildslaves), it is highly recommended that you use one of the SSH manholes instead.
# some examples:
from buildbot import manhole
c['manhole'] = manhole.AuthorizedKeysManhole(1234, "authorized_keys")
c['manhole'] = manhole.PasswordManhole(1234, "alice", "mysecretpassword")
c['manhole'] = manhole.TelnetManhole(1234, "bob", "snoop_my_password_please")
The Manhole instance can be configured to listen on a specific port. You may wish to have this listening port bind to the loopback interface (sometimes known as lo0, localhost, or 127.0.0.1) to restrict access to clients which are running on the same host.
from buildbot.manhole import PasswordManhole
c['manhole'] = PasswordManhole("tcp:9999:interface=127.0.0.1","admin","passwd")
To have the Manhole listen on all interfaces, use "tcp:9999" or simply 9999. This port specification uses twisted.application.strports, so you can make it listen on SSL or even UNIX-domain sockets if you want.
Note that using any Manhole requires that the TwistedConch package be installed.
The buildmaster's SSH server will use a different host key than the normal sshd running on a typical unix host. This will cause the ssh client to complain about a host key mismatch, because it does not realize there are two separate servers running on the same host. To avoid this, use a clause like the following in your .ssh/config file:
Host remotehost-buildbot
HostName remotehost
HostKeyAlias remotehost-buildbot
Port 9999
# use 'user' if you use PasswordManhole and your name is not 'admin'.
# if you use AuthorizedKeysManhole, this probably doesn't matter.
User admin
Using Manhole
After you have connected to a manhole instance, you will find yourself at a Python prompt. You have access to two objects: master (the BuildMaster) and status (the master's Status object). Most interesting objects on the master can be reached from these two objects.
To aid in navigation, the show method is defined. It displays the non-method attributes of an object.
A manhole session might look like:
>>> show(master)
data attributes of <buildbot.master.BuildMaster instance at 0x7f7a4ab7df38>
                       basedir : '/home/dustin/code/buildbot/t/buildbot/'...
                     botmaster : <type 'instance'>
                buildCacheSize : None
                  buildHorizon : None
                   buildbotURL : http://localhost:8010/
               changeCacheSize : None
                    change_svc : <type 'instance'>
                configFileName : master.cfg
                            db : <class 'buildbot.db.connector.DBConnector'>
              db_poll_interval : None
                        db_url : sqlite:///state.sqlite
                              ...
>>> show(master.botmaster.builders['win32'])
data attributes of <Builder ''builder'' at 48963528>
                              ...
>>> win32 = _
>>> win32.category = 'w32'
Metrics Options
c['metrics'] = dict(log_interval=10, periodic_interval=10)
metrics can be a dictionary that configures various aspects of the metrics subsystem. If metrics is None, then metrics collection, logging and reporting will be disabled.
log_interval determines how often metrics should be logged to twistd.log. It defaults to 60s. If set to 0 or None, then logging of metrics will be disabled. This value can be changed via a reconfig.
periodic_interval determines how often various non-event based metrics are collected, such as memory usage, uncollectable garbage, reactor delay. This defaults to 10s. If set to 0 or None, then periodic collection of this data is disabled. This value can also be changed via a reconfig.
Read more about metrics in the Metrics section in the developer documentation.
Users Options
from buildbot.process.users import manual
c['user_managers'] = []
c['user_managers'].append(manual.CommandlineUserManager(username="user",
                                                   passwd="userpw",
                                                   port=9990))
user_managers contains a list of ways to manually manage User Objects within Buildbot (see User Objects). Currently implemented is a commandline tool buildbot user, described at length in user. In the future, a web client will also be able to manage User Objects and their attributes.
As shown above, to enable the buildbot user tool, you must initialize a CommandlineUserManager instance in your master.cfg. CommandlineUserManager instances require the following arguments:
- username
- This is the username that will be registered on the PB connection and need to be used when calling buildbot user.
- passwd
- This is the passwd that will be registered on the PB connection and need to be used when calling buildbot user.
- port
- The PB connection port must be different than c['slavePortnum'] and be specified when calling buildbot user
Input Validation
import re
c['validation'] = {
    'branch' : re.compile(r'^[\w.+/~-]*$'),
    'revision' : re.compile(r'^[ \w\.\-\/]*$'),
    'property_name' : re.compile(r'^[\w\.\-\/\~:]*$'),
    'property_value' : re.compile(r'^[\w\.\-\/\~:]*$'),
}
This option configures the validation applied to user inputs of various types. This validation is important since these values are often included in command-line arguments executed on slaves. Allowing arbitrary input from untrusted users may raise security concerns.
The keys describe the type of input validated; the values are compiled regular expressions against which the input will be matched. The defaults for each type of input are those given in the example, above.
Revision Links
The revlink parameter is used to create links from revision IDs in the web status to a web-view of your source control system. The parameter's value must be a callable.
By default, Buildbot is configured to generate revlinks for a number of open source hosting platforms.
The callable takes the revision id and repository argument, and should return an URL to the revision. Note that the revision id may not always be in the form you expect, so code defensively. In particular, a revision of "??" may be supplied when no other information is available.
Note that SourceStamps that are not created from version-control changes (e.g., those created by a Nightly or Periodic scheduler) may have an empty repository string, if the repository is not known to the scheduler.
Revision Link Helpers
Buildbot provides two helpers for generating revision links. buildbot.revlinks.RevlinkMatcher takes a list of regular expressions, and replacement text. The regular expressions should all have the same number of capture groups. The replacement text should have sed-style references to that capture groups (i.e. '1' for the first capture group), and a single '%s' reference, for the revision ID. The repository given is tried against each regular expression in turn. The results are the substituted into the replacement text, along with the revision ID to obtain the revision link.
from buildbot import revlinks
c['revlink'] = revlinks.RevlinkMatch([r'git://notmuchmail.org/git/(.*)'],
                                      r'http://git.notmuchmail.org/git/\1/commit/%s')
buildbot.revlinks.RevlinkMultiplexer takes a list of revision link callables, and tries each in turn, returning the first successful match.
Codebase Generator
all_repositories = {
    r'https://hg/hg/mailsuite/mailclient': 'mailexe',
    r'https://hg/hg/mailsuite/mapilib': 'mapilib',
    r'https://hg/hg/mailsuite/imaplib': 'imaplib',
    r'https://github.com/mailinc/mailsuite/mailclient': 'mailexe',
    r'https://github.com/mailinc/mailsuite/mapilib': 'mapilib',
    r'https://github.com/mailinc/mailsuite/imaplib': 'imaplib',
}

def codebaseGenerator(chdict):
    return all_repositories[chdict['repository']]

c['codebaseGenerator'] = codebaseGenerator
For any incoming change, the codebase is set to ''. This codebase value is sufficient if all changes come from the same repository (or clones). If changes come from different repositories, extra processing will be needed to determine the codebase for the incoming change. This codebase will then be a logical name for the combination of repository and or branch etc.
The codebaseGenerator accepts a change dictionary as produced by the buildbot.db.changes.ChangesConnectorComponent, with a changeid equal to None.
Change Sources
A Version Control System maintains a source tree, and tells the buildmaster when it changes. The first step of each Build is typically to acquire a copy of some version of this tree.
This chapter describes how the Buildbot learns about what Changes have occurred. For more information on VC systems and Changes, see Version Control Systems.
Changes can be provided by a variety of ChangeSource types, although any given project will typically have only a single ChangeSource active. This section provides a description of all available ChangeSource types and explains how to set up each of them.
Choosing a Change Source
There are a variety of ChangeSource classes available, some of which are meant to be used in conjunction with other tools to deliver Change events from the VC repository to the buildmaster.
As a quick guide, here is a list of VC systems and the ChangeSources that might be useful with them. Note that some of these modules are in Buildbot's "contrib" directory, meaning that they have been offered by other users in hopes they may be useful, and might require some additional work to make them functional.
- CVS
- CVSMaildirSource (watching mail sent by contrib/buildbot_cvs_mail.py script)
- PBChangeSource (listening for connections from buildbot sendchange run in a loginfo script)
- PBChangeSource (listening for connections from a long-running contrib/viewcvspoll.py polling process which examines the ViewCVS database directly)
- Change Hooks in WebStatus
- SVN
- PBChangeSource (listening for connections from contrib/svn_buildbot.py run in a postcommit script)
- PBChangeSource (listening for connections from a long-running contrib/svn_watcher.py or contrib/svnpoller.py polling process
- SVNCommitEmailMaildirSource (watching for email sent by commit-email.pl)
- SVNPoller (polling the SVN repository)
- Change Hooks in WebStatus
- GoogleCodeAtomPoller (polling the commit feed for a GoogleCode Git repository)
- Darcs
- PBChangeSource (listening for connections from contrib/darcs_buildbot.py in a commit script)
- Change Hooks in WebStatus
- Mercurial
- PBChangeSource (listening for connections from contrib/hg_buildbot.py run in an 'changegroup' hook)
- Change Hooks in WebStatus
- PBChangeSource (listening for connections from buildbot/changes/hgbuildbot.py run as an in-process 'changegroup' hook)
- HgPoller (polling a remote Mercurial repository)
- GoogleCodeAtomPoller (polling the commit feed for a GoogleCode Git repository)
- Bzr (the newer Bazaar)
- PBChangeSource (listening for connections from contrib/bzr_buildbot.py run in a post-change-branch-tip or commit hook)
- BzrPoller (polling the Bzr repository)
- Change Hooks in WebStatus
- Git
- PBChangeSource (listening for connections from contrib/git_buildbot.py run in the post-receive hook)
- PBChangeSource (listening for connections from contrib/github_buildbot.py, which listens for notifications from GitHub)
- Change Hooks in WebStatus
- GitHub change hook (specifically designed for GitHub notifications, but requiring a publicly-accessible WebStatus)
- GitPoller (polling a remote Git repository)
- GoogleCodeAtomPoller (polling the commit feed for a GoogleCode Git repository)
- Repo/Git
- GerritChangeSource connects to Gerrit via SSH to get a live stream of changes
- Monotone
- PBChangeSource (listening for connections from monotone-buildbot.lua, which is available with Monotone)
All VC systems can be driven by a PBChangeSource and the buildbot sendchange tool run from some form of commit script. If you write an email parsing function, they can also all be driven by a suitable mail-parsing source. Additionally, handlers for web-based notification (i.e. from GitHub) can be used with WebStatus' change_hook module. The interface is simple, so adding your own handlers (and sharing!) should be a breeze.
See Change Source Index for a full list of change sources.
Configuring Change Sources
The change_source configuration key holds all active change sources for the configuration.
Most configurations have a single ChangeSource, watching only a single tree, e.g.,
c['change_source'] = PBChangeSource()
For more advanced configurations, the parameter can be a list of change sources:
source1 = ...
source2 = ...
c['change_source'] = [ source1, source1 ]
Repository and Project
ChangeSources will, in general, automatically provide the proper repository attribute for any changes they produce. For systems which operate on URL-like specifiers, this is a repository URL. Other ChangeSources adapt the concept as necessary.
Many ChangeSources allow you to specify a project, as well. This attribute is useful when building from several distinct codebases in the same buildmaster: the project string can serve to differentiate the different codebases. Schedulers can filter on project, so you can configure different builders to run for each project.
Mail-parsing ChangeSources
Many projects publish information about changes to their source tree by sending an email message out to a mailing list, frequently named PROJECT-commits or PROJECT-changes. Each message usually contains a description of the change (who made the change, which files were affected) and sometimes a copy of the diff. Humans can subscribe to this list to stay informed about what's happening to the source tree.
The Buildbot can also be subscribed to a -commits mailing list, and can trigger builds in response to Changes that it hears about. The buildmaster admin needs to arrange for these email messages to arrive in a place where the buildmaster can find them, and configure the buildmaster to parse the messages correctly. Once that is in place, the email parser will create Change objects and deliver them to the Schedulers (see Schedulers) just like any other ChangeSource.
There are two components to setting up an email-based ChangeSource. The first is to route the email messages to the buildmaster, which is done by dropping them into a maildir. The second is to actually parse the messages, which is highly dependent upon the tool that was used to create them. Each VC system has a collection of favorite change-emailing tools, and each has a slightly different format, so each has a different parsing function. There is a separate ChangeSource variant for each parsing function.
Once you've chosen a maildir location and a parsing function, create the change source and put it in change_source
from buildbot.changes.mail import CVSMaildirSource
c['change_source'] = CVSMaildirSource("~/maildir-buildbot",
                                        prefix="/trunk/")
Subscribing the Buildmaster
The recommended way to install the buildbot is to create a dedicated account for the buildmaster. If you do this, the account will probably have a distinct email address (perhaps buildmaster@example.org). Then just arrange for this account's email to be delivered to a suitable maildir (described in the next section).
If the buildbot does not have its own account, extension addresses can be used to distinguish between email intended for the buildmaster and email intended for the rest of the account. In most modern MTAs, the e.g. foo@example.org account has control over every email address at example.org which begins with "foo", such that email addressed to account-foo@example.org can be delivered to a different destination than account-bar@example.org. qmail does this by using separate .qmail files for the two destinations (.qmail-foo and .qmail-bar, with .qmail controlling the base address and .qmail-default controlling all other extensions). Other MTAs have similar mechanisms.
Thus you can assign an extension address like foo-buildmaster@example.org to the buildmaster, and retain foo@example.org for your own use.
Using Maildirs
A maildir is a simple directory structure originally developed for qmail that allows safe atomic update without locking. Create a base directory with three subdirectories: new, tmp, and cur. When messages arrive, they are put into a uniquely-named file (using pids, timestamps, and random numbers) in tmp. When the file is complete, it is atomically renamed into new. Eventually the buildmaster notices the file in new, reads and parses the contents, then moves it into cur. A cronjob can be used to delete files in cur at leisure.
Maildirs are frequently created with the maildirmake tool, but a simple mkdir -p ~/MAILDIR/{cur,new,tmp} is pretty much equivalent.
Many modern MTAs can deliver directly to maildirs. The usual .forward or .procmailrc syntax is to name the base directory with a trailing slash, so something like ~/MAILDIR/. qmail and postfix are maildir-capable MTAs, and procmail is a maildir-capable MDA (Mail Delivery Agent).
Here is an example procmail config, located in ~/.procmailrc:
# .procmailrc
# routes incoming mail to appropriate mailboxes
PATH=/usr/bin:/usr/local/bin
MAILDIR=$HOME/Mail
LOGFILE=.procmail_log
SHELL=/bin/sh

:0
*
new
If procmail is not setup on a system wide basis, then the following one-line .forward file will invoke it.
!/usr/bin/procmail
For MTAs which cannot put files into maildirs directly, the safecat tool can be executed from a .forward file to accomplish the same thing.
The Buildmaster uses the linux DNotify facility to receive immediate notification when the maildir's new directory has changed. When this facility is not available, it polls the directory for new messages, every 10 seconds by default.
Parsing Email Change Messages
The second component to setting up an email-based ChangeSource is to parse the actual notices. This is highly dependent upon the VC system and commit script in use.
A couple of common tools used to create these change emails, along with the buildbot tools to parse them, are:
- CVS
- Buildbot CVS MailNotifier
- CVSMaildirSource
- SVN
- svnmailer
- http://opensource.perlig.de/en/svnmailer/
- commit-email.pl
- SVNCommitEmailMaildirSource
- Bzr
- Launchpad
- BzrLaunchpadEmailMaildirSource
- Mercurial
- NotifyExtension
- http://www.selenic.com/mercurial/wiki/index.cgi/NotifyExtension
- Git
The following sections describe the parsers available for each of these tools.
Most of these parsers accept a prefix= argument, which is used to limit the set of files that the buildmaster pays attention to. This is most useful for systems like CVS and SVN which put multiple projects in a single repository (or use repository names to indicate branches). Each filename that appears in the email is tested against the prefix: if the filename does not start with the prefix, the file is ignored. If the filename does start with the prefix, that prefix is stripped from the filename before any further processing is done. Thus the prefix usually ends with a slash.
CVSMaildirSource
- class buildbot.changes.mail.CVSMaildirSource
This parser works with the buildbot_cvs_maildir.py script in the contrib directory.
The script sends an email containing all the files submitted in one directory. It is invoked by using the CVSROOT/loginfo facility.
The Buildbot's CVSMaildirSource knows how to parse these messages and turn them into Change objects. It takes the directory name of the maildir root. For example:
from buildbot.changes.mail import CVSMaildirSource
c['change_source'] = CVSMaildirSource("/home/buildbot/Mail")
CVS must be configured to invoke the buildbot_cvs_mail.py script when files are checked in. This is done via the CVS loginfo configuration file.
To update this, first do:
cvs checkout CVSROOT
cd to the CVSROOT directory and edit the file loginfo, adding a line like:
SomeModule /cvsroot/CVSROOT/buildbot_cvs_mail.py --cvsroot :ext:example.com:/cvsroot -e buildbot -P SomeModule %@{sVv@}
Note
For cvs version 1.12.x, the --path %p option is required. Version 1.11.x and 1.12.x report the directory path differently.
The above example you put the buildbot_cvs_mail.py script under /cvsroot/CVSROOT. It can be anywhere. Run the script with --help to see all the options. At the very least, the options -e (email) and -P (project) should be specified. The line must end with %{sVv} This is expanded to the files that were modified.
Additional entries can be added to support more modules.
See buildbot_cvs_mail.py --help` for more information on the available options.
SVNCommitEmailMaildirSource
- class buildbot.changes.mail.SVNCommitEmailMaildirSource
SVNCommitEmailMaildirSource parses message sent out by the commit-email.pl script, which is included in the Subversion distribution.
It does not currently handle branches: all of the Change objects that it creates will be associated with the default (i.e. trunk) branch.
from buildbot.changes.mail import SVNCommitEmailMaildirSource
c['change_source'] = SVNCommitEmailMaildirSource("~/maildir-buildbot")
BzrLaunchpadEmailMaildirSource
- class buildbot.changes.mail.BzrLaunchpadEmailMaildirSource
BzrLaunchpadEmailMaildirSource parses the mails that are sent to addresses that subscribe to branch revision notifications for a bzr branch hosted on Launchpad.
The branch name defaults to lp:Launchpad path. For example lp:~maria-captains/maria/5.1.
If only a single branch is used, the default branch name can be changed by setting defaultBranch.
For multiple branches, pass a dictionary as the value of the branchMap option to map specific repository paths to specific branch names (see example below). The leading lp: prefix of the path is optional.
The prefix option is not supported (it is silently ignored). Use the branchMap and defaultBranch instead to assign changes to branches (and just do not subscribe the buildbot to branches that are not of interest).
The revision number is obtained from the email text. The bzr revision id is not available in the mails sent by Launchpad. However, it is possible to set the bzr append_revisions_only option for public shared repositories to avoid new pushes of merges changing the meaning of old revision numbers.
from buildbot.changes.mail import BzrLaunchpadEmailMaildirSource
bm = { 'lp:~maria-captains/maria/5.1' : '5.1', 'lp:~maria-captains/maria/6.0' : '6.0' }
c['change_source'] = BzrLaunchpadEmailMaildirSource("~/maildir-buildbot", branchMap = bm)
PBChangeSource
- class buildbot.changes.pb.PBChangeSource
PBChangeSource actually listens on a TCP port for clients to connect and push change notices into the Buildmaster. This is used by the built-in buildbot sendchange notification tool, as well as several version-control hook scripts. This change is also useful for creating new kinds of change sources that work on a push model instead of some kind of subscription scheme, for example a script which is run out of an email .forward file. This ChangeSource always runs on the same TCP port as the slaves. It shares the same protocol, and in fact shares the same space of "usernames", so you cannot configure a PBChangeSource with the same name as a slave.
If you have a publicly accessible slave port, and are using PBChangeSource, you must establish a secure username and password for the change source. If your sendchange credentials are known (e.g., the defaults), then your buildmaster is susceptible to injection of arbitrary changes, which (depending on the build factories) could lead to arbitrary code execution on buildslaves.
The PBChangeSource is created with the following arguments.
- port
- which port to listen on. If None (which is the default), it shares the port used for buildslave connections.
- user
- The user account that the client program must use to connect. Defaults to change
- passwd
- The password for the connection - defaults to changepw. Do not use this default on a publicly exposed port!
- prefix
The prefix to be found and stripped from filenames delivered over the connection, defaulting to None. Any filenames which do not start with this prefix will be removed. If all the filenames in a given Change are removed, the that whole Change will be dropped. This string should probably end with a directory separator.
This is useful for changes coming from version control systems that represent branches as parent directories within the repository (like SVN and Perforce). Use a prefix of trunk/ or project/branches/foobranch/ to only follow one branch and to get correct tree-relative filenames. Without a prefix, the PBChangeSource will probably deliver Changes with filenames like trunk/foo.c instead of just foo.c. Of course this also depends upon the tool sending the Changes in (like buildbot sendchange) and what filenames it is delivering: that tool may be filtering and stripping prefixes at the sending end.
For example:
from buildbot.changes import pb
c['change_source'] = pb.PBChangeSource(port=9999, user='laura', passwd='fpga')
The following hooks are useful for sending changes to a PBChangeSource:
Mercurial Hook
Since Mercurial is written in Python, the hook script can invoke Buildbot's sendchange function directly, rather than having to spawn an external process. This function delivers the same sort of changes as buildbot sendchange and the various hook scripts in contrib/, so you'll need to add a PBChangeSource to your buildmaster to receive these changes.
To set this up, first choose a Mercurial repository that represents your central official source tree. This will be the same repository that your buildslaves will eventually pull from. Install Buildbot on the machine that hosts this repository, using the same version of Python as Mercurial is using (so that the Mercurial hook can import code from buildbot). Then add the following to the .hg/hgrc file in that repository, replacing the buildmaster hostname/portnumber as appropriate for your buildbot:
[hooks]
changegroup.buildbot = python:buildbot.changes.hgbuildbot.hook

[hgbuildbot]
master = buildmaster.example.org:9987
# .. other hgbuildbot parameters ..
The master configuration key allows to have more than one buildmaster specification. The buildmasters have to be separated by a whitspace or comma (see also 'hg help config'):
master =
    buildmaster.example.org:9987
    buildmaster2.example.org:9989
Note
Mercurial lets you define multiple changegroup hooks by giving them distinct names, like changegroup.foo and changegroup.bar, which is why we use changegroup.buildbot in this example. There is nothing magical about the buildbot suffix in the hook name. The [hgbuildbot] section is special, however, as it is the only section that the buildbot hook pays attention to.)
Also note that this runs as a changegroup hook, rather than as an incoming hook. The changegroup hook is run with multiple revisions at a time (say, if multiple revisions are being pushed to this repository in a single hg push command), whereas the incoming hook is run with just one revision at a time. The hgbuildbot.hook function will only work with the changegroup hook.
Changes' attribute properties has an entry is_merge which is set to true when the change was caused by a merge.
If the buildmaster PBChangeSource is configured to require sendchange credentials then you can set these with the auth parameter. When this parameter is not set it defaults to change:changepw, which are the defaults for the user and password values of a PBChangeSource which doesn't require authentication.
[hgbuildbot]
auth = clientname:supersecret
# ...
You can set this parameter in either the global /etc/mercurial/hgrc, your personal ~/.hgrc file or the repository local .hg/hgrc file. But since this value is stored in plain text, you must make sure that it can only be read by those users that need to know the authentication credentials.
The [hgbuildbot] section has two other parameters that you might specify, both of which control the name of the branch that is attached to the changes coming from this hook.
One common branch naming policy for Mercurial repositories is to use Mercurial's built-in branches (the kind created with hg branch and listed with hg branches). This feature associates persistent names with particular lines of descent within a single repository. (note that the buildbot source.Mercurial checkout step does not yet support this kind of branch). To have the commit hook deliver this sort of branch name with the Change object, use branchtype = inrepo, this is the default behavior:
[hgbuildbot]
branchtype = inrepo
# ...
Another approach is for each branch to go into a separate repository, and all the branches for a single project share a common parent directory. For example, you might have /var/repos/PROJECT/trunk/ and /var/repos/PROJECT/release. To use this style, use the branchtype = dirname setting, which simply uses the last component of the repository's enclosing directory as the branch name:
[hgbuildbot]
branchtype = dirname
# ...
Finally, if you want to simply specify the branchname directly, for all changes, use branch = BRANCHNAME. This overrides branchtype:
[hgbuildbot]
branch = trunk
# ...
If you use branch= like this, you'll need to put a separate .hgrc in each repository. If you use branchtype=, you may be able to use the same .hgrc for all your repositories, stored in ~/.hgrc or /etc/mercurial/hgrc.
As twisted needs to hook some signals, and some web servers strictly forbid that, the parameter fork in the [hgbuildbot] section will instruct Mercurial to fork before sending the change request. Then as the created process will be of short life, it is considered as safe to disable the signal restriction in the Apache setting like that WSGIRestrictSignal Off. Refer to the documentation of your web server for other way to do the same.
The category parameter sets the category for any changes generated from the hook. Likewise, the project parameter sets the project.
Changes' repository attributes are formed from the Mercurial repo path by stripping strip slashes on the left, then prepending the baseurl. For example, assume the following parameters:
[hgbuildbot]
baseurl = http://hg.myorg.com/repos/
strip = 3
# ...
Then a repopath of /var/repos/myproject/release would have its left 3 slashes stripped, leaving myproject/release, after which the base URL would be prepended, to create http://hg.myorg.com/repos/myproject/release.
The hgbuildbot baseurl value defaults to the value of the same parameter in the web section of the configuration.
Note
older versions of Buildbot created repository strings that did not contain an entire URL. To continue this pattern, set the hgbuildbot baseurl parameter to an empty string:
[hgbuildbot]
baseurl = http://hg.myorg.com/repos/
Bzr Hook
Bzr is also written in Python, and the Bzr hook depends on Twisted to send the changes.
To install, put contrib/bzr_buildbot.py in one of your plugins locations a bzr plugins directory (e.g., ~/.bazaar/plugins). Then, in one of your bazaar conf files (e.g., ~/.bazaar/locations.conf), set the location you want to connect with buildbot with these keys:
- buildbot_on one of 'commit', 'push, or 'change'. Turns the plugin on to report changes via commit, changes via push, or any changes to the trunk. 'change' is recommended.
- buildbot_server (required to send to a buildbot master) the URL of the buildbot master to which you will connect (as of this writing, the same server and port to which slaves connect).
- buildbot_port (optional, defaults to 9989) the port of the buildbot master to which you will connect (as of this writing, the same server and port to which slaves connect)
- buildbot_pqm (optional, defaults to not pqm) Normally, the user that commits the revision is the user that is responsible for the change. When run in a pqm (Patch Queue Manager, see https://launchpad.net/pqm) environment, the user that commits is the Patch Queue Manager, and the user that committed the parent revision is responsible for the change. To turn on the pqm mode, set this value to any of (case-insensitive) "Yes", "Y", "True", or "T".
- buildbot_dry_run (optional, defaults to not a dry run) Normally, the post-commit hook will attempt to communicate with the configured buildbot server and port. If this parameter is included and any of (case-insensitive) "Yes", "Y", "True", or "T", then the hook will simply print what it would have sent, but not attempt to contact the buildbot master.
- buildbot_send_branch_name (optional, defaults to not sending the branch name) If your buildbot's bzr source build step uses a repourl, do not turn this on. If your buildbot's bzr build step uses a baseURL, then you may set this value to any of (case-insensitive) "Yes", "Y", "True", or "T" to have the buildbot master append the branch name to the baseURL.
Note
The bzr smart server (as of version 2.2.2) doesn't know how to resolve bzr:// urls into absolute paths so any paths in locations.conf won't match, hence no change notifications will be sent to Buildbot. Setting configuration parameters globally or in-branch might still work. When buildbot no longer has a hardcoded password, it will be a configuration option here as well.
Here's a simple example that you might have in your ~/.bazaar/locations.conf.
[chroot-*:///var/local/myrepo/mybranch]
buildbot_on = change
buildbot_server = localhost
P4Source
The P4Source periodically polls a Perforce depot for changes. It accepts the following arguments:
- p4base
- The base depot path to watch, without the trailing '/...'.
- p4port
- The Perforce server to connect to (as host:port).
- p4user
- The Perforce user.
- p4passwd
- The Perforce password.
- p4bin
- An optional string parameter. Specify the location of the perforce command line binary (p4). You only need to do this if the perforce binary is not in the path of the buildbot user. Defaults to p4.
- split_file
- A function that maps a pathname, without the leading p4base, to a (branch, filename) tuple. The default just returns (None, branchfile), which effectively disables branch support. You should supply a function which understands your repository structure.
- pollInterval
- How often to poll, in seconds. Defaults to 600 (10 minutes).
- histmax
- The maximum number of changes to inspect at a time. If more than this number occur since the last poll, older changes will be silently ignored.
- encoding
- The character encoding of p4's output. This defaults to "utf8", but if your commit messages are in another encoding, specify that here.
Example
This configuration uses the P4PORT, P4USER, and P4PASSWD specified in the buildmaster's environment. It watches a project in which the branch name is simply the next path component, and the file is all path components after.
from buildbot.changes import p4poller
s = p4poller.P4Source(p4base='//depot/project/',
                      split_file=lambda branchfile: branchfile.split('/',1),
                     )
c['change_source'] = s
BonsaiPoller
The BonsaiPoller periodically polls a Bonsai server. This is a CGI script accessed through a web server that provides information about a CVS tree, for example the Mozilla bonsai server at http://bonsai.mozilla.org. Bonsai servers are usable by both humans and machines. In this case, the buildbot's change source forms a query which asks about any files in the specified branch which have changed since the last query.
BonsaiPoller accepts the following arguments:
- bonsaiURL
- The base URL of the Bonsai server, e.g., http://bonsai.mozilla.org
- module
- The module to look for changes in. Commonly this is all.
- branch
- The branch to look for changes in. This will appear in the branch field of the resulting change objects.
- tree
- The tree to look for changes in. Commonly this is all.
- cvsroot
- The CVS root of the repository. Usually this is /cvsroot.
- pollInterval
- The time (in seconds) between queries for changes.
- project
- The project name to attach to all change objects produced by this change source.
SVNPoller
- class buildbot.changes.svnpoller.SVNPoller
The SVNPoller is a ChangeSource which periodically polls a Subversion repository for new revisions, by running the svn log command in a subshell. It can watch a single branch or multiple branches.
SVNPoller accepts the following arguments:
- svnurl
The base URL path to watch, like svn://svn.twistedmatrix.com/svn/Twisted/trunk, or http://divmod.org/svn/Divmo/, or even file:///home/svn/Repository/ProjectA/branches/1.5/. This must include the access scheme, the location of the repository (both the hostname for remote ones, and any additional directory names necessary to get to the repository), and the sub-path within the repository's virtual filesystem for the project and branch of interest.
The SVNPoller will only pay attention to files inside the subdirectory specified by the complete svnurl.
- split_file
A function to convert pathnames into (branch, relative_pathname) tuples. Use this to explain your repository's branch-naming policy to SVNPoller. This function must accept a single string (the pathname relative to the repository) and return a two-entry tuple. Directory pathnames always end with a right slash to distinguish them from files, like trunk/src/, or src/. There are a few utility functions in buildbot.changes.svnpoller that can be used as a split_file function; see below for details.
For directories, the relative pathname returned by split_file should end with a right slash but an empty string is also accepted for the root, like ("branches/1.5.x", "") being converted from "branches/1.5.x/".
The default value always returns (None, path), which indicates that all files are on the trunk.
Subclasses of SVNPoller can override the split_file method instead of using the split_file= argument.
- project
- Set the name of the project to be used for the SVNPoller. This will then be set in any changes generated by the SVNPoller, and can be used in a Change Filter for triggering particular builders.
- svnuser
- An optional string parameter. If set, the --user argument will be added to all svn commands. Use this if you have to authenticate to the svn server before you can do svn info or svn log commands.
- svnpasswd
- Like svnuser, this will cause a --password argument to be passed to all svn commands.
- pollInterval
- How often to poll, in seconds. Defaults to 600 (checking once every 10 minutes). Lower this if you want the buildbot to notice changes faster, raise it if you want to reduce the network and CPU load on your svn server. Please be considerate of public SVN repositories by using a large interval when polling them.
- histmax
- The maximum number of changes to inspect at a time. Every pollInterval seconds, the SVNPoller asks for the last histmax changes and looks through them for any revisions it does not already know about. If more than histmax revisions have been committed since the last poll, older changes will be silently ignored. Larger values of histmax will cause more time and memory to be consumed on each poll attempt. histmax defaults to 100.
- svnbin
- This controls the svn executable to use. If subversion is installed in a weird place on your system (outside of the buildmaster's PATH), use this to tell SVNPoller where to find it. The default value of svn will almost always be sufficient.
- revlinktmpl
- This parameter is deprecated in favour of specifying a global revlink option. This parameter allows a link to be provided for each revision (for example, to websvn or viewvc). These links appear anywhere changes are shown, such as on build or change pages. The proper form for this parameter is an URL with the portion that will substitute for a revision number replaced by ''%s''. For example, 'http://myserver/websvn/revision.php?rev=%s' could be used to cause revision links to be created to a websvn repository viewer.
- cachepath
- If specified, this is a pathname of a cache file that SVNPoller will use to store its state between restarts of the master.
- extra_args
- If specified, the extra arguments will be added to the svn command args.
Several split file functions are available for common SVN repository layouts. For a poller that is only monitoring trunk, the default split file function is available explicitly as split_file_alwaystrunk:
from buildbot.changes.svnpoller import SVNPoller
from buildbot.changes.svnpoller import split_file_alwaystrunk
c['change_source'] = SVNPoller(
    svnurl="svn://svn.twistedmatrix.com/svn/Twisted/trunk",
    split_file=split_file_alwaystrunk)
For repositories with the /trunk and /branches/{BRANCH} layout, split_file_branches will do the job:
from buildbot.changes.svnpoller import SVNPoller
from buildbot.changes.svnpoller import split_file_branches
c['change_source'] = SVNPoller(
    svnurl="https://amanda.svn.sourceforge.net/svnroot/amanda/amanda",
    split_file=split_file_branches)
When using this splitter the poller will set the project attribute of any changes to the project attribute of the poller.
For repositories with the {PROJECT}/trunk and {PROJECT}/branches/{BRANCH} layout, split_file_projects_branches will do the job:
from buildbot.changes.svnpoller import SVNPoller
from buildbot.changes.svnpoller import split_file_projects_branches
c['change_source'] = SVNPoller(
    svnurl="https://amanda.svn.sourceforge.net/svnroot/amanda/",
    split_file=split_file_projects_branches)
When using this splitter the poller will set the project attribute of any changes to the project determined by the splitter.
The SVNPoller is highly adaptable to various Subversion layouts. See Customizing SVNPoller for details and some common scenarios.
Bzr Poller
If you cannot insert a Bzr hook in the server, you can use the Bzr Poller. To use, put contrib/bzr_buildbot.py somewhere that your buildbot configuration can import it. Even putting it in the same directory as the master.cfg should work. Install the poller in the buildbot configuration as with any other change source. Minimally, provide a URL that you want to poll (bzr://, bzr+ssh://, or lp:), making sure the buildbot user has necessary privileges.
# bzr_buildbot.py in the same directory as master.cfg
from bzr_buildbot import BzrPoller
c['change_source'] = BzrPoller(
    url='bzr://hostname/my_project',
    poll_interval=300)
The BzrPoller parameters are:
- url
- The URL to poll.
- poll_interval
- The number of seconds to wait between polls. Defaults to 10 minutes.
- branch_name
- Any value to be used as the branch name. Defaults to None, or specify a string, or specify the constants from bzr_buildbot.py SHORT or FULL to get the short branch name or full branch address.
- blame_merge_author
- normally, the user that commits the revision is the user that is responsible for the change. When run in a pqm (Patch Queue Manager, see https://launchpad.net/pqm) environment, the user that commits is the Patch Queue Manager, and the user that committed the merged, parent revision is responsible for the change. set this value to True if this is pointed against a PQM-managed branch.
GitPoller
If you cannot take advantage of post-receive hooks as provided by contrib/git_buildbot.py for example, then you can use the GitPoller.
The GitPoller periodically fetches from a remote Git repository and processes any changes. It requires its own working directory for operation. The default should be adequate, but it can be overridden via the workdir property.
Note
There can only be a single GitPoller pointed at any given repository.
The GitPoller requires Git-1.7 and later. It accepts the following arguments:
- repourl
- the git-url that describes the remote repository, e.g. git@example.com:foobaz/myrepo.git (see the git fetch help for more info on git-url formats)
- branches
- a list of the branches to fetch, will default to ['master']
- branch
- accepts a single branch name to fetch. Exists for backwards compatibility with old configurations.
- pollInterval
- interval in seconds between polls, default is 10 minutes
- gitbin
- path to the Git binary, defaults to just 'git'
- category
- Set the category to be used for the changes produced by the GitPoller. This will then be set in any changes generated by the GitPoller, and can be used in a Change Filter for triggering particular builders.
- project
- Set the name of the project to be used for the GitPoller. This will then be set in any changes generated by the GitPoller, and can be used in a Change Filter for triggering particular builders.
- usetimestamps
- parse each revision's commit timestamp (default is True), or ignore it in favor of the current time (so recently processed commits appear together in the waterfall page)
- encoding
- Set encoding will be used to parse author's name and commit message. Default encoding is 'utf-8'. This will not be applied to file names since Git will translate non-ascii file names to unreadable escape sequences.
- workdir
- the directory where the poller should keep its local repository. The default is gitpoller_work. If this is a relative path, it will be interpreted relative to the master's basedir. Multiple Git pollers can share the same directory.
A configuration for the Git poller might look like this:
from buildbot.changes.gitpoller import GitPoller
c['change_source'] = GitPoller(repourl='git@example.com:foobaz/myrepo.git',
                               branches=['master', 'great_new_feature'])
HgPoller
If you cannot take advantage of post-receive hooks as provided by buildbot/changes/hgbuildbot.py for example, then you can use the HgPoller.
The HgPoller periodically pulls a named branch from a remote Mercurial repository and processes any changes. It requires its own working directory for operation, which must be specified via the workdir property.
The HgPoller requires a working hg executable, and at least a read-only access to the repository it polls (possibly through ssh keys or by tweaking the hgrc of the system user buildbot runs as).
The HgPoller will not transmit any change if there are several heads on the watched named branch. This is similar (although not identical) to the Mercurial executable behaviour. This exceptional condition is usually the result of a developer mistake, and usually does not last for long. It is reported in logs. If fixed by a later merge, the buildmaster administrator does not have anything to do: that merge will be transmitted, together with the intermediate ones.
The HgPoller accepts the following arguments:
- repourl
- the url that describes the remote repository, e.g. http://hg.example.com/projects/myrepo. Any url suitable for hg pull can be specified.
- branch
- the desired branch to pull, will default to 'default'
- workdir
the directory where the poller should keep its local repository. It is mandatory for now, although later releases may provide a meaningful default.
It also serves to identify the poller in the buildmaster internal database. Changing it may result in re-processing all changes so far.
Several HgPoller instances may share the same workdir for mutualisation of the common history between two different branches, thus easing on local and remote system resources and bandwidth.
If relative, the workdir will be interpreted from the master directory.
- pollInterval
- interval in seconds between polls, default is 10 minutes
- hgbin
- path to the Mercurial binary, defaults to just 'hg'
- category
- Set the category to be used for the changes produced by the HgPoller. This will then be set in any changes generated by the HgPoller, and can be used in a Change Filter for triggering particular builders.
- project
- Set the name of the project to be used for the HgPoller. This will then be set in any changes generated by the HgPoller, and can be used in a Change Filter for triggering particular builders.
- usetimestamps
- parse each revision's commit timestamp (default is True), or ignore it in favor of the current time (so recently processed commits appear together in the waterfall page)
- encoding
- Set encoding will be used to parse author's name and commit message. Default encoding is 'utf-8'.
A configuration for the Mercurial poller might look like this:
from buildbot.changes.hgpoller import HgPoller
c['change_source'] = HgPoller(repourl='http://hg.example.org/projects/myrepo',
                               branch='great_new_feature',
                               workdir='hg-myrepo')
GerritChangeSource
- class buildbot.changes.gerritchangesource.GerritChangeSource
The GerritChangeSource class connects to a Gerrit server by its SSH interface and uses its event source mechanism, gerrit stream-events.
This class adds a change to the buildbot system for each of the following events:
- patchset-created
- A change is proposed for review. Automatic checks like checkpatch.pl can be automatically triggered. Beware of what kind of automatic task you trigger. At this point, no trusted human has reviewed the code, and a patch could be specially crafted by an attacker to compromise your buildslaves.
- ref-updated
- A change has been merged into the repository. Typically, this kind of event can lead to a complete rebuild of the project, and upload binaries to an incremental build results server.
This class will populate the property list of the triggered build with the info received from Gerrit server in JSON format.
In case of patchset-created event, these properties will be:
- event.change.branch
- Branch of the Change
- event.change.id
- Change's ID in the Gerrit system (the ChangeId: in commit comments)
- event.change.number
- Change's number in Gerrit system
- event.change.owner.email
- Change's owner email (owner is first uploader)
- event.change.owner.name
- Change's owner name
- event.change.project
- Project of the Change
- event.change.subject
- Change's subject
- event.change.url
- URL of the Change in the Gerrit's web interface
- event.patchSet.number
- Patchset's version number
- event.patchSet.ref
- Patchset's Gerrit "virtual branch"
- event.patchSet.revision
- Patchset's Git commit ID
- event.patchSet.uploader.email
- Patchset uploader's email (owner is first uploader)
- event.patchSet.uploader.name
- Patchset uploader's name (owner is first uploader)
- event.type
- Event type (patchset-created)
- event.uploader.email
- Patchset uploader's email
- event.uploader.name
- Patchset uploader's name
In case of ref-updated event, these properties will be:
- event.refUpdate.newRev
- New Git commit ID (after merger)
- event.refUpdate.oldRev
- Previous Git commit ID (before merger)
- event.refUpdate.project
- Project that was updated
- event.refUpdate.refName
- Branch that was updated
- event.submitter.email
- Submitter's email (merger responsible)
- event.submitter.name
- Submitter's name (merger responsible)
- event.type
- Event type (ref-updated)
- event.submitter.email
- Submitter's email (merger responsible)
- event.submitter.name
- Submitter's name (merger responsible)
A configuration for this source might look like:
from buildbot.changes.gerritchangesource import GerritChangeSource
c['change_source'] = GerritChangeSource(gerrit_server, gerrit_user)
see master/docs/examples/repo_gerrit.cfg in the Buildbot distribution for a full example setup of GerritChangeSource.
Change Hooks (HTTP Notifications)
Buildbot already provides a web frontend, and that frontend can easily be used to receive HTTP push notifications of commits from services like GitHub or GoogleCode. See Change Hooks for more information.
GoogleCodeAtomPoller
The GoogleCodeAtomPoller periodically polls a Google Code Project's commit feed for changes. Works on SVN, Git, and Mercurial repositories. Branches are not understood (yet). It accepts the following arguments:
- feedurl
- The commit Atom feed URL of the GoogleCode repository (MANDATORY)
- pollinterval
- Polling frequency for the feed (in seconds). Default is 1 hour (OPTIONAL)
As an example, to poll the Ostinato project's commit feed every 3 hours, the configuration would look like this:
from googlecode_atom import GoogleCodeAtomPoller
c['change_source'] = GoogleCodeAtomPoller(
    feedurl="http://code.google.com/feeds/p/ostinato/hgchanges/basic",
    pollinterval=10800)
(note that you will need to download googlecode_atom.py from the Buildbot source and install it somewhere on your PYTHONPATH first)
Schedulers
Schedulers are responsible for initiating builds on builders.
Some schedulers listen for changes from ChangeSources and generate build sets in response to these changes. Others generate build sets without changes, based on other events in the buildmaster.
Configuring Schedulers
The schedulers configuration parameter gives a list of Scheduler instances, each of which causes builds to be started on a particular set of Builders. The two basic Scheduler classes you are likely to start with are SingleBranchScheduler and Periodic, but you can write a customized subclass to implement more complicated build scheduling.
Scheduler arguments should always be specified by name (as keyword arguments), to allow for future expansion:
sched = SingleBranchScheduler(name="quick", builderNames=['lin', 'win'])
There are several common arguments for schedulers, although not all are available with all schedulers.
- name
- Each Scheduler must have a unique name. This is used in status displays, and is also available in the build property scheduler.
- builderNames
- This is the set of builders which this scheduler should trigger, specified as a list of names (strings).
- properties
This is a dictionary specifying properties that will be transmitted to all builds started by this scheduler. The owner property may be of particular interest, as its contents (as a list) will be added to the list of "interested users" (Doing Things With Users) for each triggered build. For example
sched = Scheduler(...,
    properties = { 'owner' : [ 'zorro@company.com', 'silver@company.com' ] })
- fileIsImportant
- A callable which takes one argument, a Change instance, and returns True if the change is worth building, and False if it is not. Unimportant Changes are accumulated until the build is triggered by an important change. The default value of None means that all Changes are important.
- change_filter
- The change filter that will determine which changes are recognized by this scheduler; Change Filters. Note that this is different from fileIsImportant: if the change filter filters out a Change, then it is completely ignored by the scheduler. If a Change is allowed by the change filter, but is deemed unimportant, then it will not cause builds to start, but will be remembered and shown in status displays.
- codebases
When the scheduler processes data from more than 1 repository at the same time then a corresponding codebase definition should be passed for each repository. A codebase definition is a dictionary with one or more of the following keys: repository, branch, revision. The codebase definitions have also to be passed as dictionary.
codebases = {'codebase1': {'repository':'....',
                           'branch':'default',
                           'revision': None},
             'codebase2': {'repository':'....'} }
Important
codebases behaves also like a change_filter on codebase. The scheduler will only process changes when their codebases are found in codebases. By default codebases is set to {'':{}} which means that only changes with codebase '' (default value for codebase) will be accepted by the scheduler.
Buildsteps can have a reference to one of the codebases. The step will only get information (revision, branch etc.) that is related to that codebase. When a scheduler is triggered by new changes, these changes (having a codebase) will be incorporated by the new build. The buildsteps referencing to the codebases that have changes get information about those changes. The buildstep that references to a codebase that does not have changes in the build get the information from the codebases definition as configured in the scheduler.
- onlyImportant
- A boolean that, when True, only adds important changes to the buildset as specified in the fileIsImportant callable. This means that unimportant changes are ignored the same way a change_filter filters changes. This defaults to False and only applies when fileIsImportant is given.
The remaining subsections represent a catalog of the available Scheduler types. All these Schedulers are defined in modules under buildbot.schedulers, and the docstrings there are the best source of documentation on the arguments taken by each one.
Change Filters
Several schedulers perform filtering on an incoming set of changes. The filter can most generically be specified as a ChangeFilter. Set up a ChangeFilter like this:
from buildbot.changes.filter import ChangeFilter
my_filter = ChangeFilter(
    project_re="^baseproduct/.*",
    branch="devel")
and then add it to a scheduler with the change_filter parameter:
sch = SomeSchedulerClass(...,
    change_filter=my_filter)
There are five attributes of changes on which you can filter:
- project
- the project string, as defined by the ChangeSource.
- repository
- the repository in which this change occurred.
- branch
- the branch on which this change occurred. Note that 'trunk' or 'master' is often denoted by None.
- category
- the category, again as defined by the ChangeSource.
- codebase
- the change's codebase.
For each attribute, the filter can look for a single, specific value:
my_filter = ChangeFilter(project = 'myproject')
or accept any of a set of values:
my_filter = ChangeFilter(project = ['myproject', 'jimsproject'])
or apply a regular expression, using the attribute name with a "_re" suffix:
my_filter = ChangeFilter(category_re = '.*deve.*')
# or, to use regular expression flags:
import re
my_filter = ChangeFilter(category_re = re.compile('.*deve.*', re.I))
For anything more complicated, define a Python function to recognize the strings you want:
def my_branch_fn(branch):
    return branch in branches_to_build and branch not in branches_to_ignore
my_filter = ChangeFilter(branch_fn = my_branch_fn)
The special argument filter_fn can be used to specify a function that is given the entire Change object, and returns a boolean.
The entire set of allowed arguments, then, is
| project | project_re | project_fn |
| repository | repository_re | repository_fn |
| branch | branch_re | branch_fn |
| category | category_re | category_fn |
| codebase | codebase_re | codebase_fn |
| filter_fn | ||
A Change passes the filter only if all arguments are satisfied. If no filter object is given to a scheduler, then all changes will be built (subject to any other restrictions the scheduler enforces).
SingleBranchScheduler
This is the original and still most popular scheduler class. It follows exactly one branch, and starts a configurable tree-stable-timer after each change on that branch. When the timer expires, it starts a build on some set of Builders. The Scheduler accepts a fileIsImportant function which can be used to ignore some Changes if they do not affect any important files.
If treeStableTimer is not set, then this scheduler starts a build for every Change that matches its change_filter and statsfies fileIsImportant. If treeStableTimer is set, then a build is triggered for each set of Changes which arrive within the configured time, and match the filters.
Note
The behavior of this scheduler is undefined, if treeStableTimer is set, and changes from multiple branches, repositories or codebases are accepted by the filter.
Note
The codebases argument will filter out codebases not specified there, but won't filter based on the branches specified there.
The arguments to this scheduler are:
name
builderNames
properties
fileIsImportant
change_filter
- onlyImportant
- See Configuring Schedulers.
- treeStableTimer
The scheduler will wait for this many seconds before starting the build. If new changes are made during this interval, the timer will be restarted, so really the build will be started after a change and then after this many seconds of inactivity.
If treeStableTimer is None, then a separate build is started immediately for each Change.
- fileIsImportant
- A callable which takes one argument, a Change instance, and returns True if the change is worth building, and False if it is not. Unimportant Changes are accumulated until the build is triggered by an important change. The default value of None means that all Changes are important.
- categories (deprecated; use change_filter)
- A list of categories of changes that this scheduler will respond to. If this is specified, then any non-matching changes are ignored.
- branch (deprecated; use change_filter)
The scheduler will pay attention to this branch, ignoring Changes that occur on other branches. Setting branch equal to the special value of None means it should only pay attention to the default branch.
Note
None is a keyword, not a string, so write None and not "None".
Example:
from buildbot.schedulers.basic  import SingleBranchScheduler
from buildbot.changes import filter
quick = SingleBranchScheduler(name="quick",
                    change_filter=filter.ChangeFilter(branch='master'),
                    treeStableTimer=60,
                    builderNames=["quick-linux", "quick-netbsd"])
full = SingleBranchScheduler(name="full",
                    change_filter=filter.ChangeFilter(branch='master'),
                    treeStableTimer=5*60,
                    builderNames=["full-linux", "full-netbsd", "full-OSX"])
c['schedulers'] = [quick, full]
In this example, the two quick builders are triggered 60 seconds after the tree has been changed. The full builds do not run quite so quickly (they wait 5 minutes), so hopefully if the quick builds fail due to a missing file or really simple typo, the developer can discover and fix the problem before the full builds are started. Both Schedulers only pay attention to the default branch: any changes on other branches are ignored by these schedulers. Each scheduler triggers a different set of Builders, referenced by name.
The old names for this scheduler, buildbot.scheduler.Scheduler and buildbot.schedulers.basic.Scheduler, are deprecated in favor of the more accurate name buildbot.schedulers.basic.SingleBranchScheduler.
AnyBranchScheduler
This scheduler uses a tree-stable-timer like the default one, but uses a separate timer for each branch.
If treeStableTimer is not set, then this scheduler is indistinguishable from bb:sched:SingleBranchScheduler. If treeStableTimer is set, then a build is triggered for each set of Changes which arrive within the configured time, and match the filters.
The arguments to this scheduler are:
name
builderNames
properties
fileIsImportant
change_filter
- onlyImportant
- See Configuring Schedulers.
- treeStableTimer
- The scheduler will wait for this many seconds before starting the build. If new changes are made on the same branch during this interval, the timer will be restarted.
- branches (deprecated; use change_filter)
- Changes on branches not specified on this list will be ignored.
- categories (deprecated; use change_filter)
- A list of categories of changes that this scheduler will respond to. If this is specified, then any non-matching changes are ignored.
Dependent Scheduler
It is common to wind up with one kind of build which should only be performed if the same source code was successfully handled by some other kind of build first. An example might be a packaging step: you might only want to produce .deb or RPM packages from a tree that was known to compile successfully and pass all unit tests. You could put the packaging step in the same Build as the compile and testing steps, but there might be other reasons to not do this (in particular you might have several Builders worth of compiles/tests, but only wish to do the packaging once). Another example is if you want to skip the full builds after a failing quick build of the same source code. Or, if one Build creates a product (like a compiled library) that is used by some other Builder, you'd want to make sure the consuming Build is run after the producing one.
You can use Dependencies to express this relationship to the Buildbot. There is a special kind of scheduler named scheduler.Dependent that will watch an upstream scheduler for builds to complete successfully (on all of its Builders). Each time that happens, the same source code (i.e. the same SourceStamp) will be used to start a new set of builds, on a different set of Builders. This downstream scheduler doesn't pay attention to Changes at all. It only pays attention to the upstream scheduler.
If the build fails on any of the Builders in the upstream set, the downstream builds will not fire. Note that, for SourceStamps generated by a ChangeSource, the revision is None, meaning HEAD. If any changes are committed between the time the upstream scheduler begins its build and the time the dependent scheduler begins its build, then those changes will be included in the downstream build. See the Triggerable Scheduler for a more flexible dependency mechanism that can avoid this problem.
The keyword arguments to this scheduler are:
name
builderNames
- properties
- See Configuring Schedulers.
- upstream
- The upstream scheduler to watch. Note that this is an instance, not the name of the scheduler.
Example:
from buildbot.schedulers import basic
tests = basic.SingleBranchScheduler(name="just-tests",
                        treeStableTimer=5*60,
                        builderNames=["full-linux", "full-netbsd", "full-OSX"])
package = basic.Dependent(name="build-package",
                        upstream=tests, # <- no quotes!
                        builderNames=["make-tarball", "make-deb", "make-rpm"])
c['schedulers'] = [tests, package]
Periodic Scheduler
This simple scheduler just triggers a build every N seconds.
The arguments to this scheduler are:
name
builderNames
properties
onlyImportant
- periodicBuildTimer
- The time, in seconds, after which to start a build.
Example:
from buildbot.schedulers import timed
nightly = timed.Periodic(name="daily",
                builderNames=["full-solaris"],
                periodicBuildTimer=24*60*60)
c['schedulers'] = [nightly]
The scheduler in this example just runs the full solaris build once per day. Note that this scheduler only lets you control the time between builds, not the absolute time-of-day of each Build, so this could easily wind up an evening or every afternoon scheduler depending upon when it was first activated.
Nightly Scheduler
This is highly configurable periodic build scheduler, which triggers a build at particular times of day, week, month, or year. The configuration syntax is very similar to the well-known crontab format, in which you provide values for minute, hour, day, and month (some of which can be wildcards), and a build is triggered whenever the current time matches the given constraints. This can run a build every night, every morning, every weekend, alternate Thursdays, on your boss's birthday, etc.
Pass some subset of minute, hour, dayOfMonth, month, and dayOfWeek; each may be a single number or a list of valid values. The builds will be triggered whenever the current time matches these values. Wildcards are represented by a '*' string. All fields default to a wildcard except 'minute', so with no fields this defaults to a build every hour, on the hour. The full list of parameters is:
name
builderNames
properties
fileIsImportant
change_filter
onlyImportant
- codebases
- See Configuring Schedulers. Note that fileIsImportant and change_filter are only relevant if onlyIfChanged is True.
- onlyIfChanged
- If this is true, then builds will not be scheduled at the designated time unless the specified branch has seen an important change since the previous build.
- branch
- (required) The branch to build when the time comes. Remember that a value of None here means the default branch, and will not match other branches!
- minute
- The minute of the hour on which to start the build. This defaults to 0, meaning an hourly build.
- hour
- The hour of the day on which to start the build, in 24-hour notation. This defaults to *, meaning every hour.
- dayOfMonth
- The day of the month to start a build. This defaults to *, meaning every day.
- month
- The month in which to start the build, with January = 1. This defaults to *, meaning every month.
- dayOfWeek
- The day of the week to start a build, with Monday = 0. This defaults to *, meaning every day of the week.
For example, the following master.cfg clause will cause a build to be started every night at 3:00am:
from buildbot.schedulers import timed
c['schedulers'].append(
    timed.Nightly(name='nightly',
        branch='master',
        builderNames=['builder1', 'builder2'],
        hour=3,
        minute=0))
This scheduler will perform a build each Monday morning at 6:23am and again at 8:23am, but only if someone has committed code in the interim:
c['schedulers'].append(
    timed.Nightly(name='BeforeWork',
         branch=`default`,
         builderNames=['builder1'],
         dayOfWeek=0,
         hour=[6,8],
         minute=23,
         onlyIfChanged=True))
The following runs a build every two hours, using Python's range function:
c.schedulers.append(
    timed.Nightly(name='every2hours',
        branch=None, # default branch
        builderNames=['builder1'],
        hour=range(0, 24, 2)))
Finally, this example will run only on December 24th:
c['schedulers'].append(
    timed.Nightly(name='SleighPreflightCheck',
        branch=None, # default branch
        builderNames=['flying_circuits', 'radar'],
        month=12,
        dayOfMonth=24,
        hour=12,
        minute=0))
Try Schedulers
This scheduler allows developers to use the buildbot try command to trigger builds of code they have not yet committed. See try for complete details.
Two implementations are available: Try_Jobdir and Try_Userpass. The former monitors a job directory, specified by the jobdir parameter, while the latter listens for PB connections on a specific port, and authenticates against userport.
The buildmaster must have a scheduler instance in the config file's schedulers list to receive try requests. This lets the administrator control who may initiate these trial builds, which branches are eligible for trial builds, and which Builders should be used for them.
The scheduler has various means to accept build requests. All of them enforce more security than the usual buildmaster ports do. Any source code being built can be used to compromise the buildslave accounts, but in general that code must be checked out from the VC repository first, so only people with commit privileges can get control of the buildslaves. The usual force-build control channels can waste buildslave time but do not allow arbitrary commands to be executed by people who don't have those commit privileges. However, the source code patch that is provided with the trial build does not have to go through the VC system first, so it is important to make sure these builds cannot be abused by a non-committer to acquire as much control over the buildslaves as a committer has. Ideally, only developers who have commit access to the VC repository would be able to start trial builds, but unfortunately the buildmaster does not, in general, have access to VC system's user list.
As a result, the try scheduler requires a bit more configuration. There are currently two ways to set this up:
- jobdir (ssh)
This approach creates a command queue directory, called the jobdir, in the buildmaster's working directory. The buildmaster admin sets the ownership and permissions of this directory to only grant write access to the desired set of developers, all of whom must have accounts on the machine. The buildbot try command creates a special file containing the source stamp information and drops it in the jobdir, just like a standard maildir. When the buildmaster notices the new file, it unpacks the information inside and starts the builds.
The config file entries used by 'buildbot try' either specify a local queuedir (for which write and mv are used) or a remote one (using scp and ssh).
The advantage of this scheme is that it is quite secure, the disadvantage is that it requires fiddling outside the buildmaster config (to set the permissions on the jobdir correctly). If the buildmaster machine happens to also house the VC repository, then it can be fairly easy to keep the VC userlist in sync with the trial-build userlist. If they are on different machines, this will be much more of a hassle. It may also involve granting developer accounts on a machine that would not otherwise require them.
To implement this, the buildslave invokes ssh -l username host buildbot tryserver ARGS, passing the patch contents over stdin. The arguments must include the inlet directory and the revision information.
- user+password (PB)
In this approach, each developer gets a username/password pair, which are all listed in the buildmaster's configuration file. When the developer runs buildbot try, their machine connects to the buildmaster via PB and authenticates themselves using that username and password, then sends a PB command to start the trial build.
The advantage of this scheme is that the entire configuration is performed inside the buildmaster's config file. The disadvantages are that it is less secure (while the cred authentication system does not expose the password in plaintext over the wire, it does not offer most of the other security properties that SSH does). In addition, the buildmaster admin is responsible for maintaining the username/password list, adding and deleting entries as developers come and go.
For example, to set up the jobdir style of trial build, using a command queue directory of MASTERDIR/jobdir (and assuming that all your project developers were members of the developers unix group), you would first set up that directory:
mkdir -p MASTERDIR/jobdir MASTERDIR/jobdir/new MASTERDIR/jobdir/cur MASTERDIR/jobdir/tmp
chgrp developers MASTERDIR/jobdir MASTERDIR/jobdir/*
chmod g+rwx,o-rwx MASTERDIR/jobdir MASTERDIR/jobdir/*
and then use the following scheduler in the buildmaster's config file:
from buildbot.schedulers.trysched import Try_Jobdir
s = Try_Jobdir(name="try1",
               builderNames=["full-linux", "full-netbsd", "full-OSX"],
               jobdir="jobdir")
c['schedulers'] = [s]
Note that you must create the jobdir before telling the buildmaster to use this configuration, otherwise you will get an error. Also remember that the buildmaster must be able to read and write to the jobdir as well. Be sure to watch the twistd.log file (Logfiles) as you start using the jobdir, to make sure the buildmaster is happy with it.
Note
Patches in the jobdir are encoded using netstrings, which place an arbitrary upper limit on patch size of 99999 bytes. If your submitted try jobs are rejected with BadJobfile, try increasing this limit with a snippet like this in your master.cfg:
from twisted.protocols.basic import NetstringReceiver
NetstringReceiver.MAX_LENGTH = 1000000
To use the username/password form of authentication, create a Try_Userpass instance instead. It takes the same builderNames argument as the Try_Jobdir form, but accepts an additional port argument (to specify the TCP port to listen on) and a userpass list of username/password pairs to accept. Remember to use good passwords for this: the security of the buildslave accounts depends upon it:
from buildbot.schedulers.trysched import Try_Userpass
s = Try_Userpass(name="try2",
                 builderNames=["full-linux", "full-netbsd", "full-OSX"],
                 port=8031,
                 userpass=[("alice","pw1"), ("bob", "pw2")] )
c['schedulers'] = [s]
Like most places in the buildbot, the port argument takes a strports specification. See twisted.application.strports for details.
Triggerable Scheduler
The Triggerable scheduler waits to be triggered by a Trigger step (see Triggering Schedulers) in another build. That step can optionally wait for the scheduler's builds to complete. This provides two advantages over Dependent schedulers. First, the same scheduler can be triggered from multiple builds. Second, the ability to wait for a Triggerable's builds to complete provides a form of "subroutine call", where one or more builds can "call" a scheduler to perform some work for them, perhaps on other buildslaves. The Triggerable-Scheduler supports multiple codebases. The scheduler filters out all codebases from Trigger steps that are not configured in the scheduler.
The parameters are just the basics:
name
builderNames
properties
- codebases
- See Configuring Schedulers.
This class is only useful in conjunction with the Trigger step. Here is a fully-worked example:
from buildbot.schedulers import basic, timed, triggerable
from buildbot.process import factory
from buildbot.steps import trigger

checkin = basic.SingleBranchScheduler(name="checkin",
            branch=None,
            treeStableTimer=5*60,
            builderNames=["checkin"])
nightly = timed.Nightly(name='nightly',
            branch=None,
            builderNames=['nightly'],
            hour=3,
            minute=0)

mktarball = triggerable.Triggerable(name="mktarball",
                builderNames=["mktarball"])
build = triggerable.Triggerable(name="build-all-platforms",
                builderNames=["build-all-platforms"])
test = triggerable.Triggerable(name="distributed-test",
                builderNames=["distributed-test"])
package = triggerable.Triggerable(name="package-all-platforms",
                builderNames=["package-all-platforms"])

c['schedulers'] = [mktarball, checkin, nightly, build, test, package]

# on checkin, make a tarball, build it, and test it
checkin_factory = factory.BuildFactory()
checkin_factory.addStep(trigger.Trigger(schedulerNames=['mktarball'],
                                       waitForFinish=True))
checkin_factory.addStep(trigger.Trigger(schedulerNames=['build-all-platforms'],
                                   waitForFinish=True))
checkin_factory.addStep(trigger.Trigger(schedulerNames=['distributed-test'],
                                  waitForFinish=True))

# and every night, make a tarball, build it, and package it
nightly_factory = factory.BuildFactory()
nightly_factory.addStep(trigger.Trigger(schedulerNames=['mktarball'],
                                       waitForFinish=True))
nightly_factory.addStep(trigger.Trigger(schedulerNames=['build-all-platforms'],
                                   waitForFinish=True))
nightly_factory.addStep(trigger.Trigger(schedulerNames=['package-all-platforms'],
                                     waitForFinish=True))
NightlyTriggerable Scheduler
- class buildbot.schedulers.timed.NightlyTriggerable
The NightlyTriggerable scheduler is a mix of the Nightly and Triggerable schedulers. This scheduler triggers builds at a particular time of day, week, or year, exactly as the Nightly scheduler. However, the source stamp set that is used that provided by the last Trigger step that targeted this scheduler.
The parameters are just the basics:
name
builderNames
properties
- codebases
- See Configuring Schedulers.
minute
hour
dayOfMonth
month
- dayOfWeek
- See Nightly.
This class is only useful in conjunction with the Trigger step. Note that waitForFinish is ignored by Trigger steps targeting this scheduler.
Here is a fully-worked example:
from buildbot.schedulers import basic, timed
from buildbot.process import factory
from buildbot.steps import shell, trigger

checkin = basic.SingleBranchScheduler(name="checkin",
            branch=None,
            treeStableTimer=5*60,
            builderNames=["checkin"])
nightly = timed.NightlyTriggerable(name='nightly',
            builderNames=['nightly'],
            hour=3,
            minute=0)

c['schedulers'] = [checkin, nightly]

# on checkin, run tests
checkin_factory = factory.BuildFactory()
checkin_factory.addStep(shell.Test())
checkin_factory.addStep(trigger.Trigger(schedulerNames=['nightly']))

# and every night, package the latest successful build
nightly_factory = factory.BuildFactory()
nightly_factory.addStep(shell.ShellCommand(command=['make', 'package']))
ForceScheduler Scheduler
The ForceScheduler scheduler is the way you can configure a force build form in the web UI.
In the builder/<builder-name> web page, you will see one form for each ForceScheduler scheduler that was configured for this builder.
This allows you to customize exactly how the build form looks, which builders have a force build form (it might not make sense to force build every builder), and who is allowed to force builds on which builders.
The scheduler takes the following parameters:
name
builderNames
reason
A parameter specifying the reason for the build. The default value is a string parameter with value "force build".
username
A parameter specifying the project for the build. The default value is a username parameter,
codebases
A list of strings or CodebaseParameter specifying the codebases that should be presented. The default is a single codebase with no name.
properties
A list of parameters, one for each property. These can be arbitrary parameters, where the parameter's name is taken as the property name, or AnyPropertyParameter, which allows the web user to specify the property name.
An example may be better than long explanation. What you need in your config file is something like:
from buildbot.schedulers.forcesched import *

sch = ForceScheduler(name="force",
             builderNames=["my-builder"],

             # will generate a combo box
             branch=ChoiceStringParameter(name="branch",
                                    choices=["main","devel"], default="main"),

             # will generate a text input
             reason=StringParameter(name="reason",label="reason:<br>",
                                    required=True, size=80),

             # will generate nothing in the form, but revision, repository,
             # and project are needed by buildbot scheduling system so we
             # need to pass a value ("")
             revision=FixedParameter(name="revision", default=""),
             repository=FixedParameter(name="repository", default=""),
             project=FixedParameter(name="project", default=""),

             # in case you dont require authentication this will display
             # input for user to type his name
             username=UserNameParameter(label="your name:<br>", size=80),

             # A completely customized property list.  The name of the
             # property is the name of the parameter
             properties=[

                BooleanParameter(name="force_build_clean",
                            label="force a make clean", default=False),

                StringParameter(name="pull_url",
                    label="optionally give a public Git pull url:<br>",
                    default="", size=80)
             ]
             )
c['schedulers'].append(sch)
Authorization
The force scheduler uses the web status's authorization framework to determine which user has the right to force which build. Here is an example of code on how you can define which user has which right:
user_mapping = {
    re.compile("project1-builder"): ["project1-maintainer", "john"] ,
    re.compile("project2-builder"): ["project2-maintainer", "jack"],
    re.compile(".*"): ["root"]
}
def force_auth(user,  status):
    global user_mapping
    for r,users in user_mapping.items():
        if r.match(status.name):
            if user in users:
                    return True
    return False

# use authz_cfg in your WebStatus setup
authz_cfg=authz.Authz(
    auth=my_auth,
    forceBuild = force_auth,
)
ForceSched Parameters
Most of the arguments to ForceScheduler are "parameters". Several classes of parameters are available, each describing a different kind of input from a force-build form.
All parameter types have a few common arguments:
name (required)
The name of the parameter. For properties, this will correspond to the name of the property that your parameter will set. The name is also used internally as the identifier for in the HTML form.
label (optional; default is same as name)
The label of the parameter. This is what is displayed to the user. HTML is permitted here.
default (optional; default: "")
The default value for the parameter, that is used if there is no user input.
required (optional; default: False)
If this is true, then an error will be shown to user if there is no input in this field
The parameter types are:
FixedParameter(name="branch", default="trunk"),
This parameter type will not be shown on the web form, and always generate a property with its default value.
StringParameter(name="pull_url",
    label="optionally give a public Git pull url:<br>",
    default="", size=80)
This parameter type will show a single-line text-entry box, and allow the user to enter an arbitrary string. It adds the following arguments:
regex (optional)
a string that will be compiled as a regex, and used to validate the input of this parameter
size (optional; default: 10)
The width of the input field (in characters)
StringParameter(name="comments",
    label="comments to be displayed to the user of the built binary",
    default="This is a development build", cols=60, rows=5)
This parameter type is similar to StringParameter, except that it is represented in the HTML form as a textarea, allowing multi-line input. It adds the StringParameter arguments, this type allows:
cols (optional; default: 80)
The number of columns the textarea will have
rows (optional; default: 20)
The number of rows the textarea will have
This class could be subclassed in order to have more customization e.g.
- developer could send a list of Git branches to pull from
- developer could send a list of gerrit changes to cherry-pick,
- developer could send a shell script to amend the build.
beware of security issues anyway.
IntParameter(name="debug_level",
    label="debug level (1-10)", default=2)
This parameter type accepts an integer value using a text-entry box.
BooleanParameter(name="force_build_clean",
    label="force a make clean", default=False)
This type represents a boolean value. It will be presented as a checkbox.
UserNameParameter(label="your name:<br>", size=80)
This parameter type accepts a username. If authentication is active, it will use the authenticated user instead of displaying a text-entry box.
- size (optional; default: 10)
- The width of the input field (in characters)
- need_email (optional; default True)
- If true, require a full email address rather than arbitrary text.
ChoiceStringParameter(name="branch",
    choices=["main","devel"], default="main")
This parameter type lets the user choose between several choices (e.g the list of branches you are supporting, or the test campaign to run). If multiple is false, then its result is a string - one of the choices. If multiple is true, then the result is a list of strings from the choices.
Note that for some use cases, the choices need to be generated dynamically. This can be done via subclassing and overiding the 'getChoices' member function. An example of this is provided by the source for the InheritBuildParameter class.
Its arguments, in addition to the common options, are:
choices
The list of available choices.
strict (optional; default: True)
If true, verify that the user's input is from the list. Note that this only affects the validation of the form request; even if this argument is False, there is no HTML form component available to enter an arbitrary value.
multiple
If true, then the user may select multiple choices.
Example:
ChoiceStringParameter(name="forced_tests",
    label = "smoke test campaign to run",
    default = default_tests,
    multiple = True,
    strict = True,
    choices = [ "test_builder1",
                "test_builder2",
                "test_builder3" ])
])

# .. and later base the schedulers to trigger off this property:

# triggers the tests depending on the property forced_test
builder1.factory.addStep(Trigger(name="Trigger tests",
                                schedulerNames=Property("forced_tests")))
CodebaseParameter(codebase="myrepo")
This is a parameter group to specify a sourcestamp for a given codebase.
codebase
The name of the codebase.
branch (optional; default: StringParameter)
A parameter specifying the branch to build. The default value is a string parameter.
revision (optional; default: StringParameter)
A parameter specifying the revision to build. The default value is a string parameter.
repository (optional; default: StringParameter)
A parameter specifying the repository for the build. The default value is a string parameter.
project (optional; default: StringParameter)
A parameter specifying the project for the build. The default value is a string parameter.
This is a special parameter for inheriting force build properties from another build. The user is presented with a list of compatible builds from which to choose, and all forced-build parameters from the selected build are copied into the new build. The new parameter is:
compatible_builds
A function to find compatible builds in the build history. This function is given the master Status instance as first argument, and the current builder name as second argument, or None when forcing all builds.
Example:
def get_compatible_builds(status, builder):
    if builder == None: # this is the case for force_build_all
        return ["cannot generate build list here"]
    # find all successful builds in builder1 and builder2
    builds = []
    for builder in ["builder1","builder2"]:
        builder_status = status.getBuilder(builder)
        for num in xrange(1,40): # 40 last builds
            b = builder_status.getBuild(-num)
            if not b:
                continue
            if b.getResults() == FAILURE:
                continue
            builds.append(builder+"/"+str(b.getNumber()))
    return builds

    # ...

        properties=[
            InheritBuildParameter(
                name="inherit",
                label="promote a build for merge",
                compatible_builds=get_compatible_builds,
                required = True),
                ])
This parameter allows a scheduler to require that a build is assigned to the chosen buildslave. The choice is assigned to the slavename property for the build. The enforceChosenSlave functor must be assigned to the canStartBuild parameter for the Builder.
Example:
from buildbot.process.builder import enforceChosenSlave

# schedulers:
    ForceScheduler(
      # ...
      properties=[
        BuildslaveChoiceParameter(),
      ]
    )

# builders:
    BuilderConfig(
      # ...
      canStartBuild=enforceChosenSlave,
    )
This parameter type can only be used in properties, and allows the user to specify both the property name and value in the HTML form.
This Parameter is here to reimplement old Buildbot behavior, and should be avoided. Stricter parameter name and type should be preferred.
Buildslaves
The slaves configuration key specifies a list of known buildslaves. In the common case, each buildslave is defined by an instance of the BuildSlave class. It represents a standard, manually started machine that will try to connect to the buildbot master as a slave. Buildbot also supports "on-demand", or latent, buildslaves, which allow buildbot to dynamically start and stop buildslave instances.
A BuildSlave instance is created with a slavename and a slavepassword. These are the same two values that need to be provided to the buildslave administrator when they create the buildslave.
The slavename must be unique, of course. The password exists to prevent evildoers from interfering with the buildbot by inserting their own (broken) buildslaves into the system and thus displacing the real ones.
Buildslaves with an unrecognized slavename or a non-matching password will be rejected when they attempt to connect, and a message describing the problem will be written to the log file (see Logfiles).
A configuration for two slaves would look like:
from buildbot.buildslave import BuildSlave
c['slaves'] = [
    BuildSlave('bot-solaris', 'solarispasswd'),
    BuildSlave('bot-bsd', 'bsdpasswd'),
]
BuildSlave Options
BuildSlave objects can also be created with an optional properties argument, a dictionary specifying properties that will be available to any builds performed on this slave. For example:
c['slaves'] = [
    BuildSlave('bot-solaris', 'solarispasswd',
                properties={ 'os':'solaris' }),
]
The BuildSlave constructor can also take an optional max_builds parameter to limit the number of builds that it will execute simultaneously:
c['slaves'] = [
    BuildSlave("bot-linux", "linuxpassword", max_builds=2)
]
Master-Slave TCP Keepalive
By default, the buildmaster sends a simple, non-blocking message to each slave every hour. These keepalives ensure that traffic is flowing over the underlying TCP connection, allowing the system's network stack to detect any problems before a build is started.
The interval can be modified by specifying the interval in seconds using the keepalive_interval parameter of BuildSlave:
c['slaves'] = [
    BuildSlave('bot-linux', 'linuxpasswd',
                keepalive_interval=3600),
]
The interval can be set to None to disable this functionality altogether.
When Buildslaves Go Missing
Sometimes, the buildslaves go away. One very common reason for this is when the buildslave process is started once (manually) and left running, but then later the machine reboots and the process is not automatically restarted.
If you'd like to have the administrator of the buildslave (or other people) be notified by email when the buildslave has been missing for too long, just add the notify_on_missing= argument to the BuildSlave definition. This value can be a single email address, or a list of addresses:
c['slaves'] = [
    BuildSlave('bot-solaris', 'solarispasswd',
                notify_on_missing="bob@example.com"),
]
By default, this will send email when the buildslave has been disconnected for more than one hour. Only one email per connection-loss event will be sent. To change the timeout, use missing_timeout= and give it a number of seconds (the default is 3600).
You can have the buildmaster send email to multiple recipients: just provide a list of addresses instead of a single one:
c['slaves'] = [
    BuildSlave('bot-solaris', 'solarispasswd',
                notify_on_missing=["bob@example.com",
                                    "alice@example.org"],
                missing_timeout=300, # notify after 5 minutes
    ),
]
The email sent this way will use a MailNotifier (see MailNotifier) status target, if one is configured. This provides a way for you to control the from address of the email, as well as the relayhost (aka smarthost) to use as an SMTP server. If no MailNotifier is configured on this buildmaster, the buildslave-missing emails will be sent using a default configuration.
Note that if you want to have a MailNotifier for buildslave-missing emails but not for regular build emails, just create one with builders=[], as follows:
from buildbot.status import mail
m = mail.MailNotifier(fromaddr="buildbot@localhost", builders=[],
                      relayhost="smtp.example.org")
c['status'].append(m)

from buildbot.buildslave import BuildSlave
c['slaves'] = [
        BuildSlave('bot-solaris', 'solarispasswd',
                    notify_on_missing="bob@example.com"),
]
Latent Buildslaves
The standard buildbot model has slaves started manually. The previous section described how to configure the master for this approach.
Another approach is to let the buildbot master start slaves when builds are ready, on-demand. Thanks to services such as Amazon Web Services' Elastic Compute Cloud ("AWS EC2"), this is relatively easy to set up, and can be very useful for some situations.
The buildslaves that are started on-demand are called "latent" buildslaves. As of this writing, buildbot ships with an abstract base class for building latent buildslaves, and a concrete implementation for AWS EC2 and for libvirt.
Common Options
The following options are available for all latent buildslaves.
- build_wait_timeout
- This option allows you to specify how long a latent slave should wait after a build for another build before it shuts down. It defaults to 10 minutes. If this is set to 0 then the slave will be shut down immediately. If it is less than 0 it will never automatically shutdown.
Amazon Web Services Elastic Compute Cloud ("AWS EC2")
EC2 is a web service that allows you to start virtual machines in an Amazon data center. Please see their website for details, including costs. Using the AWS EC2 latent buildslaves involves getting an EC2 account with AWS and setting up payment; customizing one or more EC2 machine images ("AMIs") on your desired operating system(s) and publishing them (privately if needed); and configuring the buildbot master to know how to start your customized images for "substantiating" your latent slaves.
To start off, to use the AWS EC2 latent buildslave, you need to get an AWS developer account and sign up for EC2. Although Amazon often changes this process, these instructions should help you get started:
- Go to http://aws.amazon.com/ and click to "Sign Up Now" for an AWS account.
- Once you are logged into your account, you need to sign up for EC2. Instructions for how to do this have changed over time because Amazon changes their website, so the best advice is to hunt for it. After signing up for EC2, it may say it wants you to upload an x.509 cert. You will need this to create images (see below) but it is not technically necessary for the buildbot master configuration.
- You must enter a valid credit card before you will be able to use EC2. Do that under 'Payment Method'.
- Make sure you're signed up for EC2 by going to 'Your Account'->'Account Activity' and verifying EC2 is listed.
Now you need to create an AMI and configure the master. You may need to run through this cycle a few times to get it working, but these instructions should get you started.
Creating an AMI is out of the scope of this document. The EC2 Getting Started Guide is a good resource for this task. Here are a few additional hints.
- When an instance of the image starts, it needs to automatically start a buildbot slave that connects to your master (to create a buildbot slave, Creating a buildslave; to make a daemon, Launching the daemons).
- You may want to make an instance of the buildbot slave, configure it as a standard buildslave in the master (i.e., not as a latent slave), and test and debug it that way before you turn it into an AMI and convert to a latent slave in the master.
Now let's assume you have an AMI that should work with the EC2LatentBuildSlave. It's now time to set up your buildbot master configuration.
You will need some information from your AWS account: the Access Key Id and the Secret Access Key. If you've built the AMI yourself, you probably already are familiar with these values. If you have not, and someone has given you access to an AMI, these hints may help you find the necessary values:
- While logged into your AWS account, find the "Access Identifiers" link (either on the left, or via "Your Account" -> "Access Identifiers".
- On the page, you'll see alphanumeric values for "Your Access Key Id:" and "Your Secret Access Key:". Make a note of these. Later on, we'll call the first one your identifier and the second one your secret_identifier.
When creating an EC2LatentBuildSlave in the buildbot master configuration, the first three arguments are required. The name and password are the first two arguments, and work the same as with normal buildslaves. The next argument specifies the type of the EC2 virtual machine (available options as of this writing include m1.small, m1.large, m1.xlarge, c1.medium, and c1.xlarge; see the EC2 documentation for descriptions of these machines).
Here is the simplest example of configuring an EC2 latent buildslave. It specifies all necessary remaining values explicitly in the instantiation.
from buildbot.buildslave.ec2 import EC2LatentBuildSlave
c['slaves'] = [EC2LatentBuildSlave('bot1', 'sekrit', 'm1.large',
                                   ami='ami-12345',
                                   identifier='publickey',
                                   secret_identifier='privatekey'
                                   )]
The ami argument specifies the AMI that the master should start. The identifier argument specifies the AWS Access Key Id, and the secret_identifier specifies the AWS Secret Access Key. Both the AMI and the account information can be specified in alternate ways.
Note
Whoever has your identifier and secret_identifier values can request AWS work charged to your account, so these values need to be carefully protected. Another way to specify these access keys is to put them in a separate file. You can then make the access privileges stricter for this separate file, and potentially let more people read your main configuration file.
By default, you can make an .ec2 directory in the home folder of the user running the buildbot master. In that directory, create a file called aws_id. The first line of that file should be your access key id; the second line should be your secret access key id. Then you can instantiate the build slave as follows.
from buildbot.buildslave.ec2 import EC2LatentBuildSlave
c['slaves'] = [EC2LatentBuildSlave('bot1', 'sekrit', 'm1.large',
                                   ami='ami-12345')]
If you want to put the key information in another file, use the aws_id_file_path initialization argument.
Previous examples used a particular AMI. If the Buildbot master will be deployed in a process-controlled environment, it may be convenient to specify the AMI more flexibly. Rather than specifying an individual AMI, specify one or two AMI filters.
In all cases, the AMI that sorts last by its location (the S3 bucket and manifest name) will be preferred.
One available filter is to specify the acceptable AMI owners, by AWS account number (the 12 digit number, usually rendered in AWS with hyphens like "1234-5678-9012", should be entered as in integer).
from buildbot.buildslave.ec2 import EC2LatentBuildSlave
bot1 = EC2LatentBuildSlave('bot1', 'sekrit', 'm1.large',
                           valid_ami_owners=[11111111111,
                                             22222222222],
                           identifier='publickey',
                           secret_identifier='privatekey'
                           )
The other available filter is to provide a regular expression string that will be matched against each AMI's location (the S3 bucket and manifest name).
from buildbot.buildslave.ec2 import EC2LatentBuildSlave
bot1 = EC2LatentBuildSlave(
    'bot1', 'sekrit', 'm1.large',
    valid_ami_location_regex=r'buildbot\-.*/image.manifest.xml',
    identifier='publickey', secret_identifier='privatekey')
The regular expression can specify a group, which will be preferred for the sorting. Only the first group is used; subsequent groups are ignored.
from buildbot.buildslave.ec2 import EC2LatentBuildSlave
bot1 = EC2LatentBuildSlave(
    'bot1', 'sekrit', 'm1.large',
    valid_ami_location_regex=r'buildbot\-.*\-(.*)/image.manifest.xml',
    identifier='publickey', secret_identifier='privatekey')
If the group can be cast to an integer, it will be. This allows 10 to sort after 1, for instance.
from buildbot.buildslave.ec2 import EC2LatentBuildSlave
bot1 = EC2LatentBuildSlave(
    'bot1', 'sekrit', 'm1.large',
    valid_ami_location_regex=r'buildbot\-.*\-(\d+)/image.manifest.xml',
    identifier='publickey', secret_identifier='privatekey')
In addition to using the password as a handshake between the master and the slave, you may want to use a firewall to assert that only machines from a specific IP can connect as slaves. This is possible with AWS EC2 by using the Elastic IP feature. To configure, generate a Elastic IP in AWS, and then specify it in your configuration using the elastic_ip argument.
from buildbot.buildslave.ec2 import EC2LatentBuildSlave
c['slaves'] = [EC2LatentBuildSlave('bot1', 'sekrit', 'm1.large',
                                   'ami-12345',
                                   identifier='publickey',
                                   secret_identifier='privatekey',
                                   elastic_ip='208.77.188.166'
                                   )]
The EC2LatentBuildSlave supports all other configuration from the standard BuildSlave. The missing_timeout and notify_on_missing specify how long to wait for an EC2 instance to attach before considering the attempt to have failed, and email addresses to alert, respectively. missing_timeout defaults to 20 minutes.
keypair_name and security_name allow you to specify different names for these AWS EC2 values. They both default to latent_buildbot_slave.
Libvirt
libvirt is a virtualization API for interacting with the virtualization capabilities of recent versions of Linux and other OSes. It is LGPL and comes with a stable C API, and Python bindings.
This means we know have an API which when tied to buildbot allows us to have slaves that run under Xen, QEMU, KVM, LXC, OpenVZ, User Mode Linux, VirtualBox and VMWare.
The libvirt code in Buildbot was developed against libvirt 0.7.5 on Ubuntu Lucid. It is used with KVM to test Python code on Karmic VM's, but obviously isn't limited to that. Each build is run on a new VM, images are temporary and thrown away after each build.
We won't show you how to set up libvirt as it is quite different on each platform, but there are a few things you should keep in mind.
- If you are running on Ubuntu, your master should run Lucid. Libvirt and apparmor are buggy on Karmic.
- If you are using the system libvirt, your buildbot master user will need to be in the libvirtd group.
- If you are using KVM, your buildbot master user will need to be in the KVM group.
- You need to think carefully about your virtual network first. Will NAT be enough? What IP will my VM's need to connect to for connecting to the master?
You need to create a base image for your builds that has everything needed to build your software. You need to configure the base image with a buildbot slave that is configured to connect to the master on boot.
Because this image may need updating a lot, we strongly suggest scripting its creation.
If you want to have multiple slaves using the same base image it can be annoying to duplicate the image just to change the buildbot credentials. One option is to use libvirt's DHCP server to allocate an identity to the slave: DHCP sets a hostname, and the slave takes its identity from that.
Doing all this is really beyond the scope of the manual, but there is a vmbuilder script and a network.xml file to create such a DHCP server in contrib/ (Contrib Scripts) that should get you started:
sudo apt-get install ubuntu-vm-builder
sudo contrib/libvirt/vmbuilder
Should create an ubuntu/ folder with a suitable image in it.
virsh net-define contrib/libvirt/network.xml
virsh net-start buildbot-network
Should set up a KVM compatible libvirt network for your buildbot VM's to run on.
If you want to add a simple on demand VM to your setup, you only need the following. We set the username to minion1, the password to sekrit. The base image is called base_image and a copy of it will be made for the duration of the VM's life. That copy will be thrown away every time a build is complete.
from buildbot.buildslave.libvirt import LibVirtSlave, Connection
c['slaves'] = [LibVirtSlave('minion1', 'sekrit', Connection("qemu:///session"),
                            '/home/buildbot/images/minion1', '/home/buildbot/images/base_image')]
You can use virt-manager to define minion1 with the correct hardware. If you don't, buildbot won't be able to find a VM to start.
LibVirtSlave accepts the following arguments:
- name
- Both a buildbot username and the name of the virtual machine.
- password
- A password for the buildbot to login to the master with.
- connection
- Connection instance wrapping connection to libvirt.
- hd_image
- The path to a libvirt disk image, normally in qcow2 format when using KVM.
- base_image
- If given a base image, buildbot will clone it every time it starts a VM. This means you always have a clean environment to do your build in.
- xml
- If a VM isn't predefined in virt-manager, then you can instead provide XML like that used with virsh define. The VM will be created automatically when needed, and destroyed when not needed any longer.
OpenStack
OpenStack is a series of interconnected components that facilitates managing compute, storage, and network resources in a data center. It is available under the Apache License and has a REST interface along with a Python client.
Setting up OpenStack is outside the domain of this document. There are four account details necessary for the Buildbot master to interact with your OpenStack cloud: username, password, a tenant name, and the auth URL to use.
OpenStack supports a large number of image formats. OpenStack maintains a short list of prebuilt images; if the desired image is not listed, The OpenStack Compute Administration Manual is a good resource for creating new images. You need to configure the image with a buildbot slave to connect to the master on boot.
With the configured image in hand, it is time to configure the buildbot master to create OpenStack instances of it. You will need the aforementioned account details. These are the same details set in either environment variables or passed as options to an OpenStack client.
OpenStackLatentBuildSlave accepts the following arguments:
- name
- The buildslave name.
- password
- A password for the buildslave to login to the master with.
- flavor
- The flavor ID to use for the instance.
- image
- A string containing the image UUID to use for the instance. A callable may instead be passed. It will be passed the list of available images and must return the image to use.
os_username
os_password
os_tenant_name
- os_auth_url
- The OpenStack authentication needed to create and delete instances. These are the same as the environment variables with uppercase names of the arguments.
- meta
- A dictionary of string key-value pairs to pass to the instance. These will be available under the metadata key from the metadata service.
Here is the simplest example of configuring an OpenStack latent buildslave.
from buildbot.buildslave.openstack import OpenStackLatentBuildSlave
c['slaves'] = [OpenStackLatentBuildSlave('bot2', 'sekrit',
                flavor=1, image='8ac9d4a4-5e03-48b0-acde-77a0345a9ab1',
                os_username='user', os_password='password',
                os_tenant_name='tenant',
                os_auth_url='http://127.0.0.1:35357/v2.0')]
The image argument also supports being given a callable. The callable will be passed the list of available images and must return the image to use. The invocation happens in a separate thread to prevent blocking the build master when interacting with OpenStack.
from buildbot.buildslave.openstack import OpenStackLatentBuildSlave

def find_image(images):
    # Sort oldest to newest.
    cmp_fn = lambda x,y: cmp(x.created, y.created)
    candidate_images = sorted(images, cmp=cmp_fn)
    # Return the oldest candiate image.
    return candidate_images[0]

c['slaves'] = [OpenStackLatentBuildSlave('bot2', 'sekrit',
                flavor=1, image=find_image,
                os_username='user', os_password='password',
                os_tenant_name='tenant',
                os_auth_url='http://127.0.0.1:35357/v2.0')]
OpenStackLatentBuildSlave supports all other configuration from the standard BuildSlave. The missing_timeout and notify_on_missing specify how long to wait for an OpenStack instance to attach before considering the attempt to have failed and email addresses to alert, respectively. missing_timeout defaults to 20 minutes.
Dangers with Latent Buildslaves
Any latent build slave that interacts with a for-fee service, such as the EC2LatentBuildSlave, brings significant risks. As already identified, the configuration will need access to account information that, if obtained by a criminal, can be used to charge services to your account. Also, bugs in the buildbot software may lead to unnecessary charges. In particular, if the master neglects to shut down an instance for some reason, a virtual machine may be running unnecessarily, charging against your account. Manual and/or automatic (e.g. nagios with a plugin using a library like boto) double-checking may be appropriate.
A comparatively trivial note is that currently if two instances try to attach to the same latent buildslave, it is likely that the system will become confused. This should not occur, unless, for instance, you configure a normal build slave to connect with the authentication of a latent buildbot. If this situation does occurs, stop all attached instances and restart the master.
Builder Configuration
The builders configuration key is a list of objects giving configuration for the Builders. For more information on the function of Builders in Buildbot, see the Concepts chapter. The class definition for the builder configuration is in buildbot.config. In the configuration file, its use looks like:
from buildbot.config import BuilderConfig
c['builders'] = [
    BuilderConfig(name='quick', slavenames=['bot1', 'bot2'], factory=f_quick),
    BuilderConfig(name='thorough', slavename='bot1', factory=f_thorough),
]
BuilderConfig takes the following keyword arguments:
- name
- This specifies the Builder's name, which is used in status reports.
slavename
- slavenames
- These arguments specify the buildslave or buildslaves that will be used by this Builder. All slaves names must appear in the slaves configuration parameter. Each buildslave can accommodate multiple builders. The slavenames parameter can be a list of names, while slavename can specify only one slave.
- factory
- This is a buildbot.process.factory.BuildFactory instance which controls how the build is performed by defining the steps in the build. Full details appear in their own section, Build Factories.
Other optional keys may be set on each BuilderConfig:
- builddir
- Specifies the name of a subdirectory of the master's basedir in which everything related to this builder will be stored. This holds build status information. If not set, this parameter defaults to the builder name, with some characters escaped. Each builder must have a unique build directory.
- slavebuilddir
- Specifies the name of a subdirectory (under the slave's configured base directory) in which everything related to this builder will be placed on the buildslave. This is where checkouts, compiles, and tests are run. If not set, defaults to builddir. If a slave is connected to multiple builders that share the same slavebuilddir, make sure the slave is set to run one build at a time or ensure this is fine to run multiple builds from the same directory simultaneously.
- category
- If provided, this is a string that identifies a category for the builder to be a part of. Status clients can limit themselves to a subset of the available categories. A common use for this is to add new builders to your setup (for a new module, or for a new buildslave) that do not work correctly yet and allow you to integrate them with the active builders. You can put these new builders in a test category, make your main status clients ignore them, and have only private status clients pick them up. As soon as they work, you can move them over to the active category.
- nextSlave
- If provided, this is a function that controls which slave will be assigned future jobs. The function is passed two arguments, the Builder object which is assigning a new job, and a list of BuildSlave objects. The function should return one of the BuildSlave objects, or None if none of the available slaves should be used. The function can optionally return a Deferred, which should fire with the same results.
- nextBuild
- If provided, this is a function that controls which build request will be handled next. The function is passed two arguments, the Builder object which is assigning a new job, and a list of BuildRequest objects of pending builds. The function should return one of the BuildRequest objects, or None if none of the pending builds should be started. This function can optionally return a Deferred which should fire with the same results.
- canStartBuild
- If provided, this is a function that can veto whether a particular buildslave should be used for a given build request. The function is passed three arguments: the Builder, a BuildSlave, and a BuildRequest. The function should return True if the combination is acceptable, or False otherwise. This function can optionally return a Deferred which should fire with the same results.
- locks
- This argument specifies a list of locks that apply to this builder; see Interlocks.
- env
A Builder may be given a dictionary of environment variables in this parameter. The variables are used in ShellCommand steps in builds created by this builder. The environment variables will override anything in the buildslave's environment. Variables passed directly to a ShellCommand will override variables of the same name passed to the Builder.
For example, if you have a pool of identical slaves it is often easier to manage variables like PATH from Buildbot rather than manually editing it inside of the slaves' environment.
f = factory.BuildFactory
f.addStep(ShellCommand(
              command=['bash', './configure']))
f.addStep(Compile())

c['builders'] = [
  BuilderConfig(name='test', factory=f,
        slavenames=['slave1', 'slave2', 'slave3', 'slave4'],
        env={'PATH': '/opt/local/bin:/opt/app/bin:/usr/local/bin:/usr/bin'}),
]
- mergeRequests
- Specifies how build requests for this builder should be merged. See Merging Build Requests, below.
- properties
- A builder may be given a dictionary of Build Properties specific for this builder in this parameter. Those values can be used later on like other properties. Interpolate.
- description
- A builder may be given an arbitrary description, which will show up in the web status on the builder's page.
Merging Build Requests
When more than one build request is available for a builder, Buildbot can "merge" the requests into a single build. This is desirable when build requests arrive more quickly than the available slaves can satisfy them, but has the drawback that separate results for each build are not available.
Requests are only candidated for a merge if both requests have exactly the same codebases.
This behavior can be controlled globally, using the mergeRequests parameter, and on a per-Builder basis, using the mergeRequests argument to the Builder configuration. If mergeRequests is given, it completely overrides the global configuration.
For either configuration parameter, a value of True (the default) causes buildbot to merge BuildRequests that have "compatible" source stamps. Source stamps are compatible if:
- their codebase, branch, project, and repository attributes match exactly;
- neither source stamp has a patch (e.g., from a try scheduler); and
- either both source stamps are associated with changes, or neither ar associated with changes but they have matching revisions.
This algorithm is implemented by the SourceStamp method canBeMergedWith.
A configuration value of False indicates that requests should never be merged.
The configuration value can also be a callable, specifying a custom merging function. See Merge Request Functions for details.
Prioritizing Builds
The BuilderConfig parameter nextBuild can be use to prioritize build requests within a builder. Note that this is orthogonal to Prioritizing Builders, which controls the order in which builders are called on to start their builds. The details of writing such a function are in Build Priority Functions.
Such a function can be provided to the BuilderConfig as follows:
def pickNextBuild(builder, requests):
    # ...
c['builders'] = [
    BuilderConfig(name='test', factory=f,
        nextBuild=pickNextBuild,
        slavenames=['slave1', 'slave2', 'slave3', 'slave4']),
]
Build Factories
Each Builder is equipped with a build factory, which is defines the steps used to perform that particular type of build. This factory is created in the configuration file, and attached to a Builder through the factory element of its dictionary.
The steps used by these builds are defined in the next section, Build Steps.
Note
Build factories are used with builders, and are not added directly to the buildmaster configuration dictionary.
Defining a Build Factory
A BuildFactory defines the steps that every build will follow. Think of it as a glorified script. For example, a build factory which consists of an SVN checkout followed by a make build would be configured as follows:
from buildbot.steps import svn, shell
from buildbot.process import factory

f = factory.BuildFactory()
f.addStep(svn.SVN(svnurl="http://..", mode="incremental"))
f.addStep(shell.Compile(command=["make", "build"]))
This factory would then be attached to one builder (or several, if desired):
c['builders'].append(
    BuilderConfig(name='quick', slavenames=['bot1', 'bot2'], factory=f))
It is also possible to pass a list of steps into the BuildFactory when it is created. Using addStep is usually simpler, but there are cases where is is more convenient to create the list of steps ahead of time, perhaps using some Python tricks to generate the steps.
from buildbot.steps import source, shell
from buildbot.process import factory

all_steps = [
    source.CVS(cvsroot=CVSROOT, cvsmodule="project", mode="update"),
    shell.Compile(command=["make", "build"]),
]
f = factory.BuildFactory(all_steps)
Finally, you can also add a sequence of steps all at once:
f.addSteps(all_steps)
Attributes
The following attributes can be set on a build factory after it is created, e.g.,
f = factory.BuildFactory()
f.useProgress = False
- useProgress
- (defaults to True): if True, the buildmaster keeps track of how long each step takes, so it can provide estimates of how long future builds will take. If builds are not expected to take a consistent amount of time (such as incremental builds in which a random set of files are recompiled or tested each time), this should be set to False to inhibit progress-tracking.
- workdir
(defaults to 'build'): workdir given to every build step created by this factory as default. The workdir can be overridden in a build step definition.
If this attribute is set to a string, that string will be used for constructing the workdir (buildslave base + builder builddir + workdir). The attribute can also be a Python callable, for more complex cases, as described in Factory Workdir Functions.
Predefined Build Factories
Buildbot includes a few predefined build factories that perform common build sequences. In practice, these are rarely used, as every site has slightly different requirements, but the source for these factories may provide examples for implementation of those requirements.
GNUAutoconf
- class buildbot.process.factory.GNUAutoconf
GNU Autoconf is a software portability tool, intended to make it possible to write programs in C (and other languages) which will run on a variety of UNIX-like systems. Most GNU software is built using autoconf. It is frequently used in combination with GNU automake. These tools both encourage a build process which usually looks like this:
% CONFIG_ENV=foo ./configure --with-flags
% make all
% make check
# make install
(except of course the Buildbot always skips the make install part).
The Buildbot's buildbot.process.factory.GNUAutoconf factory is designed to build projects which use GNU autoconf and/or automake. The configuration environment variables, the configure flags, and command lines used for the compile and test are all configurable, in general the default values will be suitable.
Example:
f = factory.GNUAutoconf(source=source.SVN(svnurl=URL, mode="copy"),
                        flags=["--disable-nls"])
Required Arguments:
- source
- This argument must be a step specification tuple that provides a BuildStep to generate the source tree.
Optional Arguments:
- configure
- The command used to configure the tree. Defaults to ./configure. Accepts either a string or a list of shell argv elements.
- configureEnv
- The environment used for the initial configuration step. This accepts a dictionary which will be merged into the buildslave's normal environment. This is commonly used to provide things like CFLAGS="-O2 -g" (to turn off debug symbols during the compile). Defaults to an empty dictionary.
- configureFlags
- A list of flags to be appended to the argument list of the configure command. This is commonly used to enable or disable specific features of the autoconf-controlled package, like ["--without-x"] to disable windowing support. Defaults to an empty list.
- compile
- this is a shell command or list of argv values which is used to actually compile the tree. It defaults to make all. If set to None, the compile step is skipped.
- test
- this is a shell command or list of argv values which is used to run the tree's self-tests. It defaults to @code{make check}. If set to None, the test step is skipped.
BasicBuildFactory
- class buildbot.process.factory.BasicBuildFactory
This is a subclass of GNUAutoconf which assumes the source is in CVS, and uses mode='clobber' to always build from a clean working copy.
BasicSVN
- class buildbot.process.factory.BasicSVN
This class is similar to BasicBuildFactory, but uses SVN instead of CVS.
QuickBuildFactory
- class buildbot.process.factory.QuickBuildFactory
The QuickBuildFactory class is a subclass of GNUAutoconf which assumes the source is in CVS, and uses mode='update' to get incremental updates.
The difference between a full build and a quick build is that quick builds are generally done incrementally, starting with the tree where the previous build was performed. That simply means that the source-checkout step should be given a mode='update' flag, to do the source update in-place.
In addition to that, this class sets the useProgress flag to False. Incremental builds will (or at least the ought to) compile as few files as necessary, so they will take an unpredictable amount of time to run. Therefore it would be misleading to claim to predict how long the build will take.
This class is probably not of use to new projects.
CPAN
- class buildbot.process.factory.CPAN
Most Perl modules available from the CPAN archive use the MakeMaker module to provide configuration, build, and test services. The standard build routine for these modules looks like:
% perl Makefile.PL
% make
% make test
# make install
(except again Buildbot skips the install step)
Buildbot provides a CPAN factory to compile and test these projects.
Arguments:
- source
- (required): A step specification tuple, like that used by GNUAutoconf.
- perl
- A string which specifies the perl executable to use. Defaults to just perl.
Distutils
- class buildbot.process.factory.Distutils
Most Python modules use the distutils package to provide configuration and build services. The standard build process looks like:
% python ./setup.py build
% python ./setup.py install
Unfortunately, although Python provides a standard unit-test framework named unittest, to the best of my knowledge distutils does not provide a standardized target to run such unit tests. (Please let me know if I'm wrong, and I will update this factory.)
The Distutils factory provides support for running the build part of this process. It accepts the same source= parameter as the other build factories.
Arguments:
- source
- (required): A step specification tuple, like that used by GNUAutoconf.
- python
- A string which specifies the python executable to use. Defaults to just python.
- test
- Provides a shell command which runs unit tests. This accepts either a string or a list. The default value is None, which disables the test step (since there is no common default command to run unit tests in distutils modules).
Trial
- class buildbot.process.factory.Trial
Twisted provides a unit test tool named trial which provides a few improvements over Python's built-in unittest module. Many python projects which use Twisted for their networking or application services also use trial for their unit tests. These modules are usually built and tested with something like the following:
% python ./setup.py build
% PYTHONPATH=build/lib.linux-i686-2.3 trial -v PROJECTNAME.test
% python ./setup.py install
Unfortunately, the build/lib directory into which the built/copied .py files are placed is actually architecture-dependent, and I do not yet know of a simple way to calculate its value. For many projects it is sufficient to import their libraries in place from the tree's base directory (PYTHONPATH=.).
In addition, the PROJECTNAME value where the test files are located is project-dependent: it is usually just the project's top-level library directory, as common practice suggests the unit test files are put in the test sub-module. This value cannot be guessed, the Trial class must be told where to find the test files.
The Trial class provides support for building and testing projects which use distutils and trial. If the test module name is specified, trial will be invoked. The library path used for testing can also be set.
One advantage of trial is that the Buildbot happens to know how to parse trial output, letting it identify which tests passed and which ones failed. The Buildbot can then provide fine-grained reports about how many tests have failed, when individual tests fail when they had been passing previously, etc.
Another feature of trial is that you can give it a series of source .py files, and it will search them for special test-case-name tags that indicate which test cases provide coverage for that file. Trial can then run just the appropriate tests. This is useful for quick builds, where you want to only run the test cases that cover the changed functionality.
Arguments:
- testpath
- Provides a directory to add to PYTHONPATH when running the unit tests, if tests are being run. Defaults to . to include the project files in-place. The generated build library is frequently architecture-dependent, but may simply be build/lib for pure-python modules.
- python
- which Python executable to use. This list will form the start of the argv array that will launch trial. If you use this, you should set trial to an explicit path (like /usr/bin/trial or ./bin/trial). The parameter defaults to None, which leaves it out entirely (running trial args instead of python ./bin/trial args). Likely values are ['python'], ['python2.2'], or ['python', '-Wall'].
- trial
- provides the name of the trial command. It is occasionally useful to use an alternate executable, such as trial2.2 which might run the tests under an older version of Python. Defaults to trial.
- trialMode
- a list of arguments to pass to trial, specifically to set the reporting mode. This defaults to ['--reporter=bwverbose'], which only works for Twisted-2.1.0 and later.
- trialArgs
- a list of arguments to pass to trial, available to turn on any extra flags you like. Defaults to [].
- tests
- Provides a module name or names which contain the unit tests for this project. Accepts a string, typically PROJECTNAME.test, or a list of strings. Defaults to None, indicating that no tests should be run. You must either set this or testChanges.
- testChanges
- if True, ignore the tests parameter and instead ask the Build for all the files that make up the Changes going into this build. Pass these filenames to trial and ask it to look for test-case-name tags, running just the tests necessary to cover the changes.
- recurse
- If True, tells Trial (with the --recurse argument) to look in all subdirectories for additional test cases.
- reactor
- which reactor to use, like 'gtk' or 'java'. If not provided, the Twisted's usual platform-dependent default is used.
- randomly
- If True, tells Trial (with the --random=0 argument) to run the test cases in random order, which sometimes catches subtle inter-test dependency bugs. Defaults to False.
The step can also take any of the ShellCommand arguments, e.g., haltOnFailure.
Unless one of tests or testChanges are set, the step will generate an exception.
Properties
Build properties are a generalized way to provide configuration information to build steps; see Build Properties for the conceptual overview of properties.
Some build properties come from external sources and are set before the build begins; others are set during the build, and available for later steps. The sources for properties are:
- global configuration -- These properties apply to all builds.
- schedulers -- A scheduler can specify properties that become available to all builds it starts.
- changes -- A change can have properties attached to it, supplying extra information gathered by the change source. This is most commonly used with the sendchange command.
- forced builds -- The "Force Build" form allows users to specify properties
- buildslaves -- A buildslave can pass properties on to the builds it performs.
- builds -- A build automatically sets a number of properties on itself.
- builders -- A builder can set properties on all the builds it runs.
- steps -- The steps of a build can set properties that are available to subsequent steps. In particular, source steps set the got_revision property.
If the same property is supplied in multiple places, the final appearance takes precedence. For example, a property set in a builder configuration will override one supplied by a scheduler.
Properties are stored internally in JSON format, so they are limited to basic types of data: numbers, strings, lists, and dictionaries.
Common Build Properties
The following build properties are set when the build is started, and are available to all steps.
- got_revision
This property is set when a Source step checks out the source tree, and provides the revision that was actually obtained from the VC system. In general this should be the same as revision, except for non-absolute sourcestamps, where got_revision indicates what revision was current when the checkout was performed. This can be used to rebuild the same source code later.
Note
For some VC systems (Darcs in particular), the revision is a large string containing newlines, and is not suitable for interpolation into a filename.
For multi-codebase builds (where codebase is not the default ''), this property is a dictionary, keyed by codebase.
- buildername
- This is a string that indicates which Builder the build was a part of. The combination of buildername and buildnumber uniquely identify a build.
- buildnumber
- Each build gets a number, scoped to the Builder (so the first build performed on any given Builder will have a build number of 0). This integer property contains the build's number.
- slavename
- This is a string which identifies which buildslave the build is running on.
- scheduler
- If the build was started from a scheduler, then this property will contain the name of that scheduler.
- workdir
- The absolute path of the base working directory on the slave, of the current builder.
For single codebase builds, where the codebase is '', the following Source Stamp Attributes are also available as properties: branch, revision, repository, and project .
Source Stamp Attributes
branch revision repository project codebase
For details of these attributes see Concepts.
changes
This attribute is a list of dictionaries reperesnting the changes that make up this sourcestamp.
has_patch patch_level patch_body patch_subdir patch_author patch_comment
These attributes are set if the source stamp was created by a try scheduler.
Using Properties in Steps
For the most part, properties are used to alter the behavior of build steps during a build. This is done by annotating the step definition in master.cfg with placeholders. When the step is executed, these placeholders will be replaced using the current values of the build properties.
Note
Properties are defined while a build is in progress; their values are not available when the configuration file is parsed. This can sometimes confuse newcomers to Buildbot! In particular, the following is a common error:
if Property('release_train') == 'alpha':
    f.addStep(...)
This does not work because the value of the property is not available when the if statement is executed. However, Python will not detect this as an error - you will just never see the step added to the factory.
You can use build properties in most step parameters. Please file bugs for any parameters which do not accept properties.
Property
The simplest form of annotation is to wrap the property name with Property:
from buildbot.steps.shell import ShellCommand
from buildbot.process.properties import Property

f.addStep(ShellCommand(command=[ 'echo', 'buildername:', Property('buildername') ]))
You can specify a default value by passing a default keyword argument:
f.addStep(ShellCommand(command=[ 'echo', 'warnings:',
                                 Property('warnings', default='none') ]))
The default value is used when the property doesn't exist, or when the value is something Python regards as False. The defaultWhenFalse argument can be set to False to force buildbot to use the default argument only if the parameter is not set:
f.addStep(ShellCommand(command=[ 'echo', 'warnings:',
                 Property('warnings', default='none', defaultWhenFalse=False) ]))
The default value can reference other properties, e.g.,
command=Property('command', default=Property('default-command'))
Interpolate
Property can only be used to replace an entire argument: in the example above, it replaces an argument to echo. Often, properties need to be interpolated into strings, instead. The tool for that job is Interpolate.
The more common pattern is to use Python dictionary-style string interpolation by using the %(prop:<propname>)s syntax. In this form, the property name goes in the parentheses, as above. A common mistake is to omit the trailing "s", leading to a rather obscure error from Python ("ValueError: unsupported format character").
from buildbot.steps.shell import ShellCommand
from buildbot.process.properties import Interpolate
f.addStep(ShellCommand(command=[ 'make', Interpolate('REVISION=%(prop:got_revision)s'),
                                 'dist' ]))
This example will result in a make command with an argument like REVISION=12098.
The syntax of dictionary-style interpolation is a selector, followed by a colon, followed by a selector specific key, optionally followed by a colon and a string indicating how to interpret the value produced by the key.
The following selectors are supported.
- prop
- The key is the name of a property.
- src
- The key is a codebase and source stamp attribute, separated by a colon.
- kw
- The key refers to a keyword argument passed to Interpolate.
The following ways of interpreting the value are available.
- -replacement
- If the key exists, substitute its value; otherwise, substitute replacement. replacement may be empty (%(prop:propname:-)s). This is the default.
- ~replacement
- Like -replacement, but only substitutes the value of the key if it is something Python regards as True. Python considers None, 0, empty lists, and the empty string to be false, so such values will be replaced by replacement.
- +replacement
- If the key exists, substitute replacement; otherwise, substitute an empty string.
?|sub_if_exists|sub_if_missing
- #?|sub_if_true|sub_if_false
- Ternary substitution, depending on either the key being present (with ?, similar to +) or being True (with #?, like ~). Notice that there is a pipe immediately following the question mark and between the two substitution alternatives. The character that follows the question mark is used as the delimiter between the two alternatives. In the above examples, it is a pipe, but any character other than ( can be used.
Although these are similar to shell substitutions, no other substitutions are currently supported.
Example
from buildbot.steps.shell import ShellCommand
from buildbot.process.properties import Interpolate
f.addStep(ShellCommand(command=[ 'make', Interpolate('REVISION=%(prop:got_revision:-%(src::revision:-unknown)s)s')
                                 'dist' ]))
In addition, Interpolate supports using positional string interpolation. Here, %s is used as a placeholder, and the substitutions (which may themselves be placeholders), are given as subsequent arguments:
.. note:
Like Python, you can use either positional interpolation or dictionary-style interpolation, not both. Thus you cannot use a string like Interpolate("foo-%(src::revision)s-%s", "branch").
Renderer
While Interpolate can handle many simple cases, and even some common conditionals, more complex cases are best handled with Python code. The renderer decorator creates a renderable object that will be replaced with the result of the function, called when the step it's passed to begins. The function receives an IProperties object, which it can use to examine the values of any and all properties. For example:
 @properties.renderer
 def makeCommand(props):
     command = [ 'make' ]
     cpus = props.getProperty('CPUs')
     if cpus:
         command += [ '-j', str(cpus+1) ]
     else:
         command += [ '-j', '2' ]
     command += [ 'all' ]
     return command
f.addStep(ShellCommand(command=makeCommand))
You can think of renderer as saying "call this function when the step starts".
WithProperties
Warning
This placeholder is deprecated. It is an older version of Interpolate. It exists for compatibility with older configs.
The simplest use of this class is with positional string interpolation. Here, %s is used as a placeholder, and property names are given as subsequent arguments:
from buildbot.steps.shell import ShellCommand
from buildbot.process.properties import WithProperties
f.addStep(ShellCommand(
          command=["tar", "czf",
                   WithProperties("build-%s-%s.tar.gz", "branch", "revision"),
                   "source"]))
If this BuildStep were used in a tree obtained from Git, it would create a tarball with a name like build-master-a7d3a333db708e786edb34b6af646edd8d4d3ad9.tar.gz.
The more common pattern is to use Python dictionary-style string interpolation by using the %(propname)s syntax. In this form, the property name goes in the parentheses, as above. A common mistake is to omit the trailing "s", leading to a rather obscure error from Python ("ValueError: unsupported format character").
from buildbot.steps.shell import ShellCommand
from buildbot.process.properties import WithProperties
f.addStep(ShellCommand(command=[ 'make', WithProperties('REVISION=%(got_revision)s'),
                                 'dist' ]))
This example will result in a make command with an argument like REVISION=12098.
The dictionary-style interpolation supports a number of more advanced syntaxes in the parentheses.
- propname:-replacement
- If propname exists, substitute its value; otherwise, substitute replacement. replacement may be empty (%(propname:-)s)
- propname:~replacement
- Like propname:-replacement, but only substitutes the value of property propname if it is something Python regards as True. Python considers None, 0, empty lists, and the empty string to be false, so such values will be replaced by replacement.
- propname:+replacement
- If propname exists, substitute replacement; otherwise, substitute an empty string.
Although these are similar to shell substitutions, no other substitutions are currently supported, and replacement in the above cannot contain more substitutions.
Note: like Python, you can use either positional interpolation or dictionary-style interpolation, not both. Thus you cannot use a string like WithProperties("foo-%(revision)s-%s", "branch").
Custom Renderables
If the options described above are not sufficient, more complex substitutions can be achieved by writing custom renderables.
Renderables are objects providing the IRenderable interface. That interface is simple - objects must provide a getRenderingFor method. The method should take one argument - an IProperties provider - and should return a string or a deferred firing with a string. Pass instances of the class anywhere other renderables are accepted. For example:
class DetermineFoo(object):
    implements(IRenderable)
    def getRenderingFor(self, props)
        if props.hasProperty('bar'):
            return props['bar']
        elif props.hasProperty('baz'):
            return props['baz']
        return 'qux'
ShellCommand(command=['echo', DetermineFoo()])
or, more practically,
class Now(object):
    implements(IRenderable)
    def getRenderingFor(self, props)
        return time.clock()
ShellCommand(command=['make', Interpolate('TIME=%(kw:now)', now=Now())])
This is equivalent to:
@renderer
def now(props):
    return time.clock()
ShellCommand(command=['make', Interpolate('TIME=%(kw:now)', now=now)])
Note that a custom renderable must be instantiated (and its constructor can take whatever arguments you'd like), whereas a function decorated with renderer can be used directly.
Build Steps
BuildSteps are usually specified in the buildmaster's configuration file, in a list that goes into the BuildFactory. The BuildStep instances in this list are used as templates to construct new independent copies for each build (so that state can be kept on the BuildStep in one build without affecting a later build). Each BuildFactory can be created with a list of steps, or the factory can be created empty and then steps added to it using the addStep method:
from buildbot.steps import source, shell
from buildbot.process import factory

f = factory.BuildFactory()
f.addStep(source.SVN(svnurl="http://svn.example.org/Trunk/"))
f.addStep(shell.ShellCommand(command=["make", "all"]))
f.addStep(shell.ShellCommand(command=["make", "test"]))
The basic behavior for a BuildStep is to:
- run for a while, then stop
- possibly invoke some RemoteCommands on the attached build slave
- possibly produce a set of log files
- finish with a status described by one of four values defined in buildbot.status.builder: SUCCESS, WARNINGS, FAILURE, SKIPPED
- provide a list of short strings to describe the step
The rest of this section describes all the standard BuildStep objects available for use in a Build, and the parameters which can be used to control each. A full list of build steps is available in the Build Step Index.
Common Parameters
All BuildSteps accept some common parameters. Some of these control how their individual status affects the overall build. Others are used to specify which Locks (see Interlocks) should be acquired before allowing the step to run.
Arguments common to all BuildStep subclasses:
- name
- the name used to describe the step on the status display. It is also used to give a name to any LogFiles created by this step.
- haltOnFailure
- if True, a FAILURE of this build step will cause the build to halt immediately. Steps with alwaysRun=True are still run. Generally speaking, haltOnFailure implies flunkOnFailure (the default for most BuildSteps). In some cases, particularly series of tests, it makes sense to haltOnFailure if something fails early on but not flunkOnFailure. This can be achieved with haltOnFailure=True, flunkOnFailure=False.
- flunkOnWarnings
- when True, a WARNINGS or FAILURE of this build step will mark the overall build as FAILURE. The remaining steps will still be executed.
- flunkOnFailure
- when True, a FAILURE of this build step will mark the overall build as a FAILURE. The remaining steps will still be executed.
- warnOnWarnings
- when True, a WARNINGS or FAILURE of this build step will mark the overall build as having WARNINGS. The remaining steps will still be executed.
- warnOnFailure
- when True, a FAILURE of this build step will mark the overall build as having WARNINGS. The remaining steps will still be executed.
- alwaysRun
- if True, this build step will always be run, even if a previous buildstep with haltOnFailure=True has failed.
- doStepIf
- A step can be configured to only run under certain conditions. To do this, set the step's doStepIf to a boolean value, or to a function that returns a boolean value or Deferred. If the value or function result is false, then the step will return SKIPPED without doing anything. Otherwise, the step will be executed normally. If you set doStepIf to a function, that function should accept one parameter, which will be the Step object itself.
- hideStepIf
A step can be optionally hidden from the waterfall and build details web pages. To do this, set the step's hideStepIf to a boolean value, or to a function that takes two parameters -- the results and the BuildStep -- and returns a boolean value. Steps are always shown while they execute, however after the step as finished, this parameter is evaluated (if a function) and if the value is True, the step is hidden. For example, in order to hide the step if the step has been skipped,
factory.addStep(Foo(..., hideStepIf=lambda results, s: results==SKIPPED))
- locks
- a list of Locks (instances of buildbot.locks.SlaveLock or buildbot.locks.MasterLock) that should be acquired before starting this Step. The Locks will be released when the step is complete. Note that this is a list of actual Lock instances, not names. Also note that all Locks must have unique names. See Interlocks.
Source Checkout
At the moment, Buildbot contains two implementations of most source steps. The new implementation handles most of the logic on the master side, and has a simpler, more unified approach. The older implementation (Source Checkout (Slave-Side)) handles the logic on the slave side, and some of the classes have a bewildering array of options.
Caution
Master-side source checkout steps are recently developed and not stable yet. If you find any bugs please report them on the Buildbot Trac. The older Slave-side described source steps are Source Checkout (Slave-Side).
The old source steps are imported like this:
from buildbot.steps.source import Git
while new source steps are in separate source-packages for each version-control system:
from buildbot.steps.source.git import Git
New users should, where possible, use the new implementations. The old implementations will be deprecated in a later release. Old users should take this opportunity to switch to the new implementations while both are supported by Buildbot.
Some version control systems have not yet been implemented as master-side steps. If you are interested in continued support for such a version control system, please consider helping the Buildbot developers to create such an implementation. In particular, version-control systems with proprietary licenses will not be supported without access to the version-control system for development.
Common Parameters
All source checkout steps accept some common parameters to control how they get the sources and where they should be placed. The remaining per-VC-system parameters are mostly to specify where exactly the sources are coming from.
mode method
These two parameters specify the means by which the source is checked out. mode specifies the type of checkout and method tells about the way to implement it.
factory = BuildFactory()
from buildbot.steps.source.mercurial import Mercurial
factory.addStep(Mercurial(repourl='path/to/repo', mode='full', method='fresh'))
The mode parameter a string describing the kind of VC operation that is desired, defaulting to incremental. The options are
- incremental
- Update the source to the desired revision, but do not remove any other files generated by previous builds. This allows compilers to take advantage of object files from previous builds. This mode is exactly same as the old update mode.
- full
- Update the source, but delete remnants of previous builds. Build steps that follow will need to regenerate all object files.
Methods are specific to the version-control system in question, as they may take advantage of special behaviors in that version-control system that can make checkouts more efficient or reliable.
- workdir
- like all Steps, this indicates the directory where the build will take place. Source Steps are special in that they perform some operations outside of the workdir (like creating the workdir itself).
- alwaysUseLatest
- if True, bypass the usual behavior of checking out the revision in the source stamp, and always update to the latest revision in the repository instead.
- retry
- If set, this specifies a tuple of (delay, repeats) which means that when a full VC checkout fails, it should be retried up to repeats times, waiting delay seconds between attempts. If you don't provide this, it defaults to None, which means VC operations should not be retried. This is provided to make life easier for buildslaves which are stuck behind poor network connections.
- repository
The name of this parameter might vary depending on the Source step you are running. The concept explained here is common to all steps and applies to repourl as well as for baseURL (when applicable).
A common idiom is to pass Property('repository', 'url://default/repo/path') as repository. This grabs the repository from the source stamp of the build. This can be a security issue, if you allow force builds from the web, or have the WebStatus change hooks enabled; as the buildslave will download code from an arbitrary repository.
- codebase
- This specifies which codebase the source step should use to select the right source stamp. The default codebase value is ''. The codebase must correspond to a codebase assigned by the codebaseGenerator. If there is no codebaseGenerator defined in the master then codebase doesn't need to be set, the default value will then match all changes.
- timeout
- Specifies the timeout for slave-side operations, in seconds. If your repositories are particularly large, then you may need to increase this value from its default of 1200 (20 minutes).
- logEnviron
- If this option is true (the default), then the step's logfile will describe the environment variables on the slave. In situations where the environment is not relevant and is long, it may be easier to set logEnviron=False.
- env
- a dictionary of environment strings which will be added to the child command's environment. The usual property interpolations can be used in environment variable names and values - see Properties.
Mercurial
- class buildbot.steps.source.mercurial.Mercurial
The Mercurial build step performs a Mercurial (aka hg) checkout or update.
Branches are available in two modes: dirname, where the name of the branch is a suffix of the name of the repository, or inrepo, which uses Hg's named-branches support. Make sure this setting matches your changehook, if you have that installed.
from buildbot.steps.source.mercurial import Mercurial
factory.addStep(Mercurial(repourl='path/to/repo', mode='full',
                          method='fresh', branchType='inrepo'))
The Mercurial step takes the following arguments:
- repourl
- where the Mercurial source repository is available.
- defaultBranch
- this specifies the name of the branch to use when a Build does not provide one of its own. This will be appended to repourl to create the string that will be passed to the hg clone command.
- branchType
- either 'dirname' (default) or 'inrepo' depending on whether the branch name should be appended to the repourl or the branch is a Mercurial named branch and can be found within the repourl.
- clobberOnBranchChange
- boolean, defaults to True. If set and using inrepos branches, clobber the tree at each branch change. Otherwise, just update to the branch.
mode method
Mercurial's incremental mode does not require a method. The full mode has three methods defined:
- clobber
- It removes the build directory entirely then makes full clone from repo. This can be slow as it need to clone whole repository
- fresh
- This remove all other files except those tracked by VCS. First it does hg purge --all then pull/update
- clean
- All the files which are tracked by Mercurial and listed ignore files are not deleted. Remaining all other files will be deleted before pull/update. This is equivalent to hg purge then pull/update.
Git
- class buildbot.steps.source.git.Git
The Git build step clones or updates a Git repository and checks out the specified branch or revision. Note that the buildbot supports Git version 1.2.0 and later: earlier versions (such as the one shipped in Ubuntu 'Dapper') do not support the git init command that the buildbot uses.
from buildbot.steps.source.git import Git
factory.addStep(Git(repourl='git://path/to/repo', mode='full',
                          method='clobber', submodules=True))
The Git step takes the following arguments:
- repourl
- (required): the URL of the upstream Git repository.
- branch
- (optional): this specifies the name of the branch to use when a Build does not provide one of its own. If this this parameter is not specified, and the Build does not provide a branch, the default branch of the remote repository will be used.
- submodules
- (optional): when initializing/updating a Git repository, this decides whether or not buildbot should consider Git submodules. Default: False.
- shallow
- (optional): instructs git to attempt shallow clones (--depth 1). This option can be used only in full builds with clobber method.
- progress
- (optional): passes the (--progress) flag to (git fetch). This solves issues of long fetches being killed due to lack of output, but requires Git 1.7.2 or later.
- retryFetch
- (optional): this value defaults to False. In any case if fetch fails buildbot retries to fetch again instead of failing the entire source checkout.
- clobberOnFailure
- (optional): defaults to False. If a fetch or full clone fails we can checkout source removing everything. This way new repository will be cloned. If retry fails it fails the source checkout step.
mode
(optional): defaults to 'incremental'. Specifies whether to clean the build tree or not.
- incremental
- The source is update, but any built files are left untouched.
- full
- The build tree is clean of any built files. The exact method for doing this is controlled by the method argument.
method
(optional): defaults to fresh when mode is full. Git's incremental mode does not require a method. The full mode has four methods defined:
- clobber
- It removes the build directory entirely then makes full clone from repo. This can be slow as it need to clone whole repository. To make faster clones enable shallow option. If shallow options is enabled and build request have unknown revision value, then this step fails.
- fresh
- This remove all other files except those tracked by Git. First it does git clean -d -f -x then fetch/checkout to a specified revision(if any). This option is equal to update mode with ignore_ignores=True in old steps.
- clean
- All the files which are tracked by Git and listed ignore files are not deleted. Remaining all other files will be deleted before fetch/checkout. This is equivalent to git clean -d -f then fetch. This is equivalent to ignore_ignores=False in old steps.
- copy
- This first checkout source into source directory then copy the source directory to build directory then performs the build operation in the copied directory. This way we make fresh builds with very less bandwidth to download source. The behavior of source checkout follows exactly same as incremental. It performs all the incremental checkout behavior in source directory.
getDescription
(optional) After checkout, invoke a git describe on the revision and save the result in a property; the property's name is either commit-description or commit-description-foo, depending on whether the codebase argument was also provided. The argument should either be a bool or dict, and will change how git describe is called:
getDescription=False: disables this feature explicitly
getDescription=True or empty dict(): Run git describe with no args
getDescription={...}: a dict with keys named the same as the Git option. Each key's value can be False or None to explicitly skip that argument.
For the following keys, a value of True appends the same-named Git argument:
- all : --all
- always: --always
- contains: --contains
- debug: --debug
- long: --long`
- exact-match: --exact-match
- tags: --tags
- dirty: --dirty
For the following keys, an integer or string value (depending on what Git expects) will set the argument's parameter appropriately. Examples show the key-value pair:
- match=foo: --match foo
- abbrev=7: --abbrev=7
- candidates=7: --candidates=7
- dirty=foo: --dirty=foo
config
(optional) A dict of git configuration settings to pass to the remote git commands.
SVN
- class buildbot.steps.source.svn.SVN
The SVN build step performs a Subversion checkout or update. There are two basic ways of setting up the checkout step, depending upon whether you are using multiple branches or not.
The SVN step should be created with the repourl argument:
- repourl
- (required): this specifies the URL argument that will be given to the svn checkout command. It dictates both where the repository is located and which sub-tree should be extracted. One way to specify the branch is to use Interpolate. For example, if you wanted to check out the trunk repository, you could use repourl=Interpolate("http://svn.example.com/repos/%(src::branch)s") Alternatively, if you are using a remote Subversion repository which is accessible through HTTP at a URL of http://svn.example.com/repos, and you wanted to check out the trunk/calc sub-tree, you would directly use repourl="http://svn.example.com/repos/trunk/calc" as an argument to your SVN step.
If you are building from multiple branches, then you should create the SVN step with the repourl and provide branch information with Interpolate:
from buildbot.steps.source.svn import SVN
factory.addStep(SVN(mode='incremental',
               repourl=Interpolate('svn://svn.example.org/svn/%(src::branch)s/myproject')))
Alternatively, the repourl argument can be used to create the SVN step without Interpolate:
from buildbot.steps.source.svn import SVN
factory.addStep(SVN(mode='full',
               repourl='svn://svn.example.org/svn/myproject/trunk'))
- username
- (optional): if specified, this will be passed to the svn binary with a --username option.
- password
- (optional): if specified, this will be passed to the svn binary with a --password option.
- extra_args
- (optional): if specified, an array of strings that will be passed as extra arguments to the svn binary.
- keep_on_purge
- (optional): specific files or directories to keep between purges, like some build outputs that can be reused between builds.
- depth
(optional): Specify depth argument to achieve sparse checkout. Only available if slave has Subversion 1.5 or higher.
If set to empty updates will not pull in any files or subdirectories not already present. If set to files, updates will pull in any files not already present, but not directories. If set to immediates, updates will pull in any files or subdirectories not already present, the new subdirectories will have depth: empty. If set to infinity, updates will pull in any files or subdirectories not already present; the new subdirectories will have depth-infinity. Infinity is equivalent to SVN default update behavior, without specifying any depth argument.
- preferLastChangedRev
- (optional): By default, the got_revision property is set to the repository's global revision ("Revision" in the svn info output). Set this parameter to True to have it set to the "Last Changed Rev" instead.
mode method
SVN's incremental mode does not require a method. The full mode has five methods defined:
- clobber
- It removes the working directory for each build then makes full checkout.
- fresh
- This always always purges local changes before updating. This deletes unversioned files and reverts everything that would appear in a svn status --no-ignore. This is equivalent to the old update mode with always_purge.
- clean
- This is same as fresh except that it deletes all unversioned files generated by svn status.
- copy
- This first checkout source into source directory then copy the source directory to build directory then performs the build operation in the copied directory. This way we make fresh builds with very less bandwidth to download source. The behavior of source checkout follows exactly same as incremental. It performs all the incremental checkout behavior in source directory.
- export
- Similar to method='copy', except using svn export to create build directory so that there are no .svn directories in the build directory.
If you are using branches, you must also make sure your ChangeSource will report the correct branch names.
CVS
- class buildbot.steps.source.cvs.CVS
The CVS build step performs a CVS checkout or update.
from buildbot.steps.source.cvs import CVS
factory.addStep(CVS(mode='incremental',
               cvsroot=':pserver:me@cvs.sourceforge.net:/cvsroot/myproj',
               cvsmodule='buildbot'))
This step takes the following arguments:
- cvsroot
- (required): specify the CVSROOT value, which points to a CVS repository, probably on a remote machine. For example, if Buildbot was hosted in CVS then the cvsroot value you would use to get a copy of the Buildbot source code might be :pserver:anonymous@cvs.sourceforge.net:/cvsroot/buildbot.
- cvsmodule
- (required): specify the cvs module, which is generally a subdirectory of the CVSROOT. The cvsmodule for the Buildbot source code is buildbot.
- branch
- a string which will be used in a -r argument. This is most useful for specifying a branch to work on. Defaults to HEAD.
- global_options
- a list of flags to be put before the argument checkout in the CVS command.
- extra_options
- a list of flags to be put after the checkout in the CVS command.
mode method
No method is needed for incremental mode. For full mode, method can take the values shown below. If no value is given, it defaults to fresh.
- clobber
- This specifies to remove the workdir and make a full checkout.
- fresh
- This method first runs cvsdisard in the build directory, then updates it. This requires cvsdiscard which is a part of the cvsutil package.
- clean
- This method is the same as method='fresh', but it runs cvsdiscard --ignore instead of cvsdiscard.
- copy
- This maintains a source directory for source, which it updates copies to the build directory. This allows Buildbot to start with a fresh directory, without downloading the entire repository on every build.
Bzr
- class buildbot.steps.source.bzr.Bzr
bzr is a descendant of Arch/Baz, and is frequently referred to as simply Bazaar. The repository-vs-workspace model is similar to Darcs, but it uses a strictly linear sequence of revisions (one history per branch) like Arch. Branches are put in subdirectories. This makes it look very much like Mercurial.
from buildbot.steps.source.bzr import Bzr
factory.addStep(Bzr(mode='incremental',
               repourl='lp:~knielsen/maria/tmp-buildbot-test'))
The step takes the following arguments:
- repourl
- (required unless baseURL is provided): the URL at which the Bzr source repository is available.
- baseURL
- (required unless repourl is provided): the base repository URL, to which a branch name will be appended. It should probably end in a slash.
- defaultBranch
- (allowed if and only if baseURL is provided): this specifies the name of the branch to use when a Build does not provide one of its own. This will be appended to baseURL to create the string that will be passed to the bzr checkout command.
mode method
No method is needed for incremental mode. For full mode, method can take the values shown below. If no value is given, it defaults to fresh.
- clobber
- This specifies to remove the workdir and make a full checkout.
- fresh
- This method first runs bzr clean-tree to remove all the unversioned files then update the repo. This remove all unversioned files including those in .bzrignore.
- clean
- This is same as fresh except that it doesn't remove the files mentioned in .bzrginore i.e, by running bzr clean-tree --ignore.
- copy
- A local bzr repository is maintained and the repo is copied to build directory for each build. Before each build the local bzr repo is updated then copied to build for next steps.
P4
- class buildbot.steps.source.p4.P4
The P4 build step creates a Perforce client specification and performs an update.
from buildbot.steps.source.p4 import P4
factory.addStep(P4(p4port=p4port,
                   p4client=WithProperties('%(P4USER)s-%(slavename)s-%(buildername)s'),
                   p4user=p4user,
                   p4base='//depot',
                   p4viewspec=p4viewspec,
                   mode='incremental',
                   ))
You can specify the client spec in two different ways. You can use the p4base, p4branch, and (optionally) p4extra_views to build up the viewspec, or you can utilize the p4viewspec to specify the whole viewspec as a set of tuples.
Using p4viewspec will allow you to add lines such as:
//depot/branch/mybranch/...             //<p4client>/...
-//depot/branch/mybranch/notthisdir/... //<p4client>/notthisdir/...
If you specify p4viewspec and any of p4base, p4branch, and/or p4extra_views you will receive a configuration error exception.
- p4base
- A view into the Perforce depot without branch name or trailing "/...". Typically //depot/proj.
- p4branch
- (optional): A single string, which is appended to the p4base as follows
- <p4base>/<p4branch>/... to form the first line in the viewspec
- p4extra_views
- (optional): a list of (depotpath, clientpath) tuples containing extra views to be mapped into the client specification. Both will have /... appended automatically. The client name and source directory will be prepended to the client path.
- p4viewspec
This will override any p4branch, p4base, and/or p4extra_views specified. The viewspec will be an array of tuples as follows [('//depot/main/','')]
yields a viewspec with just
//depot/main/... //<p4client>/...
- p4port
- (optional): the host:port string describing how to get to the P4 Depot (repository), used as the -p argument for all p4 commands.
- p4user
- (optional): the Perforce user, used as the -u argument to all p4 commands.
- p4passwd
- (optional): the Perforce password, used as the -p argument to all p4 commands.
- p4client
- (optional): The name of the client to use. In mode='full' and mode='incremental', it's particularly important that a unique name is used for each checkout directory to avoid incorrect synchronization. For this reason, Python percent substitution will be performed on this value to replace %(slave)s with the slave name and %(builder)s with the builder name. The default is buildbot_%(slave)s_%(build)s.
- p4line_end
- (optional): The type of line ending handling P4 should use. This is added directly to the client spec's LineEnd property. The default is local.
Repo
- class buildbot.steps.source.repo.Repo
The Repo build step performs a Repo init and sync.
It is a drop-in replacement for Repo (Slave-Side), which should not be used anymore for new and old projects.
The Repo step takes the following arguments:
- manifestURL
- (required): the URL at which the Repo's manifests source repository is available.
- manifestBranch
- (optional, defaults to master): the manifest repository branch on which repo will take its manifest. Corresponds to the -b argument to the repo init command.
- manifestFile
- (optional, defaults to default.xml): the manifest filename. Corresponds to the -m argument to the repo init command.
- tarball
- (optional, defaults to None): the repo tarball used for fast bootstrap. If not present the tarball will be created automatically after first sync. It is a copy of the .repo directory which contains all the Git objects. This feature helps to minimize network usage on very big projects with lots of slaves.
- jobs
- (optional, defaults to None): Number of projects to fetch simultaneously while syncing. Passed to repo sync subcommand with "-j".
- syncAllBranches
- (optional, defaults to False): renderable boolean to control whether repo syncs all branches. i.e. repo sync -c
- updateTarballAge
- (optional, defaults to "one week"): renderable to control the policy of updating of the tarball given properties Returns: max age of tarball in seconds, or None, if we want to skip tarball update The default value should be good trade off on size of the tarball, and update frequency compared to cost of tarball creation
- repoDownloads
(optional, defaults to None): list of repo download commands to perform at the end of the Repo step each string in the list will be prefixed repo download, and run as is. This means you can include parameter in the string. e.g:
- ["-c project 1234/4"] will cherry-pick patchset 4 of patch 1234 in project project
- ["-f project 1234/4"] will enforce fast-forward on patchset 4 of patch 1234 in project project
- class buildbot.steps.source.repo.RepoDownloadsFromProperties
RepoDownloadsFromProperties can be used as a renderable of the repoDownload parameter it will look in passed properties for string with following possible format:
- repo download project change_number/patchset_number.
- project change_number/patchset_number.
- project/change_number/patchset_number.
All of these properties will be translated into a repo download. This feature allows integrators to build with several pending interdependent changes, which at the moment cannot be described properly in Gerrit, and can only be described by humans.
- class buildbot.steps.source.repo.RepoDownloadsFromChangeSource
RepoDownloadsFromChangeSource can be used as a renderable of the repoDownload parameter
This rendereable integrates with GerritChangeSource, and will automatically use the repo download command of repo to download the additionnal changes introduced by a pending changeset.
Note
you can use the two above Rendereable in conjuction by using the class buildbot.process.properties.FlattenList
for example:
from buildbot.steps.source.repo import Repo, RepoDownloadsFromChangeSource,
from buildbot.steps.source.repo import RepoDownloadsFromProperties
from buildbot.process.properties import FlattenList

factory.addStep(Repo(manifestUrl='git://mygerrit.org/manifest.git',
                     repoDownloads=FlattenList([RepoDownloadsFromChangeSource(),
                                                RepoDownloadsFromProperties("repo_downloads")
                                                ]
                                               )
                     ))
Source Checkout (Slave-Side)
This section describes the more mature slave-side source steps. Where possible, new users should use the master-side source checkout steps, as the slave-side steps will be removed in a future version. See Source Checkout.
The first step of any build is typically to acquire the source code from which the build will be performed. There are several classes to handle this, one for each of the different source control system that Buildbot knows about. For a description of how Buildbot treats source control in general, see Version Control Systems.
All source checkout steps accept some common parameters to control how they get the sources and where they should be placed. The remaining per-VC-system parameters are mostly to specify where exactly the sources are coming from.
- mode
a string describing the kind of VC operation that is desired. Defaults to update.
- update
- specifies that the CVS checkout/update should be performed directly into the workdir. Each build is performed in the same directory, allowing for incremental builds. This minimizes disk space, bandwidth, and CPU time. However, it may encounter problems if the build process does not handle dependencies properly (sometimes you must do a clean build to make sure everything gets compiled), or if source files are deleted but generated files can influence test behavior (e.g. Python's .pyc files), or when source directories are deleted but generated files prevent CVS from removing them. Builds ought to be correct regardless of whether they are done from scratch or incrementally, but it is useful to test both kinds: this mode exercises the incremental-build style.
- copy
- specifies that the CVS workspace should be maintained in a separate directory (called the copydir), using checkout or update as necessary. For each build, a new workdir is created with a copy of the source tree (rm -rf workdir; cp -r copydir workdir). This doubles the disk space required, but keeps the bandwidth low (update instead of a full checkout). A full 'clean' build is performed each time. This avoids any generated-file build problems, but is still occasionally vulnerable to CVS problems such as a repository being manually rearranged, causing CVS errors on update which are not an issue with a full checkout.
- clobber
- specifies that the working directory should be deleted each time, necessitating a full checkout for each build. This insures a clean build off a complete checkout, avoiding any of the problems described above. This mode exercises the from-scratch build style.
- export
- this is like clobber, except that the cvs export command is used to create the working directory. This command removes all CVS metadata files (the CVS/ directories) from the tree, which is sometimes useful for creating source tarballs (to avoid including the metadata in the tar file).
- workdir
- As for all steps, this indicates the directory where the build will take place. Source Steps are special in that they perform some operations outside of the workdir (like creating the workdir itself).
- alwaysUseLatest
- if True, bypass the usual update to the last Change behavior, and always update to the latest changes instead.
- retry
- If set, this specifies a tuple of (delay, repeats) which means that when a full VC checkout fails, it should be retried up to repeats times, waiting delay seconds between attempts. If you don't provide this, it defaults to None, which means VC operations should not be retried. This is provided to make life easier for buildslaves which are stuck behind poor network connections.
- repository
The name of this parameter might varies depending on the Source step you are running. The concept explained here is common to all steps and applies to repourl as well as for baseURL (when applicable). Buildbot, now being aware of the repository name via the change source, might in some cases not need the repository url. There are multiple way to pass it through to this step, those correspond to the type of the parameter given to this step:
- None
- In the case where no parameter is specified, the repository url will be taken exactly from the Change attribute. You are looking for that one if your ChangeSource step has all information about how to reach the Change.
- string
- The parameter might be a string, in this case, this string will be taken as the repository url, and nothing more. the value coming from the ChangeSource step will be forgotten.
- format string
- If the parameter is a string containing %s, then this the repository attribute from the Change will be place in place of the %s. This is useful when the change source knows where the repository resides locally, but don't know the scheme used to access it. For instance ssh://server/%s makes sense if the the repository attribute is the local path of the repository.
- dict
- In this case, the repository URL will be the value indexed by the repository attribute in the dict given as parameter.
- callable
- The callable given as parameter will take the repository attribute from the Change and its return value will be used as repository URL.
Note
this is quite similar to the mechanism used by the WebStatus for the changecommentlink, projects or repositories parameter.
- timeout
- Specifies the timeout for slave-side operations, in seconds. If your repositories are particularly large, then you may need to increase this value from its default of 1200 (20 minutes).
My habit as a developer is to do a cvs update and make each morning. Problems can occur, either because of bad code being checked in, or by incomplete dependencies causing a partial rebuild to fail where a complete from-scratch build might succeed. A quick Builder which emulates this incremental-build behavior would use the mode='update' setting.
On the other hand, other kinds of dependency problems can cause a clean build to fail where a partial build might succeed. This frequently results from a link step that depends upon an object file that was removed from a later version of the tree: in the partial tree, the object file is still around (even though the Makefiles no longer know how to create it).
official builds (traceable builds performed from a known set of source revisions) are always done as clean builds, to make sure it is not influenced by any uncontrolled factors (like leftover files from a previous build). A full Builder which behaves this way would want to use the mode='clobber' setting.
Each VC system has a corresponding source checkout class: their arguments are described on the following pages.
CVS (Slave-Side)
The CVS build step performs a CVS checkout or update. It takes the following arguments:
- cvsroot
- (required): specify the CVSROOT value, which points to a CVS repository, probably on a remote machine. For example, the cvsroot value you would use to get a copy of the Buildbot source code is :pserver:anonymous@cvs.sourceforge.net:/cvsroot/buildbot
- cvsmodule
- (required): specify the cvs module, which is generally a subdirectory of the CVSROOT. The cvsmodule for the Buildbot source code is buildbot.
- branch
- a string which will be used in a -r argument. This is most useful for specifying a branch to work on. Defaults to HEAD.
- global_options
- a list of flags to be put before the verb in the CVS command.
checkout_options
export_options
- extra_options
- a list of flags to be put after the verb in the CVS command. checkout_options is only used for checkout operations, export_options is only used for export operations, and extra_options is used for both.
- checkoutDelay
- if set, the number of seconds to put between the timestamp of the last known Change and the value used for the -D option. Defaults to half of the parent Build's treeStableTimer.
SVN (Slave-Side)
The SVN build step performs a Subversion checkout or update. There are two basic ways of setting up the checkout step, depending upon whether you are using multiple branches or not.
The most versatile way to create the SVN step is with the svnurl argument:
- svnurl
- (required): this specifies the URL argument that will be given to the svn checkout command. It dictates both where the repository is located and which sub-tree should be extracted. In this respect, it is like a combination of the CVS cvsroot and cvsmodule arguments. For example, if you are using a remote Subversion repository which is accessible through HTTP at a URL of http://svn.example.com/repos, and you wanted to check out the trunk/calc sub-tree, you would use svnurl="http://svn.example.com/repos/trunk/calc" as an argument to your SVN step.
The svnurl argument can be considered as a universal means to create the SVN step as it ignores the branch information in the SourceStamp.
Alternatively, if you are building from multiple branches, then you should preferentially create the SVN step with the baseURL and defaultBranch arguments instead:
- baseURL
- (required): this specifies the base repository URL, to which a branch name will be appended. It should probably end in a slash.
- defaultBranch
(optional): this specifies the name of the branch to use when a Build does not provide one of its own. This will be appended to baseURL to create the string that will be passed to the svn checkout command.
It is possible to mix to have a mix of SVN steps that use either the svnurl or baseURL arguments but not both at the same time.
- username
- (optional): if specified, this will be passed to the svn binary with a --username option.
- password
- (optional): if specified, this will be passed to the svn binary with a --password option. The password itself will be suitably obfuscated in the logs.
- extra_args
- (optional): if specified, an array of strings that will be passed as extra arguments to the svn binary.
- keep_on_purge
- (optional): specific files or directories to keep between purges, like some build outputs that can be reused between builds.
- ignore_ignores
- (optional): when purging changes, don't use rules defined in svn:ignore properties and global-ignores in subversion/config.
- always_purge
- (optional): if set to True, always purge local changes before updating. This deletes unversioned files and reverts everything that would appear in a svn status.
- depth
(optional): Specify depth argument to achieve sparse checkout. Only available if slave has Subversion 1.5 or higher.
If set to "empty" updates will not pull in any files or subdirectories not already present. If set to "files", updates will pull in any files not already present, but not directories. If set to "immediates", updates will pull in any files or subdirectories not already present, the new subdirectories will have depth: empty. If set to "infinity", updates will pull in any files or subdirectories not already present; the new subdirectories will have depth-infinity. Infinity is equivalent to SVN default update behavior, without specifying any depth argument.
If you are using branches, you must also make sure your ChangeSource will report the correct branch names.
Darcs (Slave-Side)
The Darcs build step performs a Darcs checkout or update.
Like SVN, this step can either be configured to always check out a specific tree, or set up to pull from a particular branch that gets specified separately for each build. Also like SVN, the repository URL given to Darcs is created by concatenating a baseURL with the branch name, and if no particular branch is requested, it uses a defaultBranch. The only difference in usage is that each potential Darcs repository URL must point to a fully-fledged repository, whereas SVN URLs usually point to sub-trees of the main Subversion repository. In other words, doing an SVN checkout of baseURL is legal, but silly, since you'd probably wind up with a copy of every single branch in the whole repository. Doing a Darcs checkout of baseURL is just plain wrong, since the parent directory of a collection of Darcs repositories is not itself a valid repository.
The Darcs step takes the following arguments:
- repourl
- (required unless baseURL is provided): the URL at which the Darcs source repository is available.
- baseURL
- (required unless repourl is provided): the base repository URL, to which a branch name will be appended. It should probably end in a slash.
- defaultBranch
- (allowed if and only if baseURL is provided): this specifies the name of the branch to use when a Build does not provide one of its own. This will be appended to baseURL to create the string that will be passed to the darcs get command.
Mercurial (Slave-Side)
The Mercurial build step performs a Mercurial (aka hg) checkout or update.
Branches are available in two modes: dirname like Darcs, or inrepo, which uses the repository internal branches. Make sure this setting matches your changehook, if you have that installed.
The Mercurial step takes the following arguments:
- repourl
- (required unless baseURL is provided): the URL at which the Mercurial source repository is available.
- baseURL
- (required unless repourl is provided): the base repository URL, to which a branch name will be appended. It should probably end in a slash.
- defaultBranch
- (allowed if and only if baseURL is provided): this specifies the name of the branch to use when a Build does not provide one of its own. This will be appended to baseURL to create the string that will be passed to the hg clone command.
- branchType
- either 'dirname' (default) or 'inrepo' depending on whether the branch name should be appended to the baseURL or the branch is a Mercurial named branch and can be found within the repourl.
- clobberOnBranchChange
- boolean, defaults to True. If set and using inrepos branches, clobber the tree at each branch change. Otherwise, just update to the branch.
Bzr (Slave-Side)
bzr is a descendant of Arch/Baz, and is frequently referred to as simply Bazaar. The repository-vs-workspace model is similar to Darcs, but it uses a strictly linear sequence of revisions (one history per branch) like Arch. Branches are put in subdirectories. This makes it look very much like Mercurial. It takes the following arguments:
- repourl
- (required unless baseURL is provided): the URL at which the Bzr source repository is available.
- baseURL
- (required unless repourl is provided): the base repository URL, to which a branch name will be appended. It should probably end in a slash.
- defaultBranch
- (allowed if and only if baseURL is provided): this specifies the name of the branch to use when a Build does not provide one of its own. This will be appended to baseURL to create the string that will be passed to the bzr checkout command.
- forceSharedRepo
- (boolean, optional, defaults to False): If set to True, the working directory will be made into a bzr shared repository if it is not already. Shared repository greatly reduces the amount of history data that needs to be downloaded if not using update/copy mode, or if using update/copy mode with multiple branches.
P4 (Slave-Side)
The P4 (Slave-Side) build step creates a Perforce client specification and performs an update.
- p4base
- A view into the Perforce depot without branch name or trailing "...". Typically //depot/proj/.
- defaultBranch
- A branch name to append on build requests if none is specified. Typically trunk.
- p4port
- (optional): the host:port string describing how to get to the P4 Depot (repository), used as the -p argument for all p4 commands.
- p4user
- (optional): the Perforce user, used as the -u argument to all p4 commands.
- p4passwd
- (optional): the Perforce password, used as the -p argument to all p4 commands.
- p4extra_views
- (optional): a list of (depotpath, clientpath) tuples containing extra views to be mapped into the client specification. Both will have "/..." appended automatically. The client name and source directory will be prepended to the client path.
- p4client
- (optional): The name of the client to use. In mode='copy' and mode='update', it's particularly important that a unique name is used for each checkout directory to avoid incorrect synchronization. For this reason, Python percent substitution will be performed on this value to replace %(slave)s with the slave name and %(builder)s with the builder name. The default is buildbot_%(slave)s_%(build)s.
- p4line_end
- (optional): The type of line ending handling P4 should use. This is added directly to the client spec's LineEnd property. The default is local.
Git (Slave-Side)
The Git build step clones or updates a Git repository and checks out the specified branch or revision. Note that the buildbot supports Git version 1.2.0 and later: earlier versions (such as the one shipped in Ubuntu 'Dapper') do not support the git init command that the buildbot uses.
The Git step takes the following arguments:
- repourl
- (required): the URL of the upstream Git repository.
- branch
- (optional): this specifies the name of the branch to use when a Build does not provide one of its own. If this this parameter is not specified, and the Build does not provide a branch, the master branch will be used.
- ignore_ignores
- (optional): when purging changes, don't use .gitignore and .git/info/exclude.
- submodules
- (optional): when initializing/updating a Git repository, this decides whether or not buildbot should consider Git submodules. Default: False.
- reference
- (optional): use the specified string as a path to a reference repository on the local machine. Git will try to grab objects from this path first instead of the main repository, if they exist.
- shallow
- (optional): instructs Git to attempt shallow clones (--depth 1). If the user/scheduler asks for a specific revision, this parameter is ignored.
- progress
- (optional): passes the (--progress) flag to (git fetch). This solves issues of long fetches being killed due to lack of output, but requires Git 1.7.2 or later.
This Source step integrates with GerritChangeSource, and will automatically use Gerrit's "virtual branch" (refs/changes/*) to download the additionnal changes introduced by a pending changeset.
Gerrit integration can be also triggered using forced build with gerrit_change property with value in format: change_number/patchset_number.
BitKeeper (Slave-Side)
The BK build step performs a BitKeeper checkout or update.
The BitKeeper step takes the following arguments:
- repourl
- (required unless baseURL is provided): the URL at which the BitKeeper source repository is available.
- baseURL
- (required unless repourl is provided): the base repository URL, to which a branch name will be appended. It should probably end in a slash.
Repo (Slave-Side)
- class buildbot.steps.source.Repo
The Repo (Slave-Side) build step performs a Repo init and sync.
This step is obsolete and should not be used anymore. please use: Repo instead
The Repo step takes the following arguments:
- manifest_url
- (required): the URL at which the Repo's manifests source repository is available.
- manifest_branch
- (optional, defaults to master): the manifest repository branch on which repo will take its manifest. Corresponds to the -b argument to the repo init command.
- manifest_file
- (optional, defaults to default.xml): the manifest filename. Corresponds to the -m argument to the repo init command.
- tarball
- (optional, defaults to None): the repo tarball used for fast bootstrap. If not present the tarball will be created automatically after first sync. It is a copy of the .repo directory which contains all the Git objects. This feature helps to minimize network usage on very big projects.
- jobs
- (optional, defaults to None): Number of projects to fetch simultaneously while syncing. Passed to repo sync subcommand with "-j".
This Source step integrates with GerritChangeSource, and will automatically use the repo download command of repo to download the additionnal changes introduced by a pending changeset.
Gerrit integration can be also triggered using forced build with following properties: repo_d, repo_d[0-9], repo_download, repo_download[0-9] with values in format: project/change_number/patchset_number. All of these properties will be translated into a repo download. This feature allows integrators to build with several pending interdependent changes, which at the moment cannot be described properly in Gerrit, and can only be described by humans.
Monotone (Slave-Side)
The Monotone build step performs a Monotone, (aka mtn) checkout or update.
The Monotone step takes the following arguments:
- repourl
- the URL at which the Monotone source repository is available.
- branch
- this specifies the name of the branch to use when a Build does not provide one of its own.
- progress
- this is a boolean that has a pull from the repository use --ticker=dot instead of the default --ticker=none.
ShellCommand
Most interesting steps involve executing a process of some sort on the buildslave. The ShellCommand class handles this activity.
Several subclasses of ShellCommand are provided as starting points for common build steps.
Using ShellCommands
- class buildbot.steps.shell.ShellCommand
This is a useful base class for just about everything you might want to do during a build (except for the initial source checkout). It runs a single command in a child shell on the buildslave. All stdout/stderr is recorded into a LogFile. The step usually finishes with a status of FAILURE if the command's exit code is non-zero, otherwise it has a status of SUCCESS.
The preferred way to specify the command is with a list of argv strings, since this allows for spaces in filenames and avoids doing any fragile shell-escaping. You can also specify the command with a single string, in which case the string is given to /bin/sh -c COMMAND for parsing.
On Windows, commands are run via cmd.exe /c which works well. However, if you're running a batch file, the error level does not get propagated correctly unless you add 'call' before your batch file's name: cmd=['call', 'myfile.bat', ...].
The ShellCommand arguments are:
- command
a list of strings (preferred) or single string (discouraged) which specifies the command to be run. A list of strings is preferred because it can be used directly as an argv array. Using a single string (with embedded spaces) requires the buildslave to pass the string to /bin/sh for interpretation, which raises all sorts of difficult questions about how to escape or interpret shell metacharacters.
If command contains nested lists (for example, from a properties substitution), then that list will be flattened before it is executed.
On the topic of shell metacharacters, note that in DOS the pipe character (|) is conditionally escaped (to ^|) when it occurs inside a more complex string in a list of strings. It remains unescaped when it occurs as part of a single string or as a lone pipe in a list of strings.
- workdir
All ShellCommands are run by default in the workdir, which defaults to the build subdirectory of the slave builder's base directory. The absolute path of the workdir will thus be the slave's basedir (set as an option to buildslave create-slave, Creating a buildslave) plus the builder's basedir (set in the builder's builddir key in master.cfg) plus the workdir itself (a class-level attribute of the BuildFactory, defaults to build).
For example:
from buildbot.steps.shell import ShellCommand
f.addStep(ShellCommand(command=["make", "test"],
                       workdir="build/tests"))
- env
a dictionary of environment strings which will be added to the child command's environment. For example, to run tests with a different i18n language setting, you might use
from buildbot.steps.shell import ShellCommand
f.addStep(ShellCommand(command=["make", "test"],
                       env={'LANG': 'fr_FR'}))
These variable settings will override any existing ones in the buildslave's environment or the environment specified in the Builder. The exception is PYTHONPATH, which is merged with (actually prepended to) any existing PYTHONPATH setting. The following example will prepend /home/buildbot/lib/python to any existing PYTHONPATH:
from buildbot.steps.shell import ShellCommand
f.addStep(ShellCommand(
              command=["make", "test"],
              env={'PYTHONPATH': "/home/buildbot/lib/python"}))
To avoid the need of concatenating path together in the master config file, if the value is a list, it will be joined together using the right platform dependant separator.
Those variables support expansion so that if you just want to prepend /home/buildbot/bin to the PATH environment variable, you can do it by putting the value ${PATH} at the end of the value like in the example below. Variables that don't exist on the slave will be replaced by "".
from buildbot.steps.shell import ShellCommand
f.addStep(ShellCommand(
              command=["make", "test"],
              env={'PATH': ["/home/buildbot/bin",
                            "${PATH}"]}))
Note that environment values must be strings (or lists that are turned into strings). In particular, numeric properties such as buildnumber must be substituted using Interpolate.
- want_stdout
- if False, stdout from the child process is discarded rather than being sent to the buildmaster for inclusion in the step's LogFile.
- want_stderr
- like want_stdout but for stderr. Note that commands run through a PTY do not have separate stdout/stderr streams: both are merged into stdout.
- usePTY
Should this command be run in a pty? The default is to observe the configuration of the client (Buildslave Options), but specifying True or False here will override the default. This option is not available on Windows.
In general, you do not want to use a pseudo-terminal. This is is only useful for running commands that require a terminal - for example, testing a command-line application that will only accept passwords read from a terminal. Using a pseudo-terminal brings lots of compatibility problems, and prevents Buildbot from distinguishing the standard error (red) and standard output (black) streams.
In previous versions, the advantage of using a pseudo-terminal was that grandchild processes were more likely to be cleaned up if the build was interrupted or times out. This occurred because using a pseudo-terminal incidentally puts the command into its own process group.
As of Buildbot-0.8.4, all commands are placed in process groups, and thus grandchild processes will be cleaned up properly.
- logfiles
Sometimes commands will log interesting data to a local file, rather than emitting everything to stdout or stderr. For example, Twisted's trial command (which runs unit tests) only presents summary information to stdout, and puts the rest into a file named _trial_temp/test.log. It is often useful to watch these files as the command runs, rather than using /bin/cat to dump their contents afterwards.
The logfiles= argument allows you to collect data from these secondary logfiles in near-real-time, as the step is running. It accepts a dictionary which maps from a local Log name (which is how the log data is presented in the build results) to either a remote filename (interpreted relative to the build's working directory), or a dictionary of options. Each named file will be polled on a regular basis (every couple of seconds) as the build runs, and any new text will be sent over to the buildmaster.
If you provide a dictionary of options instead of a string, you must specify the filename key. You can optionally provide a follow key which is a boolean controlling whether a logfile is followed or concatenated in its entirety. Following is appropriate for logfiles to which the build step will append, where the pre-existing contents are not interesting. The default value for follow is False, which gives the same behavior as just providing a string filename.
from buildbot.steps.shell import ShellCommand
f.addStep(ShellCommand(
              command=["make", "test"],
              logfiles={"triallog": "_trial_temp/test.log"}))
The above example will add a log named 'triallog' on the master, based on _trial_temp/test.log on the slave.
from buildbot.steps.shell import ShellCommand
f.addStep(ShellCommand(
              command=["make", "test"],
              logfiles={"triallog": {"filename": "_trial_temp/test.log",
                   "follow": True,}}))
- lazylogfiles
- If set to True, logfiles will be tracked lazily, meaning that they will only be added when and if something is written to them. This can be used to suppress the display of empty or missing log files. The default is False.
- timeout
- if the command fails to produce any output for this many seconds, it is assumed to be locked up and will be killed. This defaults to 1200 seconds. Pass None to disable.
- maxTime
- if the command takes longer than this many seconds, it will be killed. This is disabled by default.
- description
- This will be used to describe the command (on the Waterfall display) while the command is still running. It should be a single imperfect-tense verb, like compiling or testing. The preferred form is a list of short strings, which allows the HTML displays to create narrower columns by emitting a <br> tag between each word. You may also provide a single string.
- descriptionDone
This will be used to describe the command once it has finished. A simple noun like compile or tests should be used. Like description, this may either be a list of short strings or a single string.
If neither description nor descriptionDone are set, the actual command arguments will be used to construct the description. This may be a bit too wide to fit comfortably on the Waterfall display.
from buildbot.steps.shell import ShellCommand
f.addStep(ShellCommand(command=["make", "test"],
                       description=["testing"],
                       descriptionDone=["tests"]))
- descriptionSuffix
This is an optional suffix appended to the end of the description (ie, after description and descriptionDone). This can be used to distinguish between build steps that would display the same descriptions in the waterfall. This parameter may be set to list of short strings, a single string, or None.
For example, a builder might use the Compile step to build two different codebases. The descriptionSuffix could be set to projectFoo and projectBar, respectively for each step, which will result in the full descriptions compiling projectFoo and compiling projectBar to be shown in the waterfall.
- logEnviron
- If this option is True (the default), then the step's logfile will describe the environment variables on the slave. In situations where the environment is not relevant and is long, it may be easier to set logEnviron=False.
- interruptSignal
- If the command should be interrupted (either by buildmaster or timeout etc.), what signal should be sent to the process, specified by name. By default this is "KILL" (9). Specify "TERM" (15) to give the process a chance to cleanup. This functionality requires a 0.8.6 slave or newer.
- initialStdin
- If the command expects input on stdin, that can be supplied a a string with this parameter. This value should not be excessively large, as it is handled as a single string throughout Buildbot -- for example, do not pass the contents of a tarball with this parameter.
- decodeRC
- This is a dictionary that decodes exit codes into results value. e.g: {0:SUCCESS,1:FAILURE,2:WARNINGS}, will treat the exit code 2 as WARNINGS. The default is to treat just 0 as successful. ({0:SUCCESS}) any exit code not present in the dictionary will be treated as FAILURE
Configure
- class buildbot.steps.shell.Configure
This is intended to handle the ./configure step from autoconf-style projects, or the perl Makefile.PL step from perl MakeMaker.pm-style modules. The default command is ./configure but you can change this by providing a command= parameter. The arguments are identical to ShellCommand.
from buildbot.steps.shell import Configure
f.addStep(Configure())
Compile
This is meant to handle compiling or building a project written in C. The default command is make all. When the compile is finished, the log file is scanned for GCC warning messages, a summary log is created with any problems that were seen, and the step is marked as WARNINGS if any were discovered. Through the WarningCountingShellCommand superclass, the number of warnings is stored in a Build Property named warnings-count, which is accumulated over all Compile steps (so if two warnings are found in one step, and three are found in another step, the overall build will have a warnings-count property of 5). Each step can be optionally given a maximum number of warnings via the maxWarnCount parameter. If this limit is exceeded, the step will be marked as a failure.
The default regular expression used to detect a warning is '.*warning[: ].*' , which is fairly liberal and may cause false-positives. To use a different regexp, provide a warningPattern= argument, or use a subclass which sets the warningPattern attribute:
from buildbot.steps.shell import Compile
f.addStep(Compile(command=["make", "test"],
                  warningPattern="^Warning: "))
The warningPattern= can also be a pre-compiled Python regexp object: this makes it possible to add flags like re.I (to use case-insensitive matching).
Note that the compiled warningPattern will have its match method called, which is subtly different from a search. Your regular expression must match the from the beginning of the line. This means that to look for the word "warning" in the middle of a line, you will need to prepend '.*' to your regular expression.
The suppressionFile= argument can be specified as the (relative) path of a file inside the workdir defining warnings to be suppressed from the warning counting and log file. The file will be uploaded to the master from the slave before compiling, and any warning matched by a line in the suppression file will be ignored. This is useful to accept certain warnings (eg. in some special module of the source tree or in cases where the compiler is being particularly stupid), yet still be able to easily detect and fix the introduction of new warnings.
The file must contain one line per pattern of warnings to ignore. Empty lines and lines beginning with # are ignored. Other lines must consist of a regexp matching the file name, followed by a colon (:), followed by a regexp matching the text of the warning. Optionally this may be followed by another colon and a line number range. For example:
# Sample warning suppression file

mi_packrec.c : .*result of 32-bit shift implicitly converted to 64 bits.* : 560-600
DictTabInfo.cpp : .*invalid access to non-static.*
kernel_types.h : .*only defines private constructors and has no friends.* : 51
If no line number range is specified, the pattern matches the whole file; if only one number is given it matches only on that line.
The default warningPattern regexp only matches the warning text, so line numbers and file names are ignored. To enable line number and file name matching, provide a different regexp and provide a function (callable) as the argument of warningExtractor=. The function is called with three arguments: the BuildStep object, the line in the log file with the warning, and the SRE_Match object of the regexp search for warningPattern. It should return a tuple (filename, linenumber, warning_test). For example:
f.addStep(Compile(command=["make"],
                  warningPattern="^(.\*?):([0-9]+): [Ww]arning: (.\*)$",
                  warningExtractor=Compile.warnExtractFromRegexpGroups,
                  suppressionFile="support-files/compiler_warnings.supp"))
(Compile.warnExtractFromRegexpGroups is a pre-defined function that returns the filename, linenumber, and text from groups (1,2,3) of the regexp match).
In projects with source files in multiple directories, it is possible to get full path names for file names matched in the suppression file, as long as the build command outputs the names of directories as they are entered into and left again. For this, specify regexps for the arguments directoryEnterPattern= and directoryLeavePattern=. The directoryEnterPattern= regexp should return the name of the directory entered into in the first matched group. The defaults, which are suitable for .. GNU Make, are these:
..     directoryEnterPattern = "make.*: Entering directory [\"`'](.*)['`\"]"
..     directoryLeavePattern = "make.*: Leaving directory"
(TODO: this step needs to be extended to look for GCC error messages as well, and collect them into a separate logfile, along with the source code filenames involved).
Visual C++
These steps are meant to handle compilation using Microsoft compilers. VC++ 6-11 (aka Visual Studio 2003-2012 and VCExpress9) are supported via calling devenv. VS2012 as well as Windows Driver Kit 8 are supported via the new MsBuild step. These steps will take care of setting up a clean compilation environment, parsing the generated output in real time and delivering as detailed as possible information about the compilation executed.
All of the classes are in buildbot.steps.vstudio. The available classes are:
- VC6
- VC7
- VC8
- VC9
- VC10
- VC11
- VS2003
- VS2005
- VS2008
- VS2010
- VS2012
- VCExpress9
- MsBuild
The available constructor arguments are
- mode
- The mode default to rebuild, which means that first all the remaining object files will be cleaned by the compiler. The alternate values are build, where only the updated files will be recompiled, and clean, where the current build files are removed and no compilation occurs.
- projectfile
- This is a mandatory argument which specifies the project file to be used during the compilation.
- config
- This argument defaults to release an gives to the compiler the configuration to use.
- installdir
- This is the place where the compiler is installed. The default value is compiler specific and is the default place where the compiler is installed.
- useenv
- This boolean parameter, defaulting to False instruct the compiler to use its own settings or the one defined through the environment variables PATH, INCLUDE, and LIB. If any of the INCLUDE or LIB parameter is defined, this parameter automatically switches to True.
- PATH
- This is a list of path to be added to the PATH environment variable. The default value is the one defined in the compiler options.
- INCLUDE
- This is a list of path where the compiler will first look for include files. Then comes the default paths defined in the compiler options.
- LIB
- This is a list of path where the compiler will first look for libraries. Then comes the default path defined in the compiler options.
- arch
- That one is only available with the class VS2005 (VC8). It gives the target architecture of the built artifact. It defaults to x86 and does not apply to MsBuild. Please see platform below.
- project
- This gives the specific project to build from within a workspace. It defaults to building all projects. This is useful for building cmake generate projects.
- platform
- This is a mandatory argument for MsBuild specifying the target platform such as 'Win32', 'x64' or 'Vista Debug'. The last one is an example of driver targets that appear once Windows Driver Kit 8 is installed.
Here is an example on how to drive compilation with Visual Studio 2010:
from buildbot.steps.VisualStudio import VS2010

f.addStep(
    VS2010(projectfile="project.sln", config="release",
        arch="x64", mode="build",
           INCLUDE=[r'C:\3rd-pary\libmagic\include'],
           LIB=[r'C:\3rd-party\libmagic\lib-x64']))
Here is a similar example using "msbuild":
from buildbot.steps.VisualStudio import MsBuild

# Build one project in Release mode for Win32
f.addStep(
    MsBuild(projectfile="trunk.sln", config="Release", platform="Win32",
            workdir="trunk",
            project="tools\\protoc"))

# Build the entire solution in Debug mode for x64
f.addStep(
    MsBuild(projectfile="trunk.sln", config='Debug', platform='x64',
            workdir="trunk"))
Test
from buildbot.steps.shell import Test
f.addStep(Test())
This is meant to handle unit tests. The default command is make test, and the warnOnFailure flag is set. The other arguments are identical to ShellCommand.
TreeSize
from buildbot.steps.shell import TreeSize
f.addStep(TreeSize())
This is a simple command that uses the du tool to measure the size of the code tree. It puts the size (as a count of 1024-byte blocks, aka 'KiB' or 'kibibytes') on the step's status text, and sets a build property named tree-size-KiB with the same value. All arguments are identical to ShellCommand.
PerlModuleTest
from buildbot.steps.shell import PerlModuleTest
f.addStep(PerlModuleTest())
This is a simple command that knows how to run tests of perl modules. It parses the output to determine the number of tests passed and failed and total number executed, saving the results for later query. The command is prove --lib lib -r t, although this can be overridden with the command argument. All other arguments are identical to those for ShellCommand.
MTR (mysql-test-run)
The MTR class is a subclass of Test. It is used to run test suites using the mysql-test-run program, as used in MySQL, Drizzle, MariaDB, and MySQL storage engine plugins.
The shell command to run the test suite is specified in the same way as for the Test class. The MTR class will parse the output of running the test suite, and use the count of tests executed so far to provide more accurate completion time estimates. Any test failures that occur during the test are summarized on the Waterfall Display.
Server error logs are added as additional log files, useful to debug test failures.
Optionally, data about the test run and any test failures can be inserted into a database for further analysis and report generation. To use this facility, create an instance of twisted.enterprise.adbapi.ConnectionPool with connections to the database. The necessary tables can be created automatically by setting autoCreateTables to True, or manually using the SQL found in the mtrlogobserver.py source file.
One problem with specifying a database is that each reload of the configuration will get a new instance of ConnectionPool (even if the connection parameters are the same). To avoid that Buildbot thinks the builder configuration has changed because of this, use the process.mtrlogobserver.EqConnectionPool subclass of ConnectionPool, which implements an equiality operation that avoids this problem.
Example use:
from buildbot.process.mtrlogobserver import MTR, EqConnectionPool
myPool = EqConnectionPool("MySQLdb", "host", "buildbot", "password", "db")
myFactory.addStep(MTR(workdir="mysql-test", dbpool=myPool,
                      command=["perl", "mysql-test-run.pl", "--force"]))
The MTR step's arguments are:
- textLimit
- Maximum number of test failures to show on the waterfall page (to not flood the page in case of a large number of test failures. Defaults to 5.
- testNameLimit
- Maximum length of test names to show unabbreviated in the waterfall page, to avoid excessive column width. Defaults to 16.
- parallel
- Value of --parallel option used for mysql-test-run.pl (number of processes used to run the test suite in parallel). Defaults to 4. This is used to determine the number of server error log files to download from the slave. Specifying a too high value does not hurt (as nonexisting error logs will be ignored), however if using --parallel value greater than the default it needs to be specified, or some server error logs will be missing.
- dbpool
- An instance of twisted.enterprise.adbapi.ConnectionPool, or None. Defaults to None. If specified, results are inserted into the database using the ConnectionPool.
- autoCreateTables
- Boolean, defaults to False. If True (and dbpool is specified), the necessary database tables will be created automatically if they do not exist already. Alternatively, the tables can be created manually from the SQL statements found in the mtrlogobserver.py source file.
- test_type
- Short string that will be inserted into the database in the row for the test run. Defaults to the empty string, but can be specified to identify different types of test runs.
- test_info
- Descriptive string that will be inserted into the database in the row for the test run. Defaults to the empty string, but can be specified as a user-readable description of this particular test run.
- mtr_subdir
- The subdirectory in which to look for server error log files. Defaults to mysql-test, which is usually correct. Interpolate is supported.
SubunitShellCommand
- class buildbot.steps.subunit.SubunitShellCommand
This buildstep is similar to ShellCommand, except that it runs the log content through a subunit filter to extract test and failure counts.
from buildbot.steps.subunit import SubunitShellCommand
f.addStep(SubunitShellCommand(command="make test"))
This runs make test and filters it through subunit. The 'tests' and 'test failed' progress metrics will now accumulate test data from the test run.
If failureOnNoTests is True, this step will fail if no test is run. By default failureOnNoTests is False.
Slave Filesystem Steps
Here are some buildsteps for manipulating the slave's filesystem.
FileExists
This step will assert that a given file exists, failing if it does not. The filename can be specified with a property.
from buildbot.steps.slave import FileExists
f.addStep(FileExists(file='test_data'))
This step requires slave version 0.8.4 or later.
CopyDirectory
This command copies a directory on the slave.
from buildbot.steps.slave import CopyDirectory
f.addStep(CopyDirectory(src="build/data", dest="tmp/data"))
This step requires slave version 0.8.5 or later.
The CopyDirectory step takes the following arguments:
- timeout
- if the copy command fails to produce any output for this many seconds, it is assumed to be locked up and will be killed. This defaults to 120 seconds. Pass None to disable.
- maxTime
- if the command takes longer than this many seconds, it will be killed. This is disabled by default.
RemoveDirectory
This command recursively deletes a directory on the slave.
from buildbot.steps.slave import RemoveDirectory
f.addStep(RemoveDirectory(dir="build/build"))
This step requires slave version 0.8.4 or later.
MakeDirectory
This command creates a directory on the slave.
from buildbot.steps.slave import MakeDirectory
f.addStep(MakeDirectory(dir="build/build"))
This step requires slave version 0.8.5 or later.
Python BuildSteps
Here are some BuildSteps that are specifically useful for projects implemented in Python.
BuildEPYDoc
- class buildbot.steps.python.BuildEPYDoc
epydoc is a tool for generating API documentation for Python modules from their docstrings. It reads all the .py files from your source tree, processes the docstrings therein, and creates a large tree of .html files (or a single .pdf file).
The BuildEPYDoc step will run epydoc to produce this API documentation, and will count the errors and warnings from its output.
You must supply the command line to be used. The default is make epydocs, which assumes that your project has a Makefile with an epydocs target. You might wish to use something like epydoc -o apiref source/PKGNAME instead. You might also want to add --pdf to generate a PDF file instead of a large tree of HTML files.
The API docs are generated in-place in the build tree (under the workdir, in the subdirectory controlled by the -o argument). To make them useful, you will probably have to copy them to somewhere they can be read. A command like rsync -ad apiref/ dev.example.com:~public_html/current-apiref/ might be useful. You might instead want to bundle them into a tarball and publish it in the same place where the generated install tarball is placed.
from buildbot.steps.python import BuildEPYDoc
f.addStep(BuildEPYDoc(command=["epydoc", "-o", "apiref", "source/mypkg"]))
PyFlakes
- class buildbot.steps.python.PyFlakes
PyFlakes is a tool to perform basic static analysis of Python code to look for simple errors, like missing imports and references of undefined names. It is like a fast and simple form of the C lint program. Other tools (like pychecker) provide more detailed results but take longer to run.
The PyFlakes step will run pyflakes and count the various kinds of errors and warnings it detects.
You must supply the command line to be used. The default is make pyflakes, which assumes you have a top-level Makefile with a pyflakes target. You might want to use something like pyflakes . or pyflakes src.
from buildbot.steps.python import PyFlakes
f.addStep(PyFlakes(command=["pyflakes", "src"]))
Sphinx
- class buildbot.steps.python.Sphinx
Sphinx is the Python Documentation Generator. It uses RestructuredText as input format.
The Sphinx step will run sphinx-build or any other program specified in its sphinx argument and count the various warnings and error it detects.
from buildbot.steps.python import Sphinx
f.addStep(Sphinx(sphinx_builddir="_build"))
This step takes the following arguments:
- sphinx_builddir
- (required) Name of the directory where the documentation will be generated.
- sphinx_sourcedir
- (optional, defaulting to .), Name the directory where the conf.py file will be found
- sphinx_builder
- (optional) Indicates the builder to use.
- sphinx
- (optional, defaulting to sphinx-build) Indicates the executable to run.
- tags
- (optional) List of tags to pass to sphinx-build
- defines
- (optional) Dictionary of defines to overwrite values of the conf.py file.
- mode
- (optional) String, one of full or incremental (the default). If set to full, indicates to Sphinx to rebuild everything without re-using the previous build results.
PyLint
Similarly, the PyLint step will run pylint and analyze the results.
You must supply the command line to be used. There is no default.
from buildbot.steps.python import PyLint
f.addStep(PyLint(command=["pylint", "src"]))
Trial
- class buildbot.steps.python_twisted.Trial
This step runs a unit test suite using trial, a unittest-like testing framework that is a component of Twisted Python. Trial is used to implement Twisted's own unit tests, and is the unittest-framework of choice for many projects that use Twisted internally.
Projects that use trial typically have all their test cases in a 'test' subdirectory of their top-level library directory. For example, for a package petmail, the tests might be in petmail/test/test_*.py. More complicated packages (like Twisted itself) may have multiple test directories, like twisted/test/test_*.py for the core functionality and twisted/mail/test/test_*.py for the email-specific tests.
To run trial tests manually, you run the trial executable and tell it where the test cases are located. The most common way of doing this is with a module name. For petmail, this might look like trial petmail.test, which would locate all the test_*.py files under petmail/test/, running every test case it could find in them. Unlike the unittest.py that comes with Python, it is not necessary to run the test_foo.py as a script; you always let trial do the importing and running. The step's tests` parameter controls which tests trial will run: it can be a string or a list of strings.
To find the test cases, the Python search path must allow something like import petmail.test to work. For packages that don't use a separate top-level lib directory, PYTHONPATH=. will work, and will use the test cases (and the code they are testing) in-place. PYTHONPATH=build/lib or PYTHONPATH=build/lib.somearch are also useful when you do a python setup.py build step first. The testpath attribute of this class controls what PYTHONPATH is set to before running trial.
Trial has the ability, through the --testmodule flag, to run only the set of test cases named by special test-case-name tags in source files. We can get the list of changed source files from our parent Build and provide them to trial, thus running the minimal set of test cases needed to cover the Changes. This is useful for quick builds, especially in trees with a lot of test cases. The testChanges parameter controls this feature: if set, it will override tests.
The trial executable itself is typically just trial, and is typically found in the shell search path. It can be overridden with the trial parameter. This is useful for Twisted's own unittests, which want to use the copy of bin/trial that comes with the sources.
To influence the version of Python being used for the tests, or to add flags to the command, set the python parameter. This can be a string (like python2.2) or a list (like ['python2.3', '-Wall']).
Trial creates and switches into a directory named _trial_temp/ before running the tests, and sends the twisted log (which includes all exceptions) to a file named test.log. This file will be pulled up to the master where it can be seen as part of the status output.
from buildbot.steps.python_twisted import Trial
f.addStep(Trial(tests='petmail.test'))
Trial has the ability to run tests on several workers in parallel (beginning with Twisted 12.3.0). Set jobs to the number of workers you want to run. Note that running trial in this way will create multiple log files (named test.N.log, err.N.log and out.N.log starting with N=0) rather than a single test.log.
This step takes the following arguments:
- jobs
- (optional) Number of slave-resident workers to use when running the tests. Defaults to 1 worker. Only works with Twisted>=12.3.0.
RemovePYCs
- class buildbot.steps.python_twisted.RemovePYCs
This is a simple built-in step that will remove .pyc files from the workdir. This is useful in builds that update their source (and thus do not automatically delete .pyc files) but where some part of the build process is dynamically searching for Python modules. Notably, trial has a bad habit of finding old test modules.
from buildbot.steps.python_twisted import RemovePYCs
f.addStep(RemovePYCs())
Transferring Files
- class buildbot.steps.transfer.FileUpload
- class buildbot.steps.transfer.FileDownload
Most of the work involved in a build will take place on the buildslave. But occasionally it is useful to do some work on the buildmaster side. The most basic way to involve the buildmaster is simply to move a file from the slave to the master, or vice versa. There are a pair of steps named FileUpload and FileDownload to provide this functionality. FileUpload moves a file up to the master, while FileDownload moves a file down from the master.
As an example, let's assume that there is a step which produces an HTML file within the source tree that contains some sort of generated project documentation. We want to move this file to the buildmaster, into a ~/public_html directory, so it can be visible to developers. This file will wind up in the slave-side working directory under the name docs/reference.html. We want to put it into the master-side ~/public_html/ref.html, and add a link to the HTML status to the uploaded file.
from buildbot.steps.shell import ShellCommand
from buildbot.steps.transfer import FileUpload
f.addStep(ShellCommand(command=["make", "docs"]))
f.addStep(FileUpload(slavesrc="docs/reference.html",
masterdest="/home/bb/public_html/ref.html",
url="http://somesite/~buildbot/ref.html"))
The masterdest= argument will be passed to os.path.expanduser, so things like ~ will be expanded properly. Non-absolute paths will be interpreted relative to the buildmaster's base directory. Likewise, the slavesrc= argument will be expanded and interpreted relative to the builder's working directory.
Note
The copied file will have the same permissions on the master as on the slave, look at the mode= parameter to set it differently.
To move a file from the master to the slave, use the FileDownload command. For example, let's assume that some step requires a configuration file that, for whatever reason, could not be recorded in the source code repository or generated on the buildslave side:
from buildbot.steps.shell import ShellCommand
from buildbot.steps.transfer import FileDownload
f.addStep(FileDownload(mastersrc="~/todays_build_config.txt",
slavedest="build_config.txt"))
f.addStep(ShellCommand(command=["make", "config"]))
Like FileUpload, the mastersrc= argument is interpreted relative to the buildmaster's base directory, and the slavedest= argument is relative to the builder's working directory. If the buildslave is running in ~buildslave, and the builder's builddir is something like tests-i386, then the workdir is going to be ~buildslave/tests-i386/build, and a slavedest= of foo/bar.html will get put in ~buildslave/tests-i386/build/foo/bar.html. Both of these commands will create any missing intervening directories.
Other Parameters
The maxsize= argument lets you set a maximum size for the file to be transferred. This may help to avoid surprises: transferring a 100MB coredump when you were expecting to move a 10kB status file might take an awfully long time. The blocksize= argument controls how the file is sent over the network: larger blocksizes are slightly more efficient but also consume more memory on each end, and there is a hard-coded limit of about 640kB.
The mode= argument allows you to control the access permissions of the target file, traditionally expressed as an octal integer. The most common value is probably 0755, which sets the x executable bit on the file (useful for shell scripts and the like). The default value for mode= is None, which means the permission bits will default to whatever the umask of the writing process is. The default umask tends to be fairly restrictive, but at least on the buildslave you can make it less restrictive with a --umask command-line option at creation time (Buildslave Options).
The keepstamp= argument is a boolean that, when True, forces the modified and accessed time of the destination file to match the times of the source file. When False (the default), the modified and accessed times of the destination file are set to the current time on the buildmaster.
The url= argument allows you to specify an url that will be displayed in the HTML status. The title of the url will be the name of the item transferred (directory for DirectoryUpload or file for FileUpload). This allows the user to add a link to the uploaded item if that one is uploaded to an accessible place.
Transfering Directories
- class buildbot.steps.transfer.DirectoryUpload
To transfer complete directories from the buildslave to the master, there is a BuildStep named DirectoryUpload. It works like FileUpload, just for directories. However it does not support the maxsize, blocksize and mode arguments. As an example, let's assume an generated project documentation, which consists of many files (like the output of doxygen or epydoc). We want to move the entire documentation to the buildmaster, into a ~/public_html/docs directory, and add a link to the uploaded documentation on the HTML status page. On the slave-side the directory can be found under docs:
from buildbot.steps.shell import ShellCommand
from buildbot.steps.transfer import DirectoryUpload
f.addStep(ShellCommand(command=["make", "docs"]))
f.addStep(DirectoryUpload(slavesrc="docs",
masterdest="~/public_html/docs",
url="~buildbot/docs"))
The DirectoryUpload step will create all necessary directories and transfers empty directories, too.
The maxsize and blocksize parameters are the same as for FileUpload, although note that the size of the transferred data is implementation-dependent, and probably much larger than you expect due to the encoding used (currently tar).
The optional compress argument can be given as 'gz' or 'bz2' to compress the datastream.
Note
The permissions on the copied files will be the same on the master as originally on the slave, see buildslave create-slave --umask to change the default one.
Transfering Strings
- class buildbot.steps.transfer.StringDownload
- class buildbot.steps.transfer.JSONStringDownload
- class buildbot.steps.transfer.JSONPropertiesDownload
Sometimes it is useful to transfer a calculated value from the master to the slave. Instead of having to create a temporary file and then use FileDownload, you can use one of the string download steps.
from buildbot.steps.transfer import StringDownload
f.addStep(StringDownload(Interpolate("%(src::branch)s-%(prop:got_revision)s\n"),
slavedest="buildid.txt"))
StringDownload works just like FileDownload except it takes a single argument, s, representing the string to download instead of a mastersrc argument.
from buildbot.steps.transfer import JSONStringDownload
buildinfo = { branch: Property('branch'), got_revision: Property('got_revision') }
f.addStep(JSONStringDownload(buildinfo, slavedest="buildinfo.json"))
JSONStringDownload is similar, except it takes an o argument, which must be JSON serializable, and transfers that as a JSON-encoded string to the slave.
from buildbot.steps.transfer import JSONPropertiesDownload
f.addStep(JSONPropertiesDownload(slavedest="build-properties.json"))
JSONPropertiesDownload transfers a json-encoded string that represents a dictionary where properties maps to a dictionary of build property name to property value; and sourcestamp represents the build's sourcestamp.
Running Commands on the Master
- class buildbot.steps.master.MasterShellCommand
Occasionally, it is useful to execute some task on the master, for example to create a directory, deploy a build result, or trigger some other centralized processing. This is possible, in a limited fashion, with the MasterShellCommand step.
This step operates similarly to a regular ShellCommand, but executes on the master, instead of the slave. To be clear, the enclosing Build object must still have a slave object, just as for any other step -- only, in this step, the slave does not do anything.
In this example, the step renames a tarball based on the day of the week.
from buildbot.steps.transfer import FileUpload
from buildbot.steps.master import MasterShellCommand
f.addStep(FileUpload(slavesrc="widgetsoft.tar.gz",
masterdest="/var/buildoutputs/widgetsoft-new.tar.gz"))
f.addStep(MasterShellCommand(command="""
cd /var/buildoutputs;
mv widgetsoft-new.tar.gz widgetsoft-`date +%a`.tar.gz"""))
Note
By default, this step passes a copy of the buildmaster's environment variables to the subprocess. To pass an explicit environment instead, add an env={..} argument.
Environment variables constructed using the env argument support expansion so that if you just want to prepend /home/buildbot/bin to the PATH environment variable, you can do it by putting the value ${PATH} at the end of the value like in the example below. Variables that don't exist on the master will be replaced by "".
from buildbot.steps.master import MasterShellCommand
f.addStep(MasterShellCommand(
command=["make", "www"],
env={'PATH': ["/home/buildbot/bin",
"${PATH}"]}))
Note that environment values must be strings (or lists that are turned into strings). In particular, numeric properties such as buildnumber must be substituted using Interpolate.
- interruptSignal
- (optional) Signal to use to end the process, if the step is interrupted.
Setting Properties
These steps set properties on the master based on information from the slave.
SetProperty
- class buildbot.steps.master.SetProperty
SetProperty takes two arguments of property and value where the value is to be assigned to the property key. It is usually called with the value argument being specifed as a Interpolate object which allows the value to be built from other property values:
from buildbot.steps.master import SetProperty
from buildbot.process.properties import Interpolate
f.addStep(SetProperty(property="SomeProperty",
value=Interpolate("sch=%(prop:scheduler)s, slave=%(prop:slavename)s")))
SetPropertyFromCommand
- class buildbot.steps.shell.SetPropertyFromCommand
This buildstep is similar to ShellCommand, except that it captures the output of the command into a property. It is usually used like this:
from buildbot.steps import shell
f.addStep(shell.SetPropertyFromCommand(command="uname -a", property="uname"))
This runs uname -a and captures its stdout, stripped of leading and trailing whitespace, in the property uname. To avoid stripping, add strip=False.
The property argument can be specified as a Interpolate object, allowing the property name to be built from other property values.
The more advanced usage allows you to specify a function to extract properties from the command output. Here you can use regular expressions, string interpolation, or whatever you would like. In this form, extract_fn should be passed, and not Property. The extract_fn function is called with three arguments: the exit status of the command, its standard output as a string, and its standard error as a string. It should return a dictionary containing all new properties.
def glob2list(rc, stdout, stderr):
jpgs = [ l.strip() for l in stdout.split('\n') ]
return { 'jpgs' : jpgs }
f.addStep(SetPropertyFromCommand(command="ls -1 *.jpg", extract_fn=glob2list))
Note that any ordering relationship of the contents of stdout and stderr is lost. For example, given
f.addStep(SetPropertyFromCommand(
command="echo output1; echo error >&2; echo output2",
extract_fn=my_extract))
Then my_extract will see stdout="output1\noutput2\n" and stderr="error\n".
- class buildbot.steps.slave.SetPropertiesFromEnv
SetPropertiesFromEnv
Buildbot slaves (later than version 0.8.3) provide their environment variables to the master on connect. These can be copied into Buildbot properties with the SetPropertiesFromEnv step. Pass a variable or list of variables in the variables parameter, then simply use the values as properties in a later step.
Note that on Windows, environment variables are case-insensitive, but Buildbot property names are case sensitive. The property will have exactly the variable name you specify, even if the underlying environment variable is capitalized differently. If, for example, you use variables=['Tmp'], the result will be a property named Tmp, even though the environment variable is displayed as TMP in the Windows GUI.
from buildbot.steps.slave import SetPropertiesFromEnv
from buildbot.steps.shell import Compile
f.addStep(SetPropertiesFromEnv(variables=["SOME_JAVA_LIB_HOME", "JAVAC"]))
f.addStep(Compile(commands=[Interpolate("%(prop:JAVAC)s"), "-cp", Interpolate("%(prop:SOME_JAVA_LIB_HOME)s")))
Note that this step requires that the Buildslave be at least version 0.8.3. For previous versions, no environment variables are available (the slave environment will appear to be empty).
Triggering Schedulers
The counterpart to the Triggerable described in section Triggerable is the Trigger build step:
from buildbot.steps.trigger import Trigger
f.addStep(Trigger(schedulerNames=['build-prep'],
waitForFinish=True,
updateSourceStamp=True,
set_properties={ 'quick' : False })
The schedulerNames= argument lists the Triggerable schedulers that should be triggered when this step is executed. Note that it is possible, but not advisable, to create a cycle where a build continually triggers itself, because the schedulers are specified by name.
If waitForFinish is True, then the step will not finish until all of the builds from the triggered schedulers have finished. Hyperlinks are added to the waterfall and the build detail web pages for each triggered build. If this argument is False (the default) or not given, then the buildstep succeeds immediately after triggering the schedulers.
The SourceStamps to use for the triggered build are controlled by the arguments updateSourceStamp, alwaysUseLatest, and sourceStamps. If updateSourceStamp is True (the default), then step updates the SourceStamp`s given to the :bb:sched:`Triggerable schedulers to include got_revision (the revision actually used in this build) as revision (the revision to use in the triggered builds). This is useful to ensure that all of the builds use exactly the same SourceStamp`s, even if other :class:`Changes have occurred while the build was running. If updateSourceStamp is False (and neither of the other arguments are specified), then the exact same SourceStamps are used. If alwaysUseLatest is True, then no SourceStamps are given, corresponding to using the latest revisions of the repositories specified in the Source steps. This is useful if the triggered builds use to a different source repository. The argument sourceStamps accepts a list of dictionaries containing the keys branch, revision, repository, project, and optionally patch_level, patch_body, patch_subdir, patch_author and patch_comment and creates the corresponding SourceStamps. If only one sourceStamp has to be specified then the argument sourceStamp can be used for a dictionary containing the keys mentioned above. The arguments updateSourceStamp, alwaysUseLatest, and sourceStamp can be specified using properties.
The set_properties parameter allows control of the properties that are passed to the triggered scheduler. The parameter takes a dictionary mapping property names to values. You may use Interpolate here to dynamically construct new property values. For the simple case of copying a property, this might look like
set_properties={"my_prop1" : Property("my_prop1")}
The copy_properties parameter, given a list of properties to copy into the new build request, has been deprecated in favor of explicit use of set_properties.
Debian Build Steps
DebPbuilder
The DebPbuilder step builds Debian packages within a chroot built by pbuilder. It populates the changeroot with a basic system and the packages listed as build requirement. The type of chroot to build is specified with the distribution, distribution and mirror parameter. To use pbuilder your buildbot must have the right to run pbuilder as root through sudo.
from buildbot.steps.package.deb.pbuilder import DebPbuilder
f.addStep(DebPbuilder())
The step takes the following parameters
- architecture
- Architecture to build chroot for.
- distribution
- Name, or nickname, of the distribution. Defaults to 'stable'.
- basetgz
- Path of the basetgz to use for building.
- mirror
- URL of the mirror used to download the packages from.
- extrapackages
- List if packages to install in addition to the base system.
- keyring
- Path to a gpg keyring to verify the downloaded packages. This is necessary if you build for a foreign distribution.
- components
- Repos to activate for chroot building.
DebCowbuilder
The DebCowbuilder step is a subclass of DebPbuilder, which use cowbuilder instead of pbuilder.
DebLintian
The DebLintian step checks a build .deb for bugs and policy violations. The packages or changes file to test is specified in fileloc
from buildbot.steps.package.deb.lintian import DebLintian
f.addStep(DebLintian(fileloc=Interpolate("%(prop:deb-changes)s")))
Miscellaneous BuildSteps
A number of steps do not fall into any particular category.
HLint
The HLint step runs Twisted Lore, a lint-like checker over a set of .xhtml files. Any deviations from recommended style is flagged and put in the output log.
The step looks at the list of changes in the build to determine which files to check - it does not check all files. It specifically excludes any .xhtml files in the top-level sandbox/ directory.
The step takes a single, optional, parameter: python. This specifies the Python executable to use to run Lore.
from buildbot.steps.python_twisted import HLint
f.addStep(HLint())
MaxQ
MaxQ (http://maxq.tigris.org/) is a web testing tool that allows you to record HTTP sessions and play them back. The MaxQ step runs this framework.
from buildbot.steps.maxq import MaxQ
f.addStep(MaxQ(testdir='tests/'))
The single argument, testdir, specifies where the tests should be run. This directory will be passed to the run_maxq.py command, and the results analyzed.
Interlocks
Until now, we assumed that a master can run builds at any slave whenever needed or desired. Some times, you want to enforce additional constraints on builds. For reasons like limited network bandwidth, old slave machines, or a self-willed data base server, you may want to limit the number of builds (or build steps) that can access a resource.
Access Modes
The mechanism used by Buildbot is known as the read/write lock [1]. It allows either many readers or a single writer but not a combination of readers and writers. The general lock has been modified and extended for use in Buildbot. Firstly, the general lock allows an infinite number of readers. In Buildbot, we often want to put an upper limit on the number of readers, for example allowing two out of five possible builds at the same time. To do this, the lock counts the number of active readers. Secondly, the terms read mode and write mode are confusing in Buildbot context. They have been replaced by counting mode (since the lock counts them) and exclusive mode. As a result of these changes, locks in Buildbot allow a number of builds (up to some fixed number) in counting mode, or they allow one build in exclusive mode.
Note
Access modes are specified when a lock is used. That is, it is possible to have a single lock that is used by several slaves in counting mode, and several slaves in exclusive mode. In fact, this is the strength of the modes: accessing a lock in exclusive mode will prevent all counting-mode accesses.
Count
Often, not all slaves are equal. To allow for this situation, Buildbot allows to have a separate upper limit on the count for each slave. In this way, you can have at most 3 concurrent builds at a fast slave, 2 at a slightly older slave, and 1 at all other slaves.
Scope
The final thing you can specify when you introduce a new lock is its scope. Some constraints are global -- they must be enforced over all slaves. Other constraints are local to each slave. A master lock is used for the global constraints. You can ensure for example that at most one build (of all builds running at all slaves) accesses the data base server. With a slave lock you can add a limit local to each slave. With such a lock, you can for example enforce an upper limit to the number of active builds at a slave, like above.
Examples
Time for a few examples. Below a master lock is defined to protect a data base, and a slave lock is created to limit the number of builds at each slave.
from buildbot import locks
db_lock = locks.MasterLock("database")
build_lock = locks.SlaveLock("slave_builds",
maxCount = 1,
maxCountForSlave = { 'fast': 3, 'new': 2 })
After importing locks from buildbot, db_lock is defined to be a master lock. The database string is used for uniquely identifying the lock. At the next line, a slave lock called build_lock is created. It is identified by the slave_builds string. Since the requirements of the lock are a bit more complicated, two optional arguments are also specified. The maxCount parameter sets the default limit for builds in counting mode to 1. For the slave called 'fast' however, we want to have at most three builds, and for the slave called 'new' the upper limit is two builds running at the same time.
The next step is accessing the locks in builds. Buildbot allows a lock to be used during an entire build (from beginning to end), or only during a single build step. In the latter case, the lock is claimed for use just before the step starts, and released again when the step ends. To prevent deadlocks, [2] it is not possible to claim or release locks at other times.
To use locks, you add them with a locks argument to a build or a step. Each use of a lock is either in counting mode (that is, possibly shared with other builds) or in exclusive mode, and this is indicated with the syntax lock.access(mode), where mode is one of "counting" or "exclusive".
A build or build step proceeds only when it has acquired all locks. If a build or step needs a lot of locks, it may be starved [3] by other builds that need fewer locks.
To illustrate use of locks, a few examples.
from buildbot import locks
from buildbot.steps import source, shell
from buildbot.process import factory
db_lock = locks.MasterLock("database")
build_lock = locks.SlaveLock("slave_builds",
maxCount = 1,
maxCountForSlave = { 'fast': 3, 'new': 2 })
f = factory.BuildFactory()
f.addStep(source.SVN(svnurl="http://example.org/svn/Trunk"))
f.addStep(shell.ShellCommand(command="make all"))
f.addStep(shell.ShellCommand(command="make test",
locks=[db_lock.access('exclusive')]))
b1 = {'name': 'full1', 'slavename': 'fast', 'builddir': 'f1', 'factory': f,
'locks': [build_lock.access('counting')] }
b2 = {'name': 'full2', 'slavename': 'new', 'builddir': 'f2', 'factory': f,
'locks': [build_lock.access('counting')] }
b3 = {'name': 'full3', 'slavename': 'old', 'builddir': 'f3', 'factory': f,
'locks': [build_lock.access('counting')] }
b4 = {'name': 'full4', 'slavename': 'other', 'builddir': 'f4', 'factory': f,
'locks': [build_lock.access('counting')] }
c['builders'] = [b1, b2, b3, b4]
Here we have four slaves b1, b2, b3, and b4. Each slave performs the same checkout, make, and test build step sequence. We want to enforce that at most one test step is executed between all slaves due to restrictions with the data base server. This is done by adding the locks= parameter with the third step. It takes a list of locks with their access mode. In this case only the db_lock is needed. The exclusive access mode is used to ensure there is at most one slave that executes the test step.
In addition to exclusive accessing the data base, we also want slaves to stay responsive even under the load of a large number of builds being triggered. For this purpose, the slave lock called build_lock is defined. Since the restraint holds for entire builds, the lock is specified in the builder with 'locks': [build_lock.access('counting')].
Note that you will occasionally see lock.access(mode) written as LockAccess(lock, mode). The two are equivalent, but the former is preferred.
| [1] | See http://en.wikipedia.org/wiki/Read/write_lock_pattern for more information. |
| [2] | Deadlock is the situation where two or more slaves each hold a lock in exclusive mode, and in addition want to claim the lock held by the other slave exclusively as well. Since locks allow at most one exclusive user, both slaves will wait forever. |
| [3] | Starving is the situation that only a few locks are available, and they are immediately grabbed by another build. As a result, it may take a long time before all locks needed by the starved build are free at the same time. |
Status Targets
The Buildmaster has a variety of ways to present build status to various users. Each such delivery method is a Status Target object in the configuration's status list. To add status targets, you just append more objects to this list:
c['status'] = []
from buildbot.status import html
c['status'].append(html.Waterfall(http_port=8010))
from buildbot.status import mail
m = mail.MailNotifier(fromaddr="buildbot@localhost",
extraRecipients=["builds@lists.example.com"],
sendToInterestedUsers=False)
c['status'].append(m)
from buildbot.status import words
c['status'].append(words.IRC(host="irc.example.com", nick="bb",
channels=[{"channel": "#example1"},
{"channel": "#example2",
"password": "somesecretpassword"}]))
Most status delivery objects take a categories= argument, which can contain a list of category names: in this case, it will only show status for Builders that are in one of the named categories.
Note
Implementation Note
Each of these objects should be a service.MultiService which will be attached to the BuildMaster object when the configuration is processed. They should use self.parent.getStatus() to get access to the top-level IStatus object, either inside startService or later. They may call status.subscribe in startService to receive notifications of builder events, in which case they must define builderAdded and related methods. See the docstrings in buildbot/interfaces.py for full details.
The remainder of this section describes each built-in status target. A full list of status targets is available in the Status Target Index.
WebStatus
- class buildbot.status.web.baseweb.WebStatus
The buildbot.status.html.WebStatus status target runs a small web server inside the buildmaster. You can point a browser at this web server and retrieve information about every build the buildbot knows about, as well as find out what the buildbot is currently working on.
The first page you will see is the Welcome Page, which contains links to all the other useful pages. By default, this page is served from the status/web/templates/root.html file in buildbot's library area.
One of the most complex resource provided by WebStatus is the Waterfall Display, which shows a time-based chart of events. This somewhat-busy display provides detailed information about all steps of all recent builds, and provides hyperlinks to look at individual build logs and source changes. By simply reloading this page on a regular basis, you will see a complete description of everything the buildbot is currently working on.
A similar, but more developer-oriented display is the Grid display. This arranges builds by SourceStamp (horizontal axis) and builder (vertical axis), and can provide quick information as to which revisions are passing or failing on which builders.
There are also pages with more specialized information. For example, there is a page which shows the last 20 builds performed by the buildbot, one line each. Each line is a link to detailed information about that build. By adding query arguments to the URL used to reach this page, you can narrow the display to builds that involved certain branches, or which ran on certain Builders. These pages are described in great detail below.
Configuration
The simplest possible configuration for WebStatus is:
from buildbot.status.html import WebStatus
c['status'].append(WebStatus(8080))
Buildbot uses a templating system for the web interface. The source of these templates can be found in the status/web/templates/ directory in buildbot's library area. You can override these templates by creating alternate versions in a templates/ directory within the buildmaster's base directory.
If that isn't enough you can also provide additional Jinja2 template loaders:
import jinja2
myloaders = [
jinja2.FileSystemLoader("/tmp/mypath"),
]
c['status'].append(html.WebStatus(
…,
jinja_loaders = myloaders,
))
The first time a buildmaster is created, the public_html/ directory is populated with some sample files, which you will probably want to customize for your own project. These files are all static: the buildbot does not modify them in any way as it serves them to HTTP clients.
Templates in templates/ take precedence over static files in public_html/.
The initial robots.txt file has Disallow lines for all of the dynamically-generated buildbot pages, to discourage web spiders and search engines from consuming a lot of CPU time as they crawl through the entire history of your buildbot. If you are running the buildbot behind a reverse proxy, you'll probably need to put the robots.txt file somewhere else (at the top level of the parent web server), and replace the URL prefixes in it with more suitable values.
If you would like to use an alternative root directory, add the public_html= option to the WebStatus creation:
c['status'].append(WebStatus(8080, public_html="/var/www/buildbot"))
In addition, if you are familiar with twisted.web Resource Trees, you can write code to add additional pages at places inside this web space. Just use webstatus.putChild to place these resources.
The following section describes the special URLs and the status views they provide.
Buildbot Web Resources
Certain URLs are magic, and the pages they serve are created by code in various classes in the buildbot.status.web package instead of being read from disk. The most common way to access these pages is for the buildmaster admin to write or modify the index.html page to contain links to them. Of course other project web pages can contain links to these buildbot pages as well.
Many pages can be modified by adding query arguments to the URL. For example, a page which shows the results of the most recent build normally does this for all builders at once. But by appending ?builder=i386 to the end of the URL, the page will show only the results for the i386 builder. When used in this way, you can add multiple builder= arguments to see multiple builders. Remembering that URL query arguments are separated from each other with ampersands, a URL that ends in ?builder=i386&builder=ppc would show builds for just those two Builders.
The branch= query argument can be used on some pages. This filters the information displayed by that page down to only the builds or changes which involved the given branch. Use branch=trunk to reference the trunk: if you aren't intentionally using branches, you're probably using trunk. Multiple branch= arguments can be used to examine multiple branches at once (so appending ?branch=foo&branch=bar to the URL will show builds involving either branch). No branch= arguments means to show builds and changes for all branches.
Some pages may include the Builder name or the build number in the main part of the URL itself. For example, a page that describes Build #7 of the i386 builder would live at /builders/i386/builds/7.
The table below lists all of the internal pages and the URLs that can be used to access them.
- /waterfall
This provides a chronologically-oriented display of the activity of all builders. It is the same display used by the Waterfall display.
By adding one or more builder= query arguments, the Waterfall is restricted to only showing information about the given Builders. By adding one or more branch= query arguments, the display is restricted to showing information about the given branches. In addition, adding one or more category= query arguments to the URL will limit the display to Builders that were defined with one of the given categories.
A show_events=true query argument causes the display to include non-Build events, like slaves attaching and detaching, as well as reconfiguration events. show_events=false hides these events. The default is to show them.
By adding the failures_only=true query argument, the Waterfall is restricted to only showing information about the builders that are currently failing. A builder is considered failing if the last finished build was not successful, a step in the current build(s) is failing, or if the builder is offline.
The last_time=, first_time=, and show_time= arguments will control what interval of time is displayed. The default is to show the latest events, but these can be used to look at earlier periods in history. The num_events= argument also provides a limit on the size of the displayed page.
The Waterfall has references to resources many of the other portions of the URL space: /builders for access to individual builds, /changes for access to information about source code changes, etc.
- /grid
This provides a chronologically oriented display of builders, by revision. The builders are listed down the left side of the page, and the revisions are listed across the top.
By adding one or more category= arguments the grid will be restricted to revisions in those categories.
A width=N argument will limit the number of revisions shown to N, defaulting to 5.
A branch=BRANCHNAME argument will limit the grid to revisions on branch BRANCHNAME.
- /tgrid
The Transposed Grid is similar to the standard grid, but, as the name implies, transposes the grid: the revisions are listed down the left side of the page, and the build hosts are listed across the top. It accepts the same query arguments. The exception being that instead of width the argument is named length.
This page also has a rev_order= query argument that lets you change in what order revisions are shown. Valid values are asc (ascending, oldest revision first) and desc (descending, newest revision first).
- /console
EXPERIMENTAL: This provides a developer-oriented display of the last changes and how they affected the builders.
It allows a developer to quickly see the status of each builder for the first build including his or her change. A green box means that the change succeeded for all the steps for a given builder. A red box means that the changed introduced a new regression on a builder. An orange box means that at least one of the tests failed, but it was also failing in the previous build, so it is not possible to see if there were any regressions from this change. Finally a yellow box means that the test is in progress.
By adding one or more builder= query arguments, the Console view is restricted to only showing information about the given Builders. Adding a repository= argument will limit display to a given repository. By adding one or more branch= query arguments, the display is restricted to showing information about the given branches. In addition, adding one or more category= query arguments to the URL will limit the display to Builders that were defined with one of the given categories. With the project= query argument, it's possible to restrict the view to changes from the given project. With the codebase= query argument, it's possible to restrict the view to changes for the given codebase.
By adding one or more name= query arguments to the URL, the console view is restricted to only showing changes made by the given users.
NOTE: To use this page, your buildbot.css file in public_html must be the one found in master/buildbot/status/web/files/default.css. This is the default for new installs, but upgrades of very old installs of Buildbot may need to manually fix the CSS file.
The console view is still in development. At this moment by default the view sorts revisions lexically, which can lead to odd behavior with non-integer revisions (e.g., Git), or with integer revisions of different length (e.g., 999 and 1000). It also has some issues with displaying multiple branches at the same time. If you do have multiple branches, you should use the branch= query argument. The order_console_by_time option may help sorting revisions, although it depends on the date being set correctly in each commit:
w = html.WebStatus(http_port=8080, order_console_by_time=True)
- /rss
- This provides a rss feed summarizing all failed builds. The same query-arguments used by 'waterfall' can be added to filter the feed output.
- /atom
- This provides an atom feed summarizing all failed builds. The same query-arguments used by 'waterfall' can be added to filter the feed output.
- /json
- This view provides quick access to Buildbot status information in a form that is easily digested from other programs, including JavaScript. See /json/help for detailed interactive documentation of the output formats for this view.
- /buildstatus?builder=$BUILDERNAME&number=$BUILDNUM
- This displays a waterfall-like chronologically-oriented view of all the steps for a given build number on a given builder.
- /builders/$BUILDERNAME
- This describes the given Builder and provides buttons to force a build. A numbuilds= argument will control how many build lines are displayed (5 by default).
- /builders/$BUILDERNAME/builds/$BUILDNUM
- This describes a specific Build.
- /builders/$BUILDERNAME/builds/$BUILDNUM/steps/$STEPNAME
- This describes a specific BuildStep.
- /builders/$BUILDERNAME/builds/$BUILDNUM/steps/$STEPNAME/logs/$LOGNAME
- This provides an HTML representation of a specific logfile.
- /builders/$BUILDERNAME/builds/$BUILDNUM/steps/$STEPNAME/logs/$LOGNAME/text
- This returns the logfile as plain text, without any HTML coloring markup. It also removes the headers, which are the lines that describe what command was run and what the environment variable settings were like. This maybe be useful for saving to disk and feeding to tools like grep.
- /changes
- This provides a brief description of the ChangeSource in use (see Change Sources).
- /changes/NN
- This shows detailed information about the numbered Change: who was the author, what files were changed, what revision number was represented, etc.
- /buildslaves
This summarizes each BuildSlave, including which Builders are configured to use it, whether the buildslave is currently connected or not, and host information retrieved from the buildslave itself.
A no_builders=1 URL argument will omit the builders column. This is useful if each buildslave is assigned to a large number of builders.
- /one_line_per_build
This page shows one line of text for each build, merging information from all Builders [1]. Each line specifies the name of the Builder, the number of the Build, what revision it used, and a summary of the results. Successful builds are in green, while failing builds are in red. The date and time of the build are added to the right-hand edge of the line. The lines are ordered by build finish timestamp.
One or more builder= or branch= arguments can be used to restrict the list. In addition, a numbuilds= argument will control how many lines are displayed (20 by default).
- /builders
This page shows a small table, with one box for each Builder, containing the results of the most recent Build. It does not show the individual steps, or the current status. This is a simple summary of buildbot status: if this page is green, then all tests are passing.
As with /one_line_per_build, this page will also honor builder= and branch= arguments.
- /users
- This page exists for authentication reasons when checking showUsersPage. It'll redirect to /authfail on False, /users/table on True, and give a username/password login prompt on 'auth'. Passing or failing results redirect to the same pages as False and True.
- /users/table
- This page shows a table containing users that are stored in the database. It has columns for their respective uid and identifier values, with the uid values being clickable for more detailed information relating to a user.
- /users/table/{NN}
- Shows all the attributes stored in the database relating to the user with uid {NN} in a table.
- /about
- This page gives a brief summary of the Buildbot itself: software version, versions of some libraries that the Buildbot depends upon, etc. It also contains a link to the buildbot.net home page.
There are also a set of web-status resources that are intended for use by other programs, rather than humans.
- /change_hook
- This provides an endpoint for web-based source change notification. It is used by GitHub and contrib/post_build_request.py. See Change Hooks for more details.
WebStatus Configuration Parameters
The most common way to run a WebStatus is on a regular TCP port. To do this, just pass in the TCP port number when you create the WebStatus instance; this is called the http_port argument:
from buildbot.status.html import WebStatus
c['status'].append(WebStatus(http_port=8080))
The http_port argument is actually a strports specification for the port that the web server should listen on. This can be a simple port number, or a string like http_port="tcp:8080:interface=127.0.0.1" (to limit connections to the loopback interface, and therefore to clients running on the same host) [2].
If instead (or in addition) you provide the distrib_port argument, a twisted.web distributed server will be started either on a TCP port (if distrib_port is like "tcp:12345") or more likely on a UNIX socket (if distrib_port is like "unix:/path/to/socket").
The public_html option gives the path to a regular directory of HTML files that will be displayed alongside the various built-in URLs buildbot supplies. This is most often used to supply CSS files (/buildbot.css) and a top-level navigational file (/index.html), but can also serve any other files required - even build results!
The buildbot web status is, by default, read-only. It displays lots of information, but users are not allowed to affect the operation of the buildmaster. However, there are a number of supported activities that can be enabled, and Buildbot can also perform rudimentary username/password authentication. The actions are:
- forceBuild
- force a particular builder to begin building, optionally with a specific revision, branch, etc.
- forceAllBuilds
- force all builders to start building
- pingBuilder
- "ping" a builder's buildslaves to check that they are alive
- gracefulShutdown
- gracefully shut down a slave when it is finished with its current build
- pauseSlave
- temporarily stop running new builds on a slave
- stopBuild
- stop a running build
- stopAllBuilds
- stop all running builds
- cancelPendingBuild
- cancel a build that has not yet started
- stopChange
- cancel builds that include a given change number
- cleanShutdown
- shut down the master gracefully, without interrupting builds
- showUsersPage
- access to page displaying users in the database, see User Objects
For each of these actions, you can configure buildbot to never allow the action, always allow the action, allow the action to any authenticated user, or check with a function of your creation to determine whether the action is OK (see below).
This is all configured with the Authz class:
from buildbot.status.html import WebStatus
from buildbot.status.web.authz import Authz
authz = Authz(
forceBuild=True,
stopBuild=True)
c['status'].append(WebStatus(http_port=8080, authz=authz))
Each of the actions listed above is an option to Authz. You can specify False (the default) to prohibit that action or True to enable it. Or you can specify a callable. Each such callable will take a username as its first argument. The remaining arguments vary depending on the type of authorization request. For forceBuild, the second argument is the builder status.
If you do not wish to allow strangers to perform actions, but do want developers to have such access, you will need to add some authentication support. Pass an instance of status.web.auth.IAuth as a auth keyword argument to Authz, and specify the action as "auth".
from buildbot.status.html import WebStatus
from buildbot.status.web.authz import Authz
from buildbot.status.web.auth import BasicAuth
users = [('bob', 'secret-pass'), ('jill', 'super-pass')]
authz = Authz(auth=BasicAuth(users),
forceBuild='auth', # only authenticated users
pingBuilder=True, # but anyone can do this
)
c['status'].append(WebStatus(http_port=8080, authz=authz))
# or
from buildbot.status.web.auth import HTPasswdAuth
auth = (HTPasswdAuth('/path/to/htpasswd'))
# or
from buildbot.status.web.auth import UsersAuth
auth = UsersAuth()
The class BasicAuth implements a basic authentication mechanism using a list of user/password tuples provided from the configuration file. The class HTPasswdAuth implements an authentication against an .htpasswd file. The HTPasswdAprAuth a subclass of HTPasswdAuth use libaprutil for authenticating. This adds support for apr1/md5 and sha1 password hashes but requires libaprutil at runtime. The UsersAuth works with User Objects to check for valid user credentials.
If you need still-more flexibility, pass a function for the authentication action. That function will be called with an authenticated username and some action-specific arguments, and should return true if the action is authorized.
def canForceBuild(username, builder_status):
if builder_status.getName() == 'smoketest':
return True # any authenticated user can run smoketest
elif username == 'releng':
return True # releng can force whatever they want
else:
return False # otherwise, no way.
authz = Authz(auth=BasicAuth(users),
forceBuild=canForceBuild)
The forceBuild and pingBuilder actions both supply a BuilderStatus object. The stopBuild action supplies a BuildStatus object. The cancelPendingBuild action supplies a BuildRequest. The remainder do not supply any extra arguments.
In case if WebStatus is served through reverse proxy that supports HTTP-based authentication (like apache, lighttpd), it's possible to to tell WebStatus to trust web server and get username from request headers. This allows displaying correct usernames in build reason, interrupt messages, etc.
Just set useHttpHeader to True in Authz constructor.
authz = Authz(useHttpHeader=True) # WebStatus secured by web frontend with HTTP auth
Please note that WebStatus can decode password for HTTP Basic requests only (for Digest authentication it's just impossible). Custom status.web.auth.IAuth subclasses may just ignore password at all since it's already validated by web server.
Administrator must make sure that it's impossible to get access to WebStatus using other way than through frontend. Usually this means that WebStatus should listen for incoming connections only on localhost (or on some firewall-protected port). Frontend must require HTTP authentication to access WebStatus pages (using any source for credentials, such as htpasswd, PAM, LDAP).
If you allow unauthenticated access through frontend as well, it's possible to specify a httpLoginLink which will be rendered on the WebStatus for unauthenticated users as a link named Login.
authz = Authz(useHttpHeader=True, httpLoginLink='https://buildbot/login')
A configuration example with Apache HTTPD as reverse proxy could look like the following.
authz = Authz(
useHttpHeader=True,
httpLoginLink='https://buildbot/login',
auth = HTPasswdAprAuth('/var/www/htpasswd'),
forceBuild = 'auth')
Corresponding Apache configuration.
ProxyPass / http://127.0.0.1:8010/
<Location /login>
AuthType Basic
AuthName "Buildbot"
AuthUserFile /var/www/htpasswd
Require valid-user
RewriteEngine on
RewriteCond %{HTTP_REFERER} ^https?://([^/]+)/(.*)$
RewriteRule ^.*$ https://%1/%2 [R,L]
</Location>
The WebStatus uses a separate log file (http.log) to avoid clutter buildbot's default log (twistd.log) with request/response messages. This log is also, by default, rotated in the same way as the twistd.log file, but you can also customize the rotation logic with the following parameters if you need a different behaviour.
- rotateLength
- An integer defining the file size at which log files are rotated.
- maxRotatedFiles
- The maximum number of old log files to keep.
These arguments adds an URL link to various places in the WebStatus, such as revisions, repositories, projects and, optionally, ticket/bug references in change comments.
The revlink argument on WebStatus is deprecated in favour of the global revlink option. Only use this if you need to generate different URLs for different web status instances.
In addition to a callable like revlink, this argument accepts a format string or a dict mapping a string (repository name) to format strings.
The format string should use %s to insert the revision id in the url. For example, for Buildbot on GitHub:
revlink='http://github.com/buildbot/buildbot/tree/%s'
The revision ID will be URL encoded before inserted in the replacement string
The changecommentlink argument can be used to create links to ticket-ids from change comments (i.e. #123).
The argument can either be a tuple of three strings, a dictionary mapping strings (project names) to tuples or a callable taking a changetext (a jinja2.Markup instance) and a project name, returning a the same change text with additional links/html tags added to it.
If the tuple is used, it should contain three strings where the first element is a regex that searches for strings (with match groups), the second is a replace-string that, when substituted with \1 etc, yields the URL and the third is the title attribute of the link. (The <a href="" title=""></a> is added by the system.) So, for Trac tickets (#42, etc): changecommentlink(r"#(\d+)", r"http://buildbot.net/trac/ticket/\1", r"Ticket \g<0>") .
A dictionary from strings to strings, mapping project names to URLs, or a callable taking a project name and returning an URL.
Same as the projects arg above, a dict or callable mapping project names to URLs.
The order_console_by_time option affects the rendering of the console; see the description of the console above.
The numbuilds option determines the number of builds that most status displays will show. It can usually be overriden in the URL, e.g., ?numbuilds=13.
The num_events option gives the default number of events that the waterfall will display. The num_events_max gives the maximum number of events displayed, even if the web browser requests more.
Change Hooks
The /change_hook url is a magic URL which will accept HTTP requests and translate them into changes for buildbot. Implementations (such as a trivial json-based endpoint and a GitHub implementation) can be found in master/buildbot/status/web/hooks. The format of the url is /change_hook/DIALECT where DIALECT is a package within the hooks directory. Change_hook is disabled by default and each DIALECT has to be enabled separately, for security reasons
An example WebStatus configuration line which enables change_hook and two DIALECTS:
c['status'].append(html.WebStatus(http_port=8010,allowForce=True,
change_hook_dialects={
'base': True,
'somehook': {'option1':True,
'option2':False}}))
Within the WebStatus arguments, the change_hook key enables/disables the module and change_hook_dialects whitelists DIALECTs where the keys are the module names and the values are optional arguments which will be passed to the hooks.
The post_build_request.py script in master/contrib allows for the submission of an arbitrary change request. Run post_build_request.py --help for more information. The base dialect must be enabled for this to work.
The GitHub hook is simple and takes no options.
c['status'].append(html.WebStatus(..
change_hook_dialects={ 'github' : True }))
With this set up, add a Post-Receive URL for the project in the GitHub administrative interface, pointing to /change_hook/github relative to the root of the web status. For example, if the grid URL is http://builds.mycompany.com/bbot/grid, then point GitHub to http://builds.mycompany.com/bbot/change_hook/github. To specify a project associated to the repository, append ?project=name to the URL.
Note that there is a standalone HTTP server available for receiving GitHub notifications, as well: contrib/github_buildbot.py. This script may be useful in cases where you cannot expose the WebStatus for public consumption.
Warning
The incoming HTTP requests for this hook are not authenticated by default. Anyone who can access the web status can "fake" a request from GitHub, potentially causing the buildmaster to run arbitrary code.
To protect URL against unauthorized access you should use change_hook_auth option
c['status'].append(html.WebStatus(..
change_hook_auth=["file:changehook.passwd"]))
And create a file changehook.passwd
user:password
Then, create a GitHub service hook (see https://help.github.com/articles/post-receive-hooks) with a WebHook URL like http://user:password@builds.mycompany.com/bbot/change_hook/github.
See the documentation for twisted cred for more option to pass to change_hook_auth.
Note that not using change_hook_auth can expose you to security risks.
The Google Code hook is quite similar to the GitHub Hook. It has one option for the "Post-Commit Authentication Key" used to check if the request is legitimate:
c['status'].append(html.WebStatus(
…,
change_hook_dialects={'googlecode': {'secret_key': 'FSP3p-Ghdn4T0oqX'}}
))
This will add a "Post-Commit URL" for the project in the Google Code administrative interface, pointing to /change_hook/googlecode relative to the root of the web status.
Alternatively, you can use the GoogleCodeAtomPoller ChangeSource that periodically poll the Google Code commit feed for changes.
Note
Google Code doesn't send the branch on which the changes were made. So, the hook always returns 'default' as the branch, you can override it with the 'branch' option:
change_hook_dialects={'googlecode': {'secret_key': 'FSP3p-Ghdn4T0oqX', 'branch': 'master'}}
The poller hook allows you to use GET requests to trigger polling. One advantage of this is your buildbot instance can (at start up) poll to get changes that happened while it was down, but then you can still use a commit hook to get fast notification of new changes.
Suppose you have a poller configured like this:
c['change_source'] = SVNPoller(
svnurl="https://amanda.svn.sourceforge.net/svnroot/amanda/amanda",
split_file=split_file_branches)
And you configure your WebStatus to enable this hook:
c['status'].append(html.WebStatus(
…,
change_hook_dialects={'poller': True}
))
Then you will be able to trigger a poll of the SVN repository by poking the /change_hook/poller URL from a commit hook like this:
curl http://yourbuildbot/change_hook/poller?poller=https%3A%2F%2Famanda.svn.sourceforge.net%2Fsvnroot%2Famanda%2Famanda
If no poller argument is provided then the hook will trigger polling of all polling change sources.
You can restrict which pollers the webhook has access to using the allowed option:
c['status'].append(html.WebStatus(
…,
change_hook_dialects={'poller': {'allowed': ['https://amanda.svn.sourceforge.net/svnroot/amanda/amanda']}}
))
MailNotifier
- class buildbot.status.mail.MailNotifier
The buildbot can also send email when builds finish. The most common use of this is to tell developers when their change has caused the build to fail. It is also quite common to send a message to a mailing list (usually named builds or similar) about every build.
The MailNotifier status target is used to accomplish this. You configure it by specifying who mail should be sent to, under what circumstances mail should be sent, and how to deliver the mail. It can be configured to only send out mail for certain builders, and only send messages when the build fails, or when the builder transitions from success to failure. It can also be configured to include various build logs in each message.
If a proper lookup function is configured, the message will be sent to the "interested users" list (Doing Things With Users), which includes all developers who made changes in the build. By default, however, Buildbot does not know how to construct an email addressed based on the information from the version control system. See the lookup argument, below, for more information.
You can add additional, statically-configured, recipients with the extraRecipients argument. You can also add interested users by setting the owners build property to a list of users in the scheduler constructor (Configuring Schedulers).
Each MailNotifier sends mail to a single set of recipients. To send different kinds of mail to different recipients, use multiple MailNotifiers.
The following simple example will send an email upon the completion of each build, to just those developers whose Changes were included in the build. The email contains a description of the Build, its results, and URLs where more information can be obtained.
from buildbot.status.mail import MailNotifier
mn = MailNotifier(fromaddr="buildbot@example.org", lookup="example.org")
c['status'].append(mn)
To get a simple one-message-per-build (say, for a mailing list), use the following form instead. This form does not send mail to individual developers (and thus does not need the lookup= argument, explained below), instead it only ever sends mail to the extra recipients named in the arguments:
mn = MailNotifier(fromaddr="buildbot@example.org",
sendToInterestedUsers=False,
extraRecipients=['listaddr@example.org'])
If your SMTP host requires authentication before it allows you to send emails, this can also be done by specifying smtpUser and smptPassword:
mn = MailNotifier(fromaddr="myuser@gmail.com",
sendToInterestedUsers=False,
extraRecipients=["listaddr@example.org"],
relayhost="smtp.gmail.com", smtpPort=587,
smtpUser="myuser@gmail.com", smtpPassword="mypassword")
If you want to require Transport Layer Security (TLS), then you can also set useTls:
mn = MailNotifier(fromaddr="myuser@gmail.com",
sendToInterestedUsers=False,
extraRecipients=["listaddr@example.org"],
useTls=True, relayhost="smtp.gmail.com", smtpPort=587,
smtpUser="myuser@gmail.com", smtpPassword="mypassword")
Note
If you see twisted.mail.smtp.TLSRequiredError exceptions in the log while using TLS, this can be due either to the server not supporting TLS or to a missing PyOpenSSL package on the buildmaster system.
In some cases it is desirable to have different information then what is provided in a standard MailNotifier message. For this purpose MailNotifier provides the argument messageFormatter (a function) which allows for the creation of messages with unique content.
For example, if only short emails are desired (e.g., for delivery to phones)
from buildbot.status.builder import Results
def messageFormatter(mode, name, build, results, master_status):
result = Results[results]
text = list()
text.append("STATUS: %s" % result.title())
return {
'body' : "\n".join(text),
'type' : 'plain'
}
mn = MailNotifier(fromaddr="buildbot@example.org",
sendToInterestedUsers=False,
mode=('problem',),
extraRecipients=['listaddr@example.org'],
messageFormatter=messageFormatter)
Another example of a function delivering a customized html email containing the last 80 log lines of logs of the last build step is given below:
from buildbot.status.builder import Results
import cgi, datetime
def html_message_formatter(mode, name, build, results, master_status):
"""Provide a customized message to Buildbot's MailNotifier.
The last 80 lines of the log are provided as well as the changes
relevant to the build. Message content is formatted as html.
"""
result = Results[results]
limit_lines = 80
text = list()
text.append(u'<h4>Build status: %s</h4>' % result.upper())
text.append(u'<table cellspacing="10"><tr>')
text.append(u"<td>Buildslave for this Build:</td><td><b>%s</b></td></tr>" % build.getSlavename())
if master_status.getURLForThing(build):
text.append(u'<tr><td>Complete logs for all build steps:</td><td><a href="%s">%s</a></td></tr>'
% (master_status.getURLForThing(build),
master_status.getURLForThing(build))
)
text.append(u'<tr><td>Build Reason:</td><td>%s</td></tr>' % build.getReason())
source = u""
for ss in build.getSourceStamps():
if ss.codebase:
source += u'%s: ' % ss.codebase
if ss.branch:
source += u"[branch %s] " % ss.branch
if ss.revision:
source += ss.revision
else:
source += u"HEAD"
if ss.patch:
source += u" (plus patch)"
if ss.patch_info: # add patch comment
source += u" (%s)" % ss.patch_info[1]
text.append(u"<tr><td>Build Source Stamp:</td><td><b>%s</b></td></tr>" % source)
text.append(u"<tr><td>Blamelist:</td><td>%s</td></tr>" % ",".join(build.getResponsibleUsers()))
text.append(u'</table>')
if ss.changes:
text.append(u'<h4>Recent Changes:</h4>')
for c in ss.changes:
cd = c.asDict()
when = datetime.datetime.fromtimestamp(cd['when'] ).ctime()
text.append(u'<table cellspacing="10">')
text.append(u'<tr><td>Repository:</td><td>%s</td></tr>' % cd['repository'] )
text.append(u'<tr><td>Project:</td><td>%s</td></tr>' % cd['project'] )
text.append(u'<tr><td>Time:</td><td>%s</td></tr>' % when)
text.append(u'<tr><td>Changed by:</td><td>%s</td></tr>' % cd['who'] )
text.append(u'<tr><td>Comments:</td><td>%s</td></tr>' % cd['comments'] )
text.append(u'</table>')
files = cd['files']
if files:
text.append(u'<table cellspacing="10"><tr><th align="left">Files</th></tr>')
for file in files:
text.append(u'<tr><td>%s:</td></tr>' % file['name'] )
text.append(u'</table>')
text.append(u'<br>')
# get log for last step
logs = build.getLogs()
# logs within a step are in reverse order. Search back until we find stdio
for log in reversed(logs):
if log.getName() == 'stdio':
break
name = "%s.%s" % (log.getStep().getName(), log.getName())
status, dummy = log.getStep().getResults()
content = log.getText().splitlines() # Note: can be VERY LARGE
url = u'%s/steps/%s/logs/%s' % (master_status.getURLForThing(build),
log.getStep().getName(),
log.getName())
text.append(u'<i>Detailed log of last build step:</i> <a href="%s">%s</a>'
% (url, url))
text.append(u'<br>')
text.append(u'<h4>Last %d lines of "%s"</h4>' % (limit_lines, name))
unilist = list()
for line in content[len(content)-limit_lines:]:
unilist.append(cgi.escape(unicode(line,'utf-8')))
text.append(u'<pre>'.join([uniline for uniline in unilist]))
text.append(u'</pre>')
text.append(u'<br><br>')
text.append(u'<b>-The Buildbot</b>')
return {
'body': u"\n".join(text),
'type': 'html'
}
mn = MailNotifier(fromaddr="buildbot@example.org",
sendToInterestedUsers=False,
mode=('failing',),
extraRecipients=['listaddr@example.org'],
messageFormatter=html_message_formatter)
MailNotifier arguments
- fromaddr
- The email address to be used in the 'From' header.
- sendToInterestedUsers
- (boolean). If True (the default), send mail to all of the Interested Users. If False, only send mail to the extraRecipients list.
- extraRecipients
- (list of strings). A list of email addresses to which messages should be sent (in addition to the InterestedUsers list, which includes any developers who made Changes that went into this build). It is a good idea to create a small mailing list and deliver to that, then let subscribers come and go as they please.
- subject
- (string). A string to be used as the subject line of the message. %(builder)s will be replaced with the name of the builder which provoked the message.
- mode
(list of strings). A combination of:
- change
- Send mail about builds which change status.
- failing
- Send mail about builds which fail.
- passing
- Send mail about builds which succeed.
- problem
- Send mail about a build which failed when the previous build has passed.
- warnings
- Send mail about builds which generate warnings.
- exception
- Send mail about builds which generate exceptions.
- all
- Always send mail about builds.
Defaults to (failing, passing, warnings).
- builders
- (list of strings). A list of builder names for which mail should be sent. Defaults to None (send mail for all builds). Use either builders or categories, but not both.
- categories
- (list of strings). A list of category names to serve status information for. Defaults to None (all categories). Use either builders or categories, but not both.
- addLogs
- (boolean). If True, include all build logs as attachments to the messages. These can be quite large. This can also be set to a list of log names, to send a subset of the logs. Defaults to False.
- addPatch
- (boolean). If True, include the patch content if a patch was present. Patches are usually used on a Try server. Defaults to True.
- buildSetSummary
- (boolean). If True, send a single summary email consisting of the concatenation of all build completion messages rather than a completion message for each build. Defaults to False.
- relayhost
- (string). The host to which the outbound SMTP connection should be made. Defaults to 'localhost'
- smtpPort
- (int). The port that will be used on outbound SMTP connections. Defaults to 25.
- useTls
- (boolean). When this argument is True (default is False) MailNotifier sends emails using TLS and authenticates with the relayhost. When using TLS the arguments smtpUser and smtpPassword must also be specified.
- smtpUser
- (string). The user name to use when authenticating with the relayhost.
- smtpPassword
- (string). The password that will be used when authenticating with the relayhost.
- lookup
(implementor of IEmailLookup). Object which provides IEmailLookup, which is responsible for mapping User names (which come from the VC system) into valid email addresses.
If the argument is not provided, the MailNotifier will attempt to build the sendToInterestedUsers from the authors of the Changes that led to the Build via User Objects. If the author of one of the Build's Changes has an email address stored, it will added to the recipients list. With this method, owners are still added to the recipients. Note that, in the current implementation of user objects, email addresses are not stored; as a result, unless you have specifically added email addresses to the user database, this functionality is unlikely to actually send any emails.
Most of the time you can use a simple Domain instance. As a shortcut, you can pass as string: this will be treated as if you had provided Domain(str). For example, lookup='twistedmatrix.com' will allow mail to be sent to all developers whose SVN usernames match their twistedmatrix.com account names. See buildbot/status/mail.py for more details.
Regardless of the setting of lookup, MailNotifier will also send mail to addresses in the extraRecipients list.
- messageFormatter
- This is a optional function that can be used to generate a custom mail message. A messageFormatter function takes the mail mode (mode), builder name (name), the build status (build), the result code (results), and the BuildMaster status (master_status). It returns a dictionary. The body key gives a string that is the complete text of the message. The type key is the message type ('plain' or 'html'). The 'html' type should be used when generating an HTML message. The subject key is optional, but gives the subject for the email.
- extraHeaders
- (dictionary) A dictionary containing key/value pairs of extra headers to add to sent e-mails. Both the keys and the values may be a Interpolate instance.
- previousBuildGetter
- An optional function to calculate the previous build to the one at hand. A previousBuildGetter takes a BuildStatus and returns a BuildStatus. This function is useful when builders don't process their requests in order of arrival (chronologically) and therefore the order of completion of builds does not reflect the order in which changes (and their respective requests) arrived into the system. In such scenarios, status transitions in the chronological sequence of builds within a builder might not reflect the actual status transition in the topological sequence of changes in the tree. What's more, the latest build (the build at hand) might not always be for the most recent request so it might not make sense to send a "change" or "problem" email about it. Returning None from this function will prevent such emails from going out.
As a help to those writing messageFormatter functions, the following table describes how to get some useful pieces of information from the various status objects:
- Name of the builder that generated this event
- name
- Title of the buildmaster
- master_status.getTitle
- MailNotifier mode
- mode (a combination of change, failing, passing, problem, warnings,
- exception, all)
Builder result as a string
from buildbot.status.builder import Results
result_str = Results[results]
# one of 'success', 'warnings', 'failure', 'skipped', or 'exception'
- URL to build page
- master_status.getURLForThing(build)
- URL to buildbot main page.
- master_status.getBuildbotURL()
- Build text
- build.getText()
- Mapping of property names to values
- build.getProperties() (a Properties instance)
- Slave name
- build.getSlavename()
- Build reason (from a forced build)
- build.getReason()
- List of responsible users
- build.getResponsibleUsers()
Source information (only valid if ss is not None)
A build has a set of sourcestamps:
for ss in build.getSourceStamp(): branch = ss.branch revision = ss.revision patch = ss.patch changes = ss.changes # listA change object has the following useful information:
- who
- (str) who made this change
- revision
- (str) what VC revision is this change
- branch
- (str) on what branch did this change occur
- when
- (str) when did this change occur
- files
- (list of str) what files were affected in this change
- comments
- (str) comments reguarding the change.
The Change methods asText and asDict can be used to format the information above. asText returns a list of strings and asDict returns a dictionary suitable for html/mail rendering.
Log information
logs = list()
for log in build.getLogs():
log_name = "%s.%s" % (log.getStep().getName(), log.getName())
log_status, dummy = log.getStep().getResults()
log_body = log.getText().splitlines() # Note: can be VERY LARGE
log_url = '%s/steps/%s/logs/%s' % (master_status.getURLForThing(build),
log.getStep().getName(),
log.getName())
logs.append((log_name, log_url, log_body, log_status))
IRC Bot
- class buildbot.status.words.IRC
The buildbot.status.words.IRC status target creates an IRC bot which will attach to certain channels and be available for status queries. It can also be asked to announce builds as they occur, or be told to shut up.
from buildbot.status import words
irc = words.IRC("irc.example.org", "botnickname",
useColors=False,
channels=[{"channel": "#example1"},
{"channel": "#example2",
"password": "somesecretpassword"}],
password="mysecretnickservpassword",
notify_events={
'exception': 1,
'successToFailure': 1,
'failureToSuccess': 1,
})
c['status'].append(irc)
Take a look at the docstring for words.IRC for more details on configuring this service. Note that the useSSL option requires PyOpenSSL. The password argument, if provided, will be sent to Nickserv to claim the nickname: some IRC servers will not allow clients to send private messages until they have logged in with a password. We can also specify a different port number. Default value is 6667.
To use the service, you address messages at the buildbot, either normally (botnickname: status) or with private messages (/msg botnickname status). The buildbot will respond in kind.
The bot will add color to some of its messages. This is enabled by default, you might turn it off with useColors=False argument to words.IRC().
If you issue a command that is currently not available, the buildbot will respond with an error message. If the noticeOnChannel=True option was used, error messages will be sent as channel notices instead of messaging. The default value is noticeOnChannel=False.
Some of the commands currently available:
- list builders
- Emit a list of all configured builders
- status BUILDER
- Announce the status of a specific Builder: what it is doing right now.
- status all
- Announce the status of all Builders
- watch BUILDER
- If the given Builder is currently running, wait until the Build is finished and then announce the results.
- last BUILDER
- Return the results of the last build to run on the given Builder.
- join CHANNEL
- Join the given IRC channel
- leave CHANNEL
- Leave the given IRC channel
- notify on|off|list EVENT
Report events relating to builds. If the command is issued as a private message, then the report will be sent back as a private message to the user who issued the command. Otherwise, the report will be sent to the channel. Available events to be notified are:
- started
- A build has started
- finished
- A build has finished
- success
- A build finished successfully
- failure
- A build failed
- exception
- A build generated and exception
- xToY
- The previous build was x, but this one is Y, where x and Y are each one of success, warnings, failure, exception (except Y is capitalized). For example: successToFailure will notify if the previous build was successful, but this one failed
- help COMMAND
- Describe a command. Use help commands to get a list of known commands.
- shutdown ARG
Control the shutdown process of the buildbot master. Available arguments are:
- check
- Check if the buildbot master is running or shutting down
- start
- Start clean shutdown
- stop
- Stop clean shutdown
- now
- Shutdown immediately without waiting for the builders to finish
- source
- Announce the URL of the Buildbot's home page.
- version
- Announce the version of this Buildbot.
Additionally, the config file may specify default notification options as shown in the example earlier.
If the allowForce=True option was used, some additional commands will be available:
- force build [--branch=BRANCH] [--revision=REVISION] [--props=PROP1=VAL1,PROP2=VAL2...] BUILDER REASON
- Tell the given Builder to start a build of the latest code. The user requesting the build and REASON are recorded in the Build status. The buildbot will announce the build's status when it finishes.The user can specify a branch and/or revision with the optional parameters --branch=BRANCH and --revision=REVISION. The user can also give a list of properties with --props=PROP1=VAL1,PROP2=VAL2...
- stop build BUILDER REASON
- Terminate any running build in the given Builder. REASON will be added to the build status to explain why it was stopped. You might use this if you committed a bug, corrected it right away, and don't want to wait for the first build (which is destined to fail) to complete before starting the second (hopefully fixed) build.
If the categories is set to a category of builders (see the categories option in Builder Configuration) changes related to only that category of builders will be sent to the channel.
If the useRevisions option is set to True, the IRC bot will send status messages that replace the build number with a list of revisions that are contained in that build. So instead of seeing build #253 of ..., you would see something like build containing revisions [a87b2c4]. Revisions that are stored as hashes are shortened to 7 characters in length, as multiple revisions can be contained in one build and may exceed the IRC message length limit.
Two additional arguments can be set to control how fast the IRC bot tries to reconnect when it encounters connection issues. lostDelay is the number of of seconds the bot will wait to reconnect when the connection is lost, where as failedDelay is the number of seconds until the bot tries to reconnect when the connection failed. lostDelay defaults to a random number between 1 and 5, while failedDelay defaults to a random one between 45 and 60. Setting random defaults like this means multiple IRC bots are less likely to deny each other by flooding the server.
PBListener
- class buildbot.status.client.PBListener
import buildbot.status.client
pbl = buildbot.status.client.PBListener(port=int, user=str,
passwd=str)
c['status'].append(pbl)
This sets up a PB listener on the given TCP port, to which a PB-based status client can connect and retrieve status information. buildbot statusgui (statusgui) is an example of such a status client. The port argument can also be a strports specification string.
StatusPush
- class buildbot.status.status_push.StatusPush
def Process(self):
print str(self.queue.popChunk())
self.queueNextServerPush()
import buildbot.status.status_push
sp = buildbot.status.status_push.StatusPush(serverPushCb=Process,
bufferDelay=0.5,
retryDelay=5)
c['status'].append(sp)
StatusPush batches events normally processed and sends it to the serverPushCb callback every bufferDelay seconds. The callback should pop items from the queue and then queue the next callback. If no items were popped from self.queue, retryDelay seconds will be waited instead.
HttpStatusPush
import buildbot.status.status_push
sp = buildbot.status.status_push.HttpStatusPush(
serverUrl="http://example.com/submit")
c['status'].append(sp)
HttpStatusPush builds on StatusPush and sends HTTP requests to serverUrl, with all the items json-encoded. It is useful to create a status front end outside of buildbot for better scalability.
GerritStatusPush
- class buildbot.status.status_gerrit.GerritStatusPush
from buildbot.status.status_gerrit import GerritStatusPush
from buildbot.status.builder import Results, SUCCESS, RETRY
def gerritReviewCB(builderName, build, result, status, arg):
if result == RETRY:
return None, 0, 0
message = "Buildbot finished compiling your patchset\n"
message += "on configuration: %s\n" % builderName
message += "The result is: %s\n" % Results[result].upper()
if arg:
message += "\nFor more details visit:\n"
message += status.getURLForThing(build) + "\n"
# message, verified, reviewed
return message, (result == SUCCESS or -1), 0
def gerritStartCB(builderName, build, arg):
message = "Buildbot started compiling your patchset\n"
message += "on configuration: %s\n" % builderName
if arg:
message += "\nFor more details visit:\n"
message += status.getURLForThing(build) + "\n"
return message
c['buildbotURL'] = 'http://buildbot.example.com/'
c['status'].append(GerritStatusPush('127.0.0.1', 'buildbot',
reviewCB=gerritReviewCB,
reviewArg=c['buildbotURL'],
startCB=gerritStartCB,
startArg=c['buildbotURL']))
GerritStatusPush sends review of the Change back to the Gerrit server, optionally also sending a message when a build is started. reviewCB should return a tuple of message, verified, reviewed. If message is None, no review will be sent. startCB should return a message.
| [1] | Apparently this is the same way http://buildd.debian.org displays build status |
| [2] | It may even be possible to provide SSL access by using a specification like "ssl:12345:privateKey=mykey.pen:certKey=cert.pem", but this is completely untested |
Customization
For advanced users, Buildbot acts as a framework supporting a customized build application. For the most part, such configurations consist of subclasses set up for use in a regular Buildbot configuration file.
This chapter describes some of the more common idioms in advanced Buildbot configurations.
At the moment, this chapter is an unordered set of suggestions; if you'd like to clean it up, fork the project on GitHub and get started!
Programmatic Configuration Generation
Bearing in mind that master.cfg is a Python file, large configurations can be shortened considerably by judicious use of Python loops. For example, the following will generate a builder for each of a range of supported versions of Python:
pythons = [ 'python2.4', 'python2.5', 'python2.6', 'python2.7',
'python3.2', python3.3' ]
pytest_slaves = [ "slave%s" % n for n in range(10) ]
for python in pythons:
f = BuildFactory()
f.addStep(SVN(..))
f.addStep(ShellCommand(command=[ python, 'test.py' ]))
c['builders'].append(BuilderConfig(
name="test-%s" % python,
factory=f,
slavenames=pytest_slaves))
Merge Request Functions
The logic Buildbot uses to decide which build request can be merged can be customized by providing a Python function (a callable) instead of True or False described in Merging Build Requests.
The callable will be invoked with three positional arguments: a Builder object and two BuildRequest objects. It should return true if the requests can be merged, and False otherwise. For example:
def mergeRequests(builder, req1, req2):
"any requests with the same branch can be merged"
return req1.source.branch == req2.source.branch
c['mergeRequests'] = mergeRequests
In many cases, the details of the SourceStamps and BuildRequests are important. In this example, only BuildRequests with the same "reason" are merged; thus developers forcing builds for different reasons will see distinct builds. Note the use of the canBeMergedWith method to access the source stamp compatibility algorithm.
def mergeRequests(builder, req1, req2):
if req1.source.canBeMergedWith(req2.source) and req1.reason == req2.reason:
return True
return False
c['mergeRequests'] = mergeRequests
If it's necessary to perform some extended operation to determine whether two requests can be merged, then the mergeRequests callable may return its result via Deferred. Note, however, that the number of invocations of the callable is proportional to the square of the request queue length, so a long-running callable may cause undesirable delays when the queue length grows. For example:
def mergeRequests(builder, req1, req2):
d = defer.gatherResults([
getMergeInfo(req1.source.revision),
getMergeInfo(req2.source.revision),
])
def process(info1, info2):
return info1 == info2
d.addCallback(process)
return d
c['mergeRequests'] = mergeRequests
Builder Priority Functions
The prioritizeBuilders configuration key specifies a function which is called with two arguments: a BuildMaster and a list of Builder objects. It should return a list of the same Builder objects, in the desired order. It may also remove items from the list if builds should not be started on those builders. If necessary, this function can return its results via a Deferred (it is called with maybeDeferred).
A simple prioritizeBuilders implementation might look like this:
def prioritizeBuilders(buildmaster, builders):
"""Prioritize builders. 'finalRelease' builds have the highest
priority, so they should be built before running tests, or
creating builds."""
builderPriorities = {
"finalRelease": 0,
"test": 1,
"build": 2,
}
builders.sort(key=lambda b: builderPriorities.get(b.name, 0))
return builders
c['prioritizeBuilders'] = prioritizeBuilders
Build Priority Functions
When a builder has multiple pending build requests, it uses a nextBuild function to decide which build it should start first. This function is given two parameters: the Builder, and a list of BuildRequest objects representing pending build requests.
A simple function to prioritize release builds over other builds might look like this:
def nextBuild(bldr, requests):
for r in requests:
if r.source.branch == 'release':
return r
return requests[0]
If some non-immediate result must be calculated, the nextBuild function can also return a Deferred:
def nextBuild(bldr, requests):
d = get_request_priorities(requests)
def pick(priorities):
if requests:
return sorted(zip(priorities, requests))[0][1]
d.addCallback(pick)
return d
Customizing SVNPoller
Each source file that is tracked by a Subversion repository has a fully-qualified SVN URL in the following form: ({REPOURL})({PROJECT-plus-BRANCH})({FILEPATH}). When you create the SVNPoller, you give it a svnurl value that includes all of the {REPOURL} and possibly some portion of the {PROJECT-plus-BRANCH} string. The SVNPoller is responsible for producing Changes that contain a branch name and a {FILEPATH} (which is relative to the top of a checked-out tree). The details of how these strings are split up depend upon how your repository names its branches.
PROJECT/BRANCHNAME/FILEPATH repositories
One common layout is to have all the various projects that share a repository get a single top-level directory each, with branches, tags, and trunk subdirectories:
amanda/trunk
/branches/3_2
/3_3
/tags/3_2_1
/3_2_2
/3_3_0
To set up a SVNPoller that watches the Amanda trunk (and nothing else), we would use the following, using the default split_file:
from buildbot.changes.svnpoller import SVNPoller
c['change_source'] = SVNPoller(
svnurl="https://svn.amanda.sourceforge.net/svnroot/amanda/amanda/trunk")
In this case, every Change that our SVNPoller produces will have its branch attribute set to None, to indicate that the Change is on the trunk. No other sub-projects or branches will be tracked.
If we want our ChangeSource to follow multiple branches, we have to do two things. First we have to change our svnurl= argument to watch more than just amanda/trunk. We will set it to amanda so that we'll see both the trunk and all the branches. Second, we have to tell SVNPoller how to split the ({PROJECT-plus-BRANCH})({FILEPATH}) strings it gets from the repository out into ({BRANCH}) and ({FILEPATH})`.
We do the latter by providing a split_file function. This function is responsible for splitting something like branches/3_3/common-src/amanda.h into branch='branches/3_3' and filepath='common-src/amanda.h'. The function is always given a string that names a file relative to the subdirectory pointed to by the SVNPoller's svnurl= argument. It is expected to return a dictionary with at least the path key. The splitter may optionally set branch, project and repository. For backwards compatibility it may return a tuple of (branchname, path). It may also return None to indicate that the file is of no interest.
Note
the function should return branches/3_3 rather than just 3_3 because the SVN checkout step, will append the branch name to the baseURL, which requires that we keep the branches component in there. Other VC schemes use a different approach towards branches and may not require this artifact.
If your repository uses this same {PROJECT}/{BRANCH}/{FILEPATH} naming scheme, the following function will work:
def split_file_branches(path):
pieces = path.split('/')
if len(pieces) > 1 and pieces[0] == 'trunk':
return (None, '/'.join(pieces[1:]))
elif len(pieces) > 2 and pieces[0] == 'branches':
return ('/'.join(pieces[0:2]),
'/'.join(pieces[2:]))
else:
return None
In fact, this is the definition of the provided split_file_branches function. So to have our Twisted-watching SVNPoller follow multiple branches, we would use this:
from buildbot.changes.svnpoller import SVNPoller, split_file_branches
c['change_source'] = SVNPoller("svn://svn.twistedmatrix.com/svn/Twisted",
split_file=split_file_branches)
Changes for all sorts of branches (with names like "branches/1.5.x", and None to indicate the trunk) will be delivered to the Schedulers. Each Scheduler is then free to use or ignore each branch as it sees fit.
If you have multiple projects in the same repository your split function can attach a project name to the Change to help the Scheduler filter out unwanted changes:
from buildbot.changes.svnpoller import split_file_branches
def split_file_projects_branches(path):
if not "/" in path:
return None
project, path = path.split("/", 1)
f = split_file_branches(path)
if f:
info = dict(project=project, path=f[1])
if f[0]:
info['branch'] = f[0]
return info
return f
Again, this is provided by default. To use it you would do this:
from buildbot.changes.svnpoller import SVNPoller, split_file_projects_branches
c['change_source'] = SVNPoller(
svnurl="https://svn.amanda.sourceforge.net/svnroot/amanda/",
split_file=split_file_projects_branches)
Note here that we are monitoring at the root of the repository, and that within that repository is a amanda subdirectory which in turn has trunk and branches. It is that amanda subdirectory whose name becomes the project field of the Change.
BRANCHNAME/PROJECT/FILEPATH repositories
Another common way to organize a Subversion repository is to put the branch name at the top, and the projects underneath. This is especially frequent when there are a number of related sub-projects that all get released in a group.
For example, Divmod.org hosts a project named Nevow as well as one named Quotient. In a checked-out Nevow tree there is a directory named formless that contains a Python source file named webform.py. This repository is accessible via webdav (and thus uses an http: scheme) through the divmod.org hostname. There are many branches in this repository, and they use a ({BRANCHNAME})/({PROJECT}) naming policy.
The fully-qualified SVN URL for the trunk version of webform.py is http://divmod.org/svn/Divmod/trunk/Nevow/formless/webform.py. The 1.5.x branch version of this file would have a URL of http://divmod.org/svn/Divmod/branches/1.5.x/Nevow/formless/webform.py. The whole Nevow trunk would be checked out with http://divmod.org/svn/Divmod/trunk/Nevow, while the Quotient trunk would be checked out using http://divmod.org/svn/Divmod/trunk/Quotient.
Now suppose we want to have an SVNPoller that only cares about the Nevow trunk. This case looks just like the {PROJECT}/{BRANCH} layout described earlier:
from buildbot.changes.svnpoller import SVNPoller
c['change_source'] = SVNPoller("http://divmod.org/svn/Divmod/trunk/Nevow")
But what happens when we want to track multiple Nevow branches? We have to point our svnurl= high enough to see all those branches, but we also don't want to include Quotient changes (since we're only building Nevow). To accomplish this, we must rely upon the split_file function to help us tell the difference between files that belong to Nevow and those that belong to Quotient, as well as figuring out which branch each one is on.
from buildbot.changes.svnpoller import SVNPoller
c['change_source'] = SVNPoller("http://divmod.org/svn/Divmod",
split_file=my_file_splitter)
The my_file_splitter function will be called with repository-relative pathnames like:
- trunk/Nevow/formless/webform.py
- This is a Nevow file, on the trunk. We want the Change that includes this to see a filename of formless/webform.py, and a branch of None
- branches/1.5.x/Nevow/formless/webform.py
- This is a Nevow file, on a branch. We want to get branch='branches/1.5.x' and filename='formless/webform.py'.
- trunk/Quotient/setup.py
- This is a Quotient file, so we want to ignore it by having my_file_splitter return None.
- branches/1.5.x/Quotient/setup.py
- This is also a Quotient file, which should be ignored.
The following definition for my_file_splitter will do the job:
def my_file_splitter(path):
pieces = path.split('/')
if pieces[0] == 'trunk':
branch = None
pieces.pop(0) # remove 'trunk'
elif pieces[0] == 'branches':
pieces.pop(0) # remove 'branches'
# grab branch name
branch = 'branches/' + pieces.pop(0)
else:
return None # something weird
projectname = pieces.pop(0)
if projectname != 'Nevow':
return None # wrong project
return dict(branch=branch, path='/'.join(pieces))
If you later decide you want to get changes for Quotient as well you could replace the last 3 lines with simply:
return dict(project=projectname, branch=branch, path='/'.join(pieces))
Writing Change Sources
For some version-control systems, making Buildbot aware of new changes can be a challenge. If the pre-supplied classes in Change Sources are not sufficient, then you will need to write your own.
There are three approaches, one of which is not even a change source. The first option is to write a change source that exposes some service to which the version control system can "push" changes. This can be more complicated, since it requires implementing a new service, but delivers changes to Buildbot immediately on commit.
The second option is often preferable to the first: implement a notification service in an external process (perhaps one that is started directly by the version control system, or by an email server) and delivers changes to Buildbot via PBChangeSource. This section does not describe this particular approach, since it requires no customization within the buildmaster process.
The third option is to write a change source which polls for changes - repeatedly connecting to an external service to check for new changes. This works well in many cases, but can produce a high load on the version control system if polling is too frequent, and can take too long to notice changes if the polling is not frequent enough.
Writing a Notification-based Change Source
- class buildbot.changes.base.ChangeSource
A custom change source must implement buildbot.interfaces.IChangeSource.
The easiest way to do this is to subclass buildbot.changes.base.ChangeSource, implementing the describe method to describe the instance. ChangeSource is a Twisted service, so you will need to implement the startService and stopService methods to control the means by which your change source receives notifications.
When the class does receive a change, it should call self.master.addChange(..) to submit it to the buildmaster. This method shares the same parameters as master.db.changes.addChange, so consult the API documentation for that function for details on the available arguments.
You will probably also want to set compare_attrs to the list of object attributes which Buildbot will use to compare one change source to another when reconfiguring. During reconfiguration, if the new change source is different from the old, then the old will be stopped and the new started.
Writing a Change Poller
- class buildbot.changes.base.PollingChangeSource
Polling is a very common means of seeking changes, so Buildbot supplies a utility parent class to make it easier. A poller should subclass buildbot.changes.base.PollingChangeSource, which is a subclass of ChangeSource. This subclass implements the Service methods, and causes the poll method to be called every self.pollInterval seconds. This method should return a Deferred to signal its completion.
Aside from the service methods, the other concerns in the previous section apply here, too.
Writing a New Latent Buildslave Implementation
Writing a new latent buildslave should only require subclassing buildbot.buildslave.AbstractLatentBuildSlave and implementing start_instance and stop_instance.
def start_instance(self):
# responsible for starting instance that will try to connect with this
# master. Should return deferred. Problems should use an errback. The
# callback value can be None, or can be an iterable of short strings to
# include in the "substantiate success" status message, such as
# identifying the instance that started.
raise NotImplementedError
def stop_instance(self, fast=False):
# responsible for shutting down instance. Return a deferred. If `fast`,
# we're trying to shut the master down, so callback as soon as is safe.
# Callback value is ignored.
raise NotImplementedError
See buildbot.ec2buildslave.EC2LatentBuildSlave for an example, or see the test example buildbot.test_slaves.FakeLatentBuildSlave.
Custom Build Classes
The standard BuildFactory object creates Build objects by default. These Builds will each execute a collection of BuildSteps in a fixed sequence. Each step can affect the results of the build, but in general there is little intelligence to tie the different steps together.
By setting the factory's buildClass attribute to a different class, you can instantiate a different build class. This might be useful, for example, to create a build class that dynamically determines which steps to run. The skeleton of such a project would look like:
class DynamicBuild(Build):
# .. override some methods
f = factory.BuildFactory()
f.buildClass = DynamicBuild
f.addStep(...)
Factory Workdir Functions
It is sometimes helpful to have a build's workdir determined at runtime based on the parameters of the build. To accomplish this, set the workdir attribute of the build factory to a callable. That callable will be invoked with the SourceStamp for the build, and should return the appropriate workdir. Note that the value must be returned immediately - Deferreds are not supported.
This can be useful, for example, in scenarios with multiple repositories submitting changes to BuildBot. In this case you likely will want to have a dedicated workdir per repository, since otherwise a sourcing step with mode = "update" will fail as a workdir with a working copy of repository A can't be "updated" for changes from a repository B. Here is an example how you can achieve workdir-per-repo:
def workdir(source_stamp):
return hashlib.md5 (source_stamp.repository).hexdigest()[:8]
build_factory = factory.BuildFactory()
build_factory.workdir = workdir
build_factory.addStep(Git(mode="update"))
# ...
builders.append ({'name': 'mybuilder',
'slavename': 'myslave',
'builddir': 'mybuilder',
'factory': build_factory})
The end result is a set of workdirs like
Repo1 => <buildslave-base>/mybuilder/a78890ba
Repo2 => <buildslave-base>/mybuilder/0823ba88
You could make the workdir function compute other paths, based on parts of the repo URL in the sourcestamp, or lookup in a lookup table based on repo URL. As long as there is a permanent 1:1 mapping between repos and workdir, this will work.
Writing New BuildSteps
While it is a good idea to keep your build process self-contained in the source code tree, sometimes it is convenient to put more intelligence into your Buildbot configuration. One way to do this is to write a custom BuildStep. Once written, this Step can be used in the master.cfg file.
The best reason for writing a custom BuildStep is to better parse the results of the command being run. For example, a BuildStep that knows about JUnit could look at the logfiles to determine which tests had been run, how many passed and how many failed, and then report more detailed information than a simple rc==0 -based good/bad decision.
Buildbot has acquired a large fleet of build steps, and sports a number of knobs and hooks to make steps easier to write. This section may seem a bit overwhelming, but most custom steps will only need to apply one or two of the techniques outlined here.
For complete documentation of the build step interfaces, see BuildSteps.
Writing BuildStep Constructors
Build steps act as their own factories, so their constructors are a bit more complex than necessary. In the configuration file, a BuildStep object is instantiated, but because steps store state locally while executing, this object cannot be used during builds.
Consider the use of a BuildStep in master.cfg:
f.addStep(MyStep(someopt="stuff", anotheropt=1))
This creates a single instance of class MyStep. However, Buildbot needs a new object each time the step is executed. An instance of BuildStep remembers how it was constructed, and can create copies of itself. When writing a new step class, then, keep in mind are that you cannot do anything "interesting" in the constructor -- limit yourself to checking and storing arguments.
It is customary to call the parent class's constructor with all otherwise-unspecified keyword arguments. Keep a **kwargs argument on the end of your options, and pass that up to the parent class's constructor.
The whole thing looks like this:
class Frobnify(LoggingBuildStep):
def __init__(self,
frob_what="frobee",
frob_how_many=None,
frob_how=None,
**kwargs):
# check
if frob_how_many is None:
raise TypeError("Frobnify argument how_many is required")
# override a parent option
kwargs['parentOpt'] = 'xyz'
# call parent
LoggingBuildStep.__init__(self, **kwargs)
# set Frobnify attributes
self.frob_what = frob_what
self.frob_how_many = how_many
self.frob_how = frob_how
class FastFrobnify(Frobnify):
def __init__(self,
speed=5,
**kwargs)
Frobnify.__init__(self, **kwargs)
self.speed = speed
Running Commands
To spawn a command in the buildslave, create a RemoteCommand instance in your step's start method and run it with runCommand:
cmd = RemoteCommand(args)
d = self.runCommand(cmd)
To add a LogFile, use addLog. Make sure the log gets closed when it finishes. When giving a Logfile to a RemoteShellCommand, just ask it to close the log when the command completes:
log = self.addLog('output')
cmd.useLog(log, closeWhenFinished=True)
Updating Status
TBD
Capturing Logfiles
Each BuildStep has a collection of logfiles. Each one has a short name, like stdio or warnings. Each LogFile contains an arbitrary amount of text, usually the contents of some output file generated during a build or test step, or a record of everything that was printed to stdout/stderr during the execution of some command.
These LogFiles are stored to disk, so they can be retrieved later.
Each can contain multiple channels, generally limited to three basic ones: stdout, stderr, and headers. For example, when a ShellCommand runs, it writes a few lines to the headers channel to indicate the exact argv strings being run, which directory the command is being executed in, and the contents of the current environment variables. Then, as the command runs, it adds a lot of stdout and stderr messages. When the command finishes, a final header line is added with the exit code of the process.
Status display plugins can format these different channels in different ways. For example, the web page shows LogFiles as text/html, with header lines in blue text, stdout in black, and stderr in red. A different URL is available which provides a text/plain format, in which stdout and stderr are collapsed together, and header lines are stripped completely. This latter option makes it easy to save the results to a file and run grep or whatever against the output.
Each BuildStep contains a mapping (implemented in a Python dictionary) from LogFile name to the actual LogFile objects. Status plugins can get a list of LogFiles to display, for example, a list of HREF links that, when clicked, provide the full contents of the LogFile.
Using LogFiles in custom BuildSteps
The most common way for a custom BuildStep to use a LogFile is to summarize the results of a ShellCommand (after the command has finished running). For example, a compile step with thousands of lines of output might want to create a summary of just the warning messages. If you were doing this from a shell, you would use something like:
grep "warning:" output.log >warnings.log
In a custom BuildStep, you could instead create a warnings LogFile that contained the same text. To do this, you would add code to your createSummary method that pulls lines from the main output log and creates a new LogFile with the results:
def createSummary(self, log):
warnings = []
sio = StringIO.StringIO(log.getText())
for line in sio.readlines():
if "warning:" in line:
warnings.append()
self.addCompleteLog('warnings', "".join(warnings))
This example uses the addCompleteLog method, which creates a new LogFile, puts some text in it, and then closes it, meaning that no further contents will be added. This LogFile will appear in the HTML display under an HREF with the name warnings, since that is the name of the LogFile.
You can also use addHTMLLog to create a complete (closed) LogFile that contains HTML instead of plain text. The normal LogFile will be HTML-escaped if presented through a web page, but the HTML LogFile will not. At the moment this is only used to present a pretty HTML representation of an otherwise ugly exception traceback when something goes badly wrong during the BuildStep.
In contrast, you might want to create a new LogFile at the beginning of the step, and add text to it as the command runs. You can create the LogFile and attach it to the build by calling addLog, which returns the LogFile object. You then add text to this LogFile by calling methods like addStdout and addHeader. When you are done, you must call the finish method so the LogFile can be closed. It may be useful to create and populate a LogFile like this from a LogObserver method - see Adding LogObservers.
The logfiles= argument to ShellCommand (see ShellCommand) creates new LogFiles and fills them in realtime by asking the buildslave to watch a actual file on disk. The buildslave will look for additions in the target file and report them back to the BuildStep. These additions will be added to the LogFile by calling addStdout. These secondary LogFiles can be used as the source of a LogObserver just like the normal stdio LogFile.
Reading Logfiles
Once a LogFile has been added to a BuildStep with addLog, addCompleteLog, addHTMLLog, or logfiles={}, your BuildStep can retrieve it by using getLog:
class MyBuildStep(ShellCommand):
logfiles = @{ "nodelog": "_test/node.log" @}
def evaluateCommand(self, cmd):
nodelog = self.getLog("nodelog")
if "STARTED" in nodelog.getText():
return SUCCESS
else:
return FAILURE
Adding LogObservers
Most shell commands emit messages to stdout or stderr as they operate, especially if you ask them nicely with a --verbose flag of some sort. They may also write text to a log file while they run. Your BuildStep can watch this output as it arrives, to keep track of how much progress the command has made. You can get a better measure of progress by counting the number of source files compiled or test cases run than by merely tracking the number of bytes that have been written to stdout. This improves the accuracy and the smoothness of the ETA display.
To accomplish this, you will need to attach a LogObserver to one of the log channels, most commonly to the stdio channel but perhaps to another one which tracks a log file. This observer is given all text as it is emitted from the command, and has the opportunity to parse that output incrementally. Once the observer has decided that some event has occurred (like a source file being compiled), it can use the setProgress method to tell the BuildStep about the progress that this event represents.
There are a number of pre-built LogObserver classes that you can choose from (defined in buildbot.process.buildstep, and of course you can subclass them to add further customization. The LogLineObserver class handles the grunt work of buffering and scanning for end-of-line delimiters, allowing your parser to operate on complete stdout/stderr lines. (Lines longer than a set maximum length are dropped; the maximum defaults to 16384 bytes, but you can change it by calling setMaxLineLength on your LogLineObserver instance. Use sys.maxint for effective infinity.)
For example, let's take a look at the TrialTestCaseCounter, which is used by the Trial step to count test cases as they are run. As Trial executes, it emits lines like the following:
buildbot.test.test_config.ConfigTest.testDebugPassword ... [OK]
buildbot.test.test_config.ConfigTest.testEmpty ... [OK]
buildbot.test.test_config.ConfigTest.testIRC ... [FAIL]
buildbot.test.test_config.ConfigTest.testLocks ... [OK]
When the tests are finished, trial emits a long line of ====== and then some lines which summarize the tests that failed. We want to avoid parsing these trailing lines, because their format is less well-defined than the [OK] lines.
The parser class looks like this:
from buildbot.process.buildstep import LogLineObserver
class TrialTestCaseCounter(LogLineObserver):
_line_re = re.compile(r'^([\w\.]+) \.\.\. \[([^\]]+)\]$')
numTests = 0
finished = False
def outLineReceived(self, line):
if self.finished:
return
if line.startswith("=" * 40):
self.finished = True
return
m = self._line_re.search(line.strip())
if m:
testname, result = m.groups()
self.numTests += 1
self.step.setProgress('tests', self.numTests)
This parser only pays attention to stdout, since that's where trial writes the progress lines. It has a mode flag named finished to ignore everything after the ==== marker, and a scary-looking regular expression to match each line while hopefully ignoring other messages that might get displayed as the test runs.
Each time it identifies a test has been completed, it increments its counter and delivers the new progress value to the step with @code{self.step.setProgress}. This class is specifically measuring progress along the tests metric, in units of test cases (as opposed to other kinds of progress like the output metric, which measures in units of bytes). The Progress-tracking code uses each progress metric separately to come up with an overall completion percentage and an ETA value.
To connect this parser into the Trial build step, Trial.__init__ ends with the following clause:
# this counter will feed Progress along the 'test cases' metric
counter = TrialTestCaseCounter()
self.addLogObserver('stdio', counter)
self.progressMetrics += ('tests',)
This creates a TrialTestCaseCounter and tells the step that the counter wants to watch the stdio log. The observer is automatically given a reference to the step in its step attribute.
Using Properties
In custom BuildSteps, you can get and set the build properties with the getProperty/setProperty methods. Each takes a string for the name of the property, and returns or accepts an arbitrary object. For example:
class MakeTarball(ShellCommand):
def start(self):
if self.getProperty("os") == "win":
self.setCommand([ ... ]) # windows-only command
else:
self.setCommand([ ... ]) # equivalent for other systems
ShellCommand.start(self)
Remember that properties set in a step may not be available until the next step begins. In particular, any Property or Interpolate instances for the current step are interpolated before the start method begins.
BuildStep URLs
Each BuildStep has a collection of links. Like its collection of LogFiles, each link has a name and a target URL. The web status page creates HREFs for each link in the same box as it does for LogFiles, except that the target of the link is the external URL instead of an internal link to a page that shows the contents of the LogFile.
These external links can be used to point at build information hosted on other servers. For example, the test process might produce an intricate description of which tests passed and failed, or some sort of code coverage data in HTML form, or a PNG or GIF image with a graph of memory usage over time. The external link can provide an easy way for users to navigate from the buildbot's status page to these external web sites or file servers. Note that the step itself is responsible for insuring that there will be a document available at the given URL (perhaps by using scp to copy the HTML output to a ~/public_html/ directory on a remote web server). Calling addURL does not magically populate a web server.
To set one of these links, the BuildStep should call the addURL method with the name of the link and the target URL. Multiple URLs can be set.
In this example, we assume that the make test command causes a collection of HTML files to be created and put somewhere on the coverage.example.org web server, in a filename that incorporates the build number.
class TestWithCodeCoverage(BuildStep):
command = ["make", "test",
Interpolate("buildnum=%(prop:buildnumber)s")]
def createSummary(self, log):
buildnumber = self.getProperty("buildnumber")
url = "http://coverage.example.org/builds/%s.html" % buildnumber
self.addURL("coverage", url)
You might also want to extract the URL from some special message output by the build process itself:
class TestWithCodeCoverage(BuildStep):
command = ["make", "test",
Interpolate("buildnum=%(prop:buildnumber)s")]
def createSummary(self, log):
output = StringIO(log.getText())
for line in output.readlines():
if line.startswith("coverage-url:"):
url = line[len("coverage-url:"):].strip()
self.addURL("coverage", url)
return
Note that a build process which emits both stdout and stderr might cause this line to be split or interleaved between other lines. It might be necessary to restrict the getText call to only stdout with something like this:
output = StringIO("".join([c[1]
for c in log.getChunks()
if c[0] == LOG_CHANNEL_STDOUT]))
Of course if the build is run under a PTY, then stdout and stderr will be merged before the buildbot ever sees them, so such interleaving will be unavoidable.
A Somewhat Whimsical Example
Let's say that we've got some snazzy new unit-test framework called Framboozle. It's the hottest thing since sliced bread. It slices, it dices, it runs unit tests like there's no tomorrow. Plus if your unit tests fail, you can use its name for a Web 2.1 startup company, make millions of dollars, and hire engineers to fix the bugs for you, while you spend your afternoons lazily hang-gliding along a scenic pacific beach, blissfully unconcerned about the state of your tests. [1]
To run a Framboozle-enabled test suite, you just run the 'framboozler' command from the top of your source code tree. The 'framboozler' command emits a bunch of stuff to stdout, but the most interesting bit is that it emits the line "FNURRRGH!" every time it finishes running a test case You'd like to have a test-case counting LogObserver that watches for these lines and counts them, because counting them will help the buildbot more accurately calculate how long the build will take, and this will let you know exactly how long you can sneak out of the office for your hang-gliding lessons without anyone noticing that you're gone.
This will involve writing a new BuildStep (probably named "Framboozle") which inherits from ShellCommand. The BuildStep class definition itself will look something like this:
from buildbot.steps.shell import ShellCommand
from buildbot.process.buildstep import LogLineObserver
class FNURRRGHCounter(LogLineObserver):
numTests = 0
def outLineReceived(self, line):
if "FNURRRGH!" in line:
self.numTests += 1
self.step.setProgress('tests', self.numTests)
class Framboozle(ShellCommand):
command = ["framboozler"]
def __init__(self, **kwargs):
ShellCommand.__init__(self, **kwargs) # always upcall!
counter = FNURRRGHCounter())
self.addLogObserver('stdio', counter)
self.progressMetrics += ('tests',)
So that's the code that we want to wind up using. How do we actually deploy it?
You have a couple of different options.
Option 1: The simplest technique is to simply put this text (everything from START to FINISH) in your master.cfg file, somewhere before the BuildFactory definition where you actually use it in a clause like:
f = BuildFactory()
f.addStep(SVN(svnurl="stuff"))
f.addStep(Framboozle())
Remember that master.cfg is secretly just a Python program with one job: populating the BuildmasterConfig dictionary. And Python programs are allowed to define as many classes as they like. So you can define classes and use them in the same file, just as long as the class is defined before some other code tries to use it.
This is easy, and it keeps the point of definition very close to the point of use, and whoever replaces you after that unfortunate hang-gliding accident will appreciate being able to easily figure out what the heck this stupid "Framboozle" step is doing anyways. The downside is that every time you reload the config file, the Framboozle class will get redefined, which means that the buildmaster will think that you've reconfigured all the Builders that use it, even though nothing changed. Bleh.
Option 2: Instead, we can put this code in a separate file, and import it into the master.cfg file just like we would the normal buildsteps like ShellCommand and SVN.
Create a directory named ~/lib/python, put everything from START to FINISH in ~/lib/python/framboozle.py, and run your buildmaster using:
PYTHONPATH=~/lib/python buildbot start MASTERDIR
or use the Makefile.buildbot to control the way buildbot start works. Or add something like this to something like your ~/.bashrc or ~/.bash_profile or ~/.cshrc:
export PYTHONPATH=~/lib/python
Once we've done this, our master.cfg can look like:
from framboozle import Framboozle
f = BuildFactory()
f.addStep(SVN(svnurl="stuff"))
f.addStep(Framboozle())
or:
import framboozle
f = BuildFactory()
f.addStep(SVN(svnurl="stuff"))
f.addStep(framboozle.Framboozle())
(check out the Python docs for details about how "import" and "from A import B" work).
What we've done here is to tell Python that every time it handles an "import" statement for some named module, it should look in our ~/lib/python/ for that module before it looks anywhere else. After our directories, it will try in a bunch of standard directories too (including the one where buildbot is installed). By setting the PYTHONPATH environment variable, you can add directories to the front of this search list.
Python knows that once it "import"s a file, it doesn't need to re-import it again. This means that reconfiguring the buildmaster (with buildbot reconfig, for example) won't make it think the Framboozle class has changed every time, so the Builders that use it will not be spuriously restarted. On the other hand, you either have to start your buildmaster in a slightly weird way, or you have to modify your environment to set the PYTHONPATH variable.
Option 3: Install this code into a standard Python library directory
Find out what your Python's standard include path is by asking it:
80:warner@luther% python
Python 2.4.4c0 (#2, Oct 2 2006, 00:57:46)
[GCC 4.1.2 20060928 (prerelease) (Debian 4.1.1-15)] on linux2
Type "help", "copyright", "credits" or "license" for more information.
>>> import sys
>>> import pprint
>>> pprint.pprint(sys.path)
['',
'/usr/lib/python24.zip',
'/usr/lib/python2.4',
'/usr/lib/python2.4/plat-linux2',
'/usr/lib/python2.4/lib-tk',
'/usr/lib/python2.4/lib-dynload',
'/usr/local/lib/python2.4/site-packages',
'/usr/lib/python2.4/site-packages',
'/usr/lib/python2.4/site-packages/Numeric',
'/var/lib/python-support/python2.4',
'/usr/lib/site-python']
In this case, putting the code into /usr/local/lib/python2.4/site-packages/framboozle.py would work just fine. We can use the same master.cfg import framboozle statement as in Option 2. By putting it in a standard include directory (instead of the decidedly non-standard ~/lib/python), we don't even have to set PYTHONPATH to anything special. The downside is that you probably have to be root to write to one of those standard include directories.
Option 4: Submit the code for inclusion in the Buildbot distribution
Make a fork of buildbot on http://github.com/djmitche/buildbot or post a patch in a bug at http://buildbot.net. In either case, post a note about your patch to the mailing list, so others can provide feedback and, eventually, commit it.
from buildbot.steps import framboozle f = BuildFactory() f.addStep(SVN(svnurl="stuff")) f.addStep(framboozle.Framboozle())
And then you don't even have to install framboozle.py anywhere on your system, since it will ship with Buildbot. You don't have to be root, you don't have to set PYTHONPATH. But you do have to make a good case for Framboozle being worth going into the main distribution, you'll probably have to provide docs and some unit test cases, you'll need to figure out what kind of beer the author likes (IPA's and Stouts for Dustin), and then you'll have to wait until the next release. But in some environments, all this is easier than getting root on your buildmaster box, so the tradeoffs may actually be worth it.
Putting the code in master.cfg (1) makes it available to that buildmaster instance. Putting it in a file in a personal library directory (2) makes it available for any buildmasters you might be running. Putting it in a file in a system-wide shared library directory (3) makes it available for any buildmasters that anyone on that system might be running. Getting it into the buildbot's upstream repository (4) makes it available for any buildmasters that anyone in the world might be running. It's all a matter of how widely you want to deploy that new class.
Writing New Status Plugins
Each status plugin is an object which provides the twisted.application.service.IService interface, which creates a tree of Services with the buildmaster at the top [not strictly true]. The status plugins are all children of an object which implements buildbot.interfaces.IStatus, the main status object. From this object, the plugin can retrieve anything it wants about current and past builds. It can also subscribe to hear about new and upcoming builds.
Status plugins which only react to human queries (like the Waterfall display) never need to subscribe to anything: they are idle until someone asks a question, then wake up and extract the information they need to answer it, then they go back to sleep. Plugins which need to act spontaneously when builds complete (like the MailNotifier plugin) need to subscribe to hear about new builds.
If the status plugin needs to run network services (like the HTTP server used by the Waterfall plugin), they can be attached as Service children of the plugin itself, using the IServiceCollection interface.
| [1] | framboozle.com is still available. Remember, I get 10% :). |
Command-line Tool
This section describes command-line tools available after buildbot installation. Since version 0.8 the one-for-all buildbot command-line tool was divided into two parts namely buildbot and buildslave. The last one was separated from main command-line tool to minimize dependencies required for running a buildslave while leaving all other functions to buildbot tool.
Every command-line tool has a list of global options and a set of commands which have their own options. One can run these tools in the following way:
buildbot [global options] command [command options]
buildslave [global options] command [command options]
The buildbot command is used on the master, while buildslave is used on the slave. Global options are the same for both tools which perform the following actions:
| --help | Print general help about available commands and global options and exit. All subsequent arguments are ignored. |
| --verbose | Set verbose output. |
| --version | Print current buildbot version and exit. All subsequent arguments are ignored. |
You can get help on any command by specifying --help as a command option:
buildbot @var{command} --help
You can also use manual pages for buildbot and buildslave for quick reference on command-line options.
The remainder of this section describes each buildbot command. See Command Line Index for a full list.
buildbot
The buildbot command-line tool can be used to start or stop a buildmaster or buildbot, and to interact with a running buildmaster. Some of its subcommands are intended for buildmaster admins, while some are for developers who are editing the code that the buildbot is monitoring.
Administrator Tools
The following buildbot sub-commands are intended for buildmaster administrators:
create-master
buildbot create-master -r {BASEDIR}
This creates a new directory and populates it with files that allow it to be used as a buildmaster's base directory.
You will usually want to use the -r option to create a relocatable buildbot.tac. This allows you to move the master directory without editing this file.
start
buildbot start [--nodaemon] {BASEDIR}
This starts a buildmaster which was already created in the given base directory. The daemon is launched in the background, with events logged to a file named twistd.log.
The --nodaemon option instructs Buildbot to skip daemonizing. The process will start in the foreground. It will only return to the command-line when it is stopped.
restart
buildbot restart [--nodaemon] {BASEDIR}
Restart the buildmaster. This is equivalent to stop followed by start The --nodaemon option has the same meaning as for start.
stop
buildbot stop {BASEDIR}
This terminates the daemon (either buildmaster or buildslave) running in the given directory. The --clean option shuts down the buildmaster cleanly.
sighup
buildbot sighup {BASEDIR}
This sends a SIGHUP to the buildmaster running in the given directory, which causes it to re-read its master.cfg file.
Developer Tools
These tools are provided for use by the developers who are working on the code that the buildbot is monitoring.
statuslog
buildbot statuslog --master {MASTERHOST}:{PORT}
This command starts a simple text-based status client, one which just prints out a new line each time an event occurs on the buildmaster.
The --master option provides the location of the buildbot.status.client.PBListener status port, used to deliver build information to realtime status clients. The option is always in the form of a string, with hostname and port number separated by a colon (HOSTNAME:PORTNUM). Note that this port is not the same as the slaveport (although a future version may allow the same port number to be used for both purposes). If you get an error message to the effect of Failure: twisted.cred.error.UnauthorizedLogin:, this may indicate that you are connecting to the slaveport rather than a PBListener port.
The --master option can also be provided by the masterstatus name in .buildbot/options (see .buildbot config directory).
statusgui
If you have set up a PBListener, you will be able to monitor your Buildbot using a simple Gtk+ application invoked with the buildbot statusgui command:
buildbot statusgui --master {MASTERHOST}:{PORT}
This command starts a simple Gtk+-based status client, which contains a few boxes for each Builder that change color as events occur. It uses the same --master argument and masterstatus option as the buildbot statuslog command (statuslog).
try
This lets a developer to ask the question What would happen if I committed this patch right now?. It runs the unit test suite (across multiple build platforms) on the developer's current code, allowing them to make sure they will not break the tree when they finally commit their changes.
The buildbot try command is meant to be run from within a developer's local tree, and starts by figuring out the base revision of that tree (what revision was current the last time the tree was updated), and a patch that can be applied to that revision of the tree to make it match the developer's copy. This (revision, patch) pair is then sent to the buildmaster, which runs a build with that SourceStamp. If you want, the tool will emit status messages as the builds run, and will not terminate until the first failure has been detected (or the last success).
There is an alternate form which accepts a pre-made patch file (typically the output of a command like svn diff). This --diff form does not require a local tree to run from. See try --diff concerning the --diff command option.
For this command to work, several pieces must be in place: the Try_Jobdir or :Try_Userpass, as well as some client-side configuration.
The try command needs to be told how to connect to the try scheduler, and must know which of the authentication approaches described above is in use by the buildmaster. You specify the approach by using --connect=ssh or --connect=pb (or try_connect = 'ssh' or try_connect = 'pb' in .buildbot/options).
For the PB approach, the command must be given a --master argument (in the form HOST:PORT) that points to TCP port that you picked in the Try_Userpass scheduler. It also takes a --username and --passwd pair of arguments that match one of the entries in the buildmaster's userpass list. These arguments can also be provided as try_master, try_username, and try_password entries in the .buildbot/options file.
For the SSH approach, the command must be given --host and --username, to get to the buildmaster host. It must also be given --jobdir, which points to the inlet directory configured above. The jobdir can be relative to the user's home directory, but most of the time you will use an explicit path like ~buildbot/project/trydir. These arguments can be provided in .buildbot/options as try_host, try_username, try_password, and try_jobdir.
The SSH approach also provides a --buildbotbin argument to allow specification of the buildbot binary to run on the buildmaster. This is useful in the case where buildbot is installed in a virtualenv on the buildmaster host, or in other circumstances where the buildbot command is not on the path of the user given by --username. The --buildbotbin argument can be provided in .buildbot/options as try_buildbotbin
Finally, the SSH approach needs to connect to a PBListener status port, so it can retrieve and report the results of the build (the PB approach uses the existing connection to retrieve status information, so this step is not necessary). This requires a --masterstatus argument, or a try_masterstatus entry in .buildbot/options, in the form of a HOSTNAME:PORT string.
The following command line arguments are deprecated, but retained for backward compatibility:
| --tryhost | is replaced by --host |
| --trydir | is replaced by --jobdir |
| --master | is replaced by --masterstatus |
Likewise, the following .buildbot/options file entries are deprecated, but retained for backward compatibility:
- try_dir is replaced by try_jobdir
- masterstatus is replaced by try_masterstatus
A trial build is performed on multiple Builders at the same time, and the developer gets to choose which Builders are used (limited to a set selected by the buildmaster admin with the TryScheduler's builderNames= argument). The set you choose will depend upon what your goals are: if you are concerned about cross-platform compatibility, you should use multiple Builders, one from each platform of interest. You might use just one builder if that platform has libraries or other facilities that allow better test coverage than what you can accomplish on your own machine, or faster test runs.
The set of Builders to use can be specified with multiple --builder arguments on the command line. It can also be specified with a single try_builders option in .buildbot/options that uses a list of strings to specify all the Builder names:
try_builders = ["full-OSX", "full-win32", "full-linux"]
If you are using the PB approach, you can get the names of the builders that are configured for the try scheduler using the get-builder-names argument:
buildbot try --get-builder-names --connect=pb --master=... --username=... --passwd=...
The try command also needs to know how to take the developer's current tree and extract the (revision, patch) source-stamp pair. Each VC system uses a different process, so you start by telling the try command which VC system you are using, with an argument like --vc=cvs or --vc=git. This can also be provided as try_vc in .buildbot/options.
The following names are recognized: bzr cvs darcs hg git mtn p4 svn
Some VC systems (notably CVS and SVN) track each directory more-or-less independently, which means the try command needs to move up to the top of the project tree before it will be able to construct a proper full-tree patch. To accomplish this, the try command will crawl up through the parent directories until it finds a marker file. The default name for this marker file is .buildbot-top, so when you are using CVS or SVN you should touch .buildbot-top from the top of your tree before running buildbot try. Alternatively, you can use a filename like ChangeLog or README, since many projects put one of these files in their top-most directory (and nowhere else). To set this filename, use --topfile=ChangeLog, or set it in the options file with try_topfile = 'ChangeLog'.
You can also manually set the top of the tree with --topdir=~/trees/mytree, or try_topdir = '~/trees/mytree'. If you use try_topdir, in a .buildbot/options file, you will need a separate options file for each tree you use, so it may be more convenient to use the try_topfile approach instead.
Other VC systems which work on full projects instead of individual directories (Darcs, Mercurial, Git, Monotone) do not require try to know the top directory, so the --try-topfile and --try-topdir arguments will be ignored.
If the try command cannot find the top directory, it will abort with an error message.
The following command line arguments are deprecated, but retained for backward compatibility:
- --try-topdir is replaced by --topdir
- --try-topfile is replaced by --topfile
Some VC systems record the branch information in a way that try can locate it. For the others, if you are using something other than the default branch, you will have to tell the buildbot which branch your tree is using. You can do this with either the --branch argument, or a try_branch entry in the .buildbot/options file.
Each VC system has a separate approach for determining the tree's base revision and computing a patch.
- CVS
- try pretends that the tree is up to date. It converts the current time into a -D time specification, uses it as the base revision, and computes the diff between the upstream tree as of that point in time versus the current contents. This works, more or less, but requires that the local clock be in reasonably good sync with the repository.
- SVN
- try does a svn status -u to find the latest repository revision number (emitted on the last line in the Status against revision: NN message). It then performs an svn diff -rNN to find out how your tree differs from the repository version, and sends the resulting patch to the buildmaster. If your tree is not up to date, this will result in the try tree being created with the latest revision, then backwards patches applied to bring it back to the version you actually checked out (plus your actual code changes), but this will still result in the correct tree being used for the build.
- bzr
- try does a bzr revision-info to find the base revision, then a bzr diff -r$base.. to obtain the patch.
- Mercurial
- hg parents --template '{node}\n' emits the full revision id (as opposed to the common 12-char truncated) which is a SHA1 hash of the current revision's contents. This is used as the base revision. hg diff then provides the patch relative to that revision. For try to work, your working directory must only have patches that are available from the same remotely-available repository that the build process' source.Mercurial will use.
- Perforce
- try does a p4 changes -m1 ... to determine the latest changelist and implicitly assumes that the local tree is synced to this revision. This is followed by a p4 diff -du to obtain the patch. A p4 patch differs slightly from a normal diff. It contains full depot paths and must be converted to paths relative to the branch top. To convert the following restriction is imposed. The p4base (see P4Source) is assumed to be //depot
- Darcs
- try does a darcs changes --context to find the list of all patches back to and including the last tag that was made. This text file (plus the location of a repository that contains all these patches) is sufficient to re-create the tree. Therefore the contents of this context file are the revision stamp for a Darcs-controlled source tree. It then does a darcs diff -u to compute the patch relative to that revision.
- Git
- git branch -v lists all the branches available in the local repository along with the revision ID it points to and a short summary of the last commit. The line containing the currently checked out branch begins with * (star and space) while all the others start with (two spaces). try scans for this line and extracts the branch name and revision from it. Then it generates a diff against the base revision.
- Monotone
- mtn automate get_base_revision_id emits the full revision id which is a SHA1 hash of the current revision's contents. This is used as the base revision. mtn diff then provides the patch relative to that revision. For try to work, your working directory must only have patches that are available from the same remotely-available repository that the build process' source.Monotone will use.
You can provide the --who=dev to designate who is running the try build. This will add the dev to the Reason field on the try build's status web page. You can also set try_who = dev in the .buildbot/options file. Note that --who=dev will not work on version 0.8.3 or earlier masters.
Similarly, --comment=COMMENT will specify the comment for the patch, which is also displayed in the patch information. The corresponding config-file option is try_comment.
If you provide the --wait option (or try_wait = True in .buildbot/options), the buildbot try command will wait until your changes have either been proven good or bad before exiting. Unless you use the --quiet option (or try_quiet=True), it will emit a progress message every 60 seconds until the builds have completed.
You can set properties to send with your change using either the --property=key=value option, which sets a single property, or the --properties=key1=value1,key2=value2... option, which sets multiple comma-separated properties. Either of these can be sepcified multiple times. Note that the --properties option uses commas to split on properties, so if your property value itself contains a comma, you'll need to use the --property option to set it.
try --diff
Sometimes you might have a patch from someone else that you want to submit to the buildbot. For example, a user may have created a patch to fix some specific bug and sent it to you by email. You've inspected the patch and suspect that it might do the job (and have at least confirmed that it doesn't do anything evil). Now you want to test it out.
One approach would be to check out a new local tree, apply the patch, run your local tests, then use buildbot try to run the tests on other platforms. An alternate approach is to use the buildbot try --diff form to have the buildbot test the patch without using a local tree.
This form takes a --diff argument which points to a file that contains the patch you want to apply. By default this patch will be applied to the TRUNK revision, but if you give the optional --baserev argument, a tree of the given revision will be used as a starting point instead of TRUNK.
You can also use buildbot try --diff=- to read the patch from stdin.
Each patch has a patchlevel associated with it. This indicates the number of slashes (and preceding pathnames) that should be stripped before applying the diff. This exactly corresponds to the -p or --strip argument to the patch utility. By default buildbot try --diff uses a patchlevel of 0, but you can override this with the -p argument.
When you use --diff, you do not need to use any of the other options that relate to a local tree, specifically --vc, --try-topfile, or --try-topdir. These options will be ignored. Of course you must still specify how to get to the buildmaster (with --connect, --tryhost, etc).
Other Tools
These tools are generally used by buildmaster administrators.
sendchange
This command is used to tell the buildmaster about source changes. It is intended to be used from within a commit script, installed on the VC server. It requires that you have a PBChangeSource (PBChangeSource) running in the buildmaster (by being set in c['change_source']).
buildbot sendchange --master {MASTERHOST}:{PORT} --auth {USER}:{PASS}
--who {USER} {FILENAMES..}
The auth option specifies the credentials to use to connect to the master, in the form user:pass. If the password is omitted, then sendchange will prompt for it. If both are omitted, the old default (username "change" and password "changepw") will be used. Note that this password is well-known, and should not be used on an internet-accessible port.
The master and username arguments can also be given in the options file (see .buildbot config directory). There are other (optional) arguments which can influence the Change that gets submitted:
| --branch | (or option branch) This provides the (string) branch specifier. If omitted, it defaults to None, indicating the default branch. All files included in this Change must be on the same branch. |
| --category | (or option category) This provides the (string) category specifier. If omitted, it defaults to None, indicating no category. The category property can be used by Schedulers to filter what changes they listen to. |
| --project | (or option project) This provides the (string) project to which this change applies, and defaults to ''. The project can be used by schedulers to decide which builders should respond to a particular change. |
| --repository | (or option repository) This provides the repository from which this change came, and defaults to ''. |
| --revision | This provides a revision specifier, appropriate to the VC system in use. |
| --revision_file | |
| This provides a filename which will be opened and the contents used as the revision specifier. This is specifically for Darcs, which uses the output of darcs changes --context as a revision specifier. This context file can be a couple of kilobytes long, spanning a couple lines per patch, and would be a hassle to pass as a command-line argument. | |
| --property | This parameter is used to set a property on the Change generated by sendchange. Properties are specified as a name:value pair, separated by a colon. You may specify many properties by passing this parameter multiple times. |
| --comments | This provides the change comments as a single argument. You may want to use --logfile instead. |
| --logfile | This instructs the tool to read the change comments from the given file. If you use - as the filename, the tool will read the change comments from stdin. |
| --encoding | Specifies the character encoding for all other parameters, defaulting to 'utf8'. |
| --vc | Specifies which VC system the Change is coming from, one of: cvs, svn, darcs, hg, bzr, git, mtn, or p4. Defaults to None. |
debugclient
buildbot debugclient --master {MASTERHOST}:{PORT} --passwd {DEBUGPW}
This launches a small Gtk+/Glade-based debug tool, connecting to the buildmaster's debug port. This debug port shares the same port number as the slaveport (see Setting the PB Port for Slaves), but the debugPort is only enabled if you set a debug password in the buildmaster's config file (see Debug Options). The --passwd option must match the c['debugPassword'] value.
--master can also be provided in .debug/options by the master key. --passwd can be provided by the debugPassword key. See .buildbot config directory.
The Connect button must be pressed before any of the other buttons will be active. This establishes the connection to the buildmaster. The other sections of the tool are as follows:
- Reload .cfg
- Forces the buildmaster to reload its master.cfg file. This is equivalent to sending a SIGHUP to the buildmaster, but can be done remotely through the debug port. Note that it is a good idea to be watching the buildmaster's twistd.log as you reload the config file, as any errors which are detected in the config file will be announced there.
- Rebuild .py
- (not yet implemented). The idea here is to use Twisted's rebuild facilities to replace the buildmaster's running code with a new version. Even if this worked, it would only be used by buildbot developers.
- poke IRC
- This locates a words.IRC status target and causes it to emit a message on all the channels to which it is currently connected. This was used to debug a problem in which the buildmaster lost the connection to the IRC server and did not attempt to reconnect.
- Commit
- This allows you to inject a Change, just as if a real one had been delivered by whatever VC hook you are using. You can set the name of the committed file and the name of the user who is doing the commit. Optionally, you can also set a revision for the change. If the revision you provide looks like a number, it will be sent as an integer, otherwise it will be sent as a string.
- Force Build
- This lets you force a Builder (selected by name) to start a build of the current source tree.
- Currently
- (obsolete). This was used to manually set the status of the given Builder, but the status-assignment code was changed in an incompatible way and these buttons are no longer meaningful.
user
Note that in order to use this command, you need to configure a CommandlineUserManager instance in your master.cfg file, which is explained in Users Options.
This command allows you to manage users in buildbot's database. No extra requirements are needed to use this command, aside from the Buildmaster running. For details on how Buildbot manages users, see Users.
| --master | The user command can be run virtually anywhere provided a location of the running buildmaster. The master argument is of the form {MASTERHOST}:{PORT}. |
| --username | PB connection authentication that should match the arguments to CommandlineUserManager. |
| --passwd | PB connection authentication that should match the arguments to CommandlineUserManager. |
| --op | There are four supported values for the op argument: add, update, remove, and get. Each are described in full in the following sections. |
| --bb_username | Used with the update option, this sets the user's username for web authentication in the database. It requires bb_password to be set along with it. |
| --bb_password | Also used with the update option, this sets the password portion of a user's web authentication credentials into the database. The password is first encrypted prior to storage for security reasons. |
| --ids | When working with users, you need to be able to refer to them by unique identifiers to find particular users in the database. The ids option lets you specify a comma separated list of these identifiers for use with the user command. The ids option is used only when using remove or show. |
| --info | Users are known in buildbot as a collection of attributes tied together by some unique identifier (see Users). These attributes are specified in the form {TYPE}={VALUE} when using the info option. These {TYPE}={VALUE} pairs are specified in a comma separated list, so for example: --info=svn=jschmo,git='Joe Schmo <joe@schmo.com>'
The info option can be specified multiple times in the user command, as each specified option will be interpreted as a new user. Note that info is only used with add or with update, and whenever you use update you need to specify the identifier of the user you want to update. This is done by prepending the info arguments with {ID:}. If we were to update 'jschmo' from the previous example, it would look like this: --info=jschmo:git='Joseph Schmo <joe@schmo.com>'
|
Note that --master, --username, --passwd, and --op are always required to issue the user command.
The --master, --username, and --passwd options can be specified in the option file with keywords user_master, user_username, and user_passwd, respectively. If user_master is not specified, then master from the options file will be used instead.
Below are examples of how each command should look. Whenever a user command is successful, results will be shown to whoever issued the command.
For add:
buildbot user --master={MASTERHOST} --op=add \
--username={USER} --passwd={USERPW} \
--info={TYPE}={VALUE},...
For update:
buildbot user --master={MASTERHOST} --op=update \
--username={USER} --passwd={USERPW} \
--info={ID}:{TYPE}={VALUE},...
For remove:
buildbot user --master={MASTERHOST} --op=remove \
--username={USER} --passwd={USERPW} \
--ids={ID1},{ID2},...
For get:
buildbot user --master={MASTERHOST} --op=get \
--username={USER} --passwd={USERPW} \
--ids={ID1},{ID2},...
A note on update: when updating the bb_username and bb_password, the info doesn't need to have additional {TYPE}={VALUE} pairs to update and can just take the {ID} portion.
.buildbot config directory
Many of the buildbot tools must be told how to contact the buildmaster that they interact with. This specification can be provided as a command-line argument, but most of the time it will be easier to set them in an options file. The buildbot command will look for a special directory named .buildbot, starting from the current directory (where the command was run) and crawling upwards, eventually looking in the user's home directory. It will look for a file named options in this directory, and will evaluate it as a Python script, looking for certain names to be set. You can just put simple name = 'value' pairs in this file to set the options.
For a description of the names used in this file, please see the documentation for the individual buildbot sub-commands. The following is a brief sample of what this file's contents could be.
# for status-reading tools
masterstatus = 'buildbot.example.org:12345'
# for 'sendchange' or the debug port
master = 'buildbot.example.org:18990'
debugPassword = 'eiv7Po'
Note carefully that the names in the options file usually do not match the command-line option name.
- masterstatus
- Equivalent to --master for statuslog and statusgui, this gives the location of the client.PBListener status port.
- master
- Equivalent to --master for debugclient and sendchange. This option is used for two purposes. It is the location of the debugPort for debugclient and the location of the pb.PBChangeSource for `sendchange. Generally these are the same port.
- debugPassword
Equivalent to --passwd for debugclient.
Important
This value must match the value of debugPassword, used to protect the debug port, for the debugclient command.
- username
- Equivalent to --username for the sendchange command.
- branch
- Equivalent to --branch for the sendchange command.
- category
- Equivalent to --category for the sendchange command.
- try_connect
- Equivalent to --connect, this specifies how the try command should deliver its request to the buildmaster. The currently accepted values are ssh and pb.
- try_builders
- Equivalent to --builders, specifies which builders should be used for the try build.
- try_vc
- Equivalent to --vc for try, this specifies the version control system being used.
- try_branch
- Equivalent to --branch, this indicates that the current tree is on a non-trunk branch.
try_topdir
- try_topfile
- Use try_topdir, equivalent to --try-topdir, to explicitly indicate the top of your working tree, or try_topfile, equivalent to --try-topfile to name a file that will only be found in that top-most directory.
try_host
try_username
- try_dir
- When try_connect is ssh, the command will use try_host for --tryhost, try_username for --username, and try_dir for --trydir. Apologies for the confusing presence and absence of 'try'.
try_username
try_password
- try_master
- Similarly, when try_connect is pb, the command will pay attention to try_username for --username, try_password for --passwd, and try_master for --master.
try_wait
- masterstatus
- try_wait and masterstatus (equivalent to --wait and master, respectively) are used to ask the try command to wait for the requested build to complete.
buildslave
buildslave command-line tool is used for buildslave management only and does not provide any additional functionality. One can create, start, stop and restart the buildslave.
create-slave
This creates a new directory and populates it with files that let it be used as a buildslave's base directory. You must provide several arguments, which are used to create the initial buildbot.tac file.
The -r option is advisable here, just like for create-master.
buildslave create-slave -r {BASEDIR} {MASTERHOST}:{PORT} {SLAVENAME} {PASSWORD}
The create-slave options are described in Buildslave Options.
start
This starts a buildslave which was already created in the given base directory. The daemon is launched in the background, with events logged to a file named twistd.log.
buildslave start [--nodaemon] BASEDIR
The --nodaemon option instructs Buildbot to skip daemonizing. The process will start in the foreground. It will only return to the command-line when it is stopped.
restart
buildslave restart [--nodaemon] BASEDIR
This restarts a buildslave which is already running. It is equivalent to a stop followed by a start.
The --nodaemon option has the same meaning as for start.
Resources
The Buildbot home page is http://buildbot.net/.
For configuration questions and general discussion, please use the buildbot-devel mailing list. The subscription instructions and archives are available at http://lists.sourceforge.net/lists/listinfo/buildbot-devel
The #buildbot channel on Freenode's IRC servers hosts development discussion, and often folks are available to answer questions there, as well.
Optimization
If you're feeling your Buildbot is running a bit slow, here are some tricks that may help you, but use them at your own risk.
Properties load speedup
For example, if most of your build properties are strings, you can gain an approx. 30% speedup if you put this snippet of code inside your master.cfg file:
def speedup_json_loads():
import json, re
original_decode = json._default_decoder.decode
my_regexp = re.compile(r'^\[\"([^"]*)\",\s+\"([^"]*)\"\]$')
def decode_with_re(str, *args, **kw):
m = my_regexp.match(str)
try:
return list(m.groups())
except:
return original_decode(str, *args, **kw)
json._default_decoder.decode = decode_with_re
speedup_json_loads()
It patches json decoder so that it would first try to extract a value from JSON that is a list of two strings (which is the case for a property being a string), and would fallback to general JSON decoder on any error
Buildbot Development
This chapter is the official repository for the collected wisdom of the Buildbot hackers. It is intended both for developers writing patches that will be included in Buildbot itself, and for advanced users who wish to customize Buildbot.
Master Organization
Buildbot makes heavy use of Twisted Python's support for services - software modules that can be started and stopped dynamically. Buildbot adds the ability to reconfigure such services, too - see Reconfiguration. Twisted arranges services into trees; the following section describes the service tree on a running master.
Buildmaster Service Hierarchy
The hierarchy begins with the master, a buildbot.master.BuildMaster instance. Most other services contain a reference to this object in their master attribute, and in general the appropriate way to access other objects or services is to begin with self.master and navigate from there.
The master has several child services:
- master.metrics
- A buildbot.process.metrics.MetricLogObserver instance that handles tracking and reporting on master metrics.
- master.caches
- A buildbot.process.caches.CacheManager instance that provides access to object caches.
- master.pbmanager
- A buildbot.pbmanager.PBManager instance that handles incoming PB connections, potentially on multiple ports, and dispatching those connections to appropriate components based on the supplied username.
- master.change_svc
- A buildbot.changes.manager.ChangeManager instance that manages the active change sources, as well as the stream of changes received from those sources. All active change sources are child services of this instance.
- master.botmaster
A buildbot.process.botmaster.BotMaster instance that manages all of the slaves and builders as child services.
The botmaster acts as the parent service for a buildbot.process.botmaster.BuildRequestDistributor instance (at master.botmaster.brd) as well as all active slaves (buildbot.buildslave.AbstractBuildSlave instances) and builders (buildbot.process.builder.Builder instances).
- master.scheduler_manager
- A buildbot.schedulers.manager.SchedulerManager instance that manages the active schedulers. All active schedulers are child services of this instance.
- master.user_manager
- A buildbot.process.users.manager.UserManagerManager instance that manages access to users. All active user managers are child services of this instance.
- master.db
- A buildbot.db.connector.DBConnector instance that manages access to the buildbot database. See Database for more information.
- master.debug
- A buildbot.process.debug.DebugServices instance that manages debugging-related access -- the debug client and manhole.
- master.status
- A buildbot.status.master.Status instance that provides access to all status data. This instance is also the service parent for all status listeners.
Definitions
Buildbot uses some terms and concepts that have specific meanings.
Repository
See Repository.
Version Control Comparison
Buildbot supports a number of version control systems, and they don't all agree on their terms. This table should help to disambiguate them.
| Name | Change | Revision | Branches |
|---|---|---|---|
| CVS | patch [1] | timestamp | unnamed |
| Subversion | revision | integer | directories |
| Git | commit | sha1 hash | named refs |
| Mercurial | changeset | sha1 hash | different repos or (permanently) named commits |
| Darcs | ? | none [2] | different repos |
| Bazaar | ? | ? | ? |
| Perforce | ? | ? | ? |
| BitKeeper | changeset | ? | different repos |
- [1] note that CVS only tracks patches to individual files. Buildbot tries to recognize coordinated changes to multiple files by correlating change times.
- [2] Darcs does not have a concise way of representing a particular revision of the source.
Buildbot Coding Style
Symbol Names
Buildbot follows PEP8 regarding the formatting of symbol names.
The single exception in naming of functions and methods. Because Buildbot uses Twisted so heavily, and Twisted uses interCaps, Buildbot methods should do the same. That is, you should spell methods and functions with the first character in lower-case, and the first letter of subsequent words capitalized, e.g., compareToOther or getChangesGreaterThan. This point is not applied very consistently in Buildbot, but let's try to be consistent in new code.
Twisted Idioms
Programming with Twisted Python can be daunting. But sticking to a few well-defined patterns can help avoid surprises.
Prefer to Return Deferreds
If you're writing a method that doesn't currently block, but could conceivably block sometime in the future, return a Deferred and document that it does so. Just about anything might block - even getters and setters!
Helpful Twisted Classes
Twisted has some useful, but little-known classes. Brief descriptions follow, but you should consult the API documentation or source code for the full details.
- twisted.internet.task.LoopingCall
- Calls an asynchronous function repeatedly at set intervals. Note that this will stop looping if the function fails. In general, you will want to wrap the function to capture and log errors.
- twisted.application.internet.TimerService
- Similar to t.i.t.LoopingCall, but implemented as a service that will automatically start and stop the function calls when the service starts and stops. See the warning about failing functions for t.i.t.LoopingCall.
Sequences of Operations
Especially in Buildbot, we're often faced with executing a sequence of operations, many of which may block.
In all cases where this occurs, there is a danger of pre-emption, so exercise the same caution you would if writing a threaded application.
For simple cases, you can use nested callback functions. For more complex cases, deferredGenerator is appropriate.
Nested Callbacks
First, an admonition: do not create extra class methods that represent the continuations of the first:
def myMethod(self):
d = ...
d.addCallback(self._myMethod_2) # BAD!
def _myMethod_2(self, res): # BAD!
# ...
Invariably, this extra method gets separated from its parent as the code evolves, and the result is completely unreadable. Instead, include all of the code for a particular function or method within the same indented block, using nested functions:
def getRevInfo(revname):
results = {}
d = defer.succeed(None)
def rev_parse(_): # note use of '_' to quietly indicate an ignored parameter
return utils.getProcessOutput(git, [ 'rev-parse', revname ])
d.addCallback(rev_parse)
def parse_rev_parse(res):
results['rev'] = res.strip()
return utils.getProcessOutput(git, [ 'log', '-1', '--format=%s%n%b', results['rev'] ])
d.addCallback(parse_rev_parse)
def parse_log(res):
results['comments'] = res.strip()
d.addCallback(parse_log)
def set_results(_):
return results
d.addCallback(set_results)
return d
it is usually best to make the first operation occur within a callback, as the deferred machinery will then handle any exceptions as a failure in the outer Deferred. As a shortcut, d.addCallback works as a decorator:
d = defer.succeed(None)
@d.addCallback
def rev_parse(_): # note use of '_' to quietly indicate an ignored parameter
return utils.getProcessOutput(git, [ 'rev-parse', revname ])
Be careful with local variables. For example, if parse_rev_parse, above, merely assigned rev = res.strip(), then that variable would be local to parse_rev_parse and not available in set_results. Mutable variables (dicts and lists) at the outer function level are appropriate for this purpose.
Note
do not try to build a loop in this style by chaining multiple Deferreds! Unbounded chaining can result in stack overflows, at least on older versions of Twisted. Use deferredGenerator instead.
inlineCallbacks
twisted.internet.defer.inlineCallbacks is a great help to writing code that makes a lot of asynchronous calls, particularly if those calls are made in loop or conditionals. Refer to the Twisted documentation for the details, but the style within Buildbot is as follows:
from twisted.internet import defer
@defer.inlineCallbacks
def mymethod(self, x, y):
xval = yield getSomething(x)
for z in (yield getZValues()):
y += z
if xval > 10:
defer.returnValue(xval + y)
return
self.someOtherMethod()
The key points to notice here:
- Always import defer as a module, not the names within it.
- Use the decorator form of inlineCallbacks.
- In most cases, the result of a yield expression should be assigned to a variable. It can be used in a larger expression, but remember that Python requires that you enclose the expression in its own set of parentheses.
- Python does not permit returning a value from a generator, so statements like return xval + y are invalid. Instead, yield the result of defer.returnValue. Although this function does cause an immediate function exit, for clarity follow it with a bare return, as in the example, unless it is the last statement in a function.
The great advantage of inlineCallbacks is that it allows you to use all of the usual Pythonic control structures in their natural form. In particular, it is easy to represent a loop, or even nested loops, in this style without losing any readability.
Note that code using deferredGenerator is no longer acceptable in Buildbot.
Locking
Remember that asynchronous programming does not free you from the need to worry about concurrency issues. Particularly if you are executing a sequence of operations, each time you wait for a Deferred, arbitrary other actions can take place.
In general, you should try to perform actions atomically, but for the rare situations that require synchronization, the following might be useful:
- twisted.internet.defer.DeferredLock
- buildbot.util.misc.deferredLocked
- buildbot.util.misc.SerializedInvocation
Joining Sequences
It's often the case that you'll want to perform multiple operations in parallel, and re-join the results at the end. For this purpose, you'll want to use a DeferredList
def getRevInfo(revname):
results = {}
finished = dict(rev_parse=False, log=False)
rev_parse_d = utils.getProcessOutput(git, [ 'rev-parse', revname ])
def parse_rev_parse(res):
return res.strip()
rev_parse_d.addCallback(parse_rev_parse)
log_d = utils.getProcessOutput(git, [ 'log', '-1', '--format=%s%n%b', results['rev'] ]))
def parse_log(res):
return res.strip()
log_d.addCallback(parse_log)
d = defer.DeferredList([rev_parse_d, log_d], consumeErrors=1, fireOnFirstErrback=1)
def handle_results(results):
return dict(rev=results[0][1], log=results[1][1])
d.addCallback(handle_results)
return d
Here the deferred list will wait for both rev_parse_d and log_d to fire, or for one of them to fail. You may attach callbacks and errbacks to a DeferredList just as for a deferred.
Buildbot's Test Suite
Buildbot's tests are under buildbot.test and, for the buildslave, buildslave.test. Tests for the slave are similar to the master, although in some cases helpful functionality on the master is not re-implemented on the slave.
Suites
Tests are divided into a few suites:
- Unit tests (buildbot.test.unit) - these follow unit-testing practices and attempt to maximally isolate the system under test. Unit tests are the main mechanism of achieving test coverage, and all new code should be well-covered by corresponding unit tests.
- Interface tests (buildbot.test.interface). In many cases, Buildbot has multiple implementations of the same interface -- at least one "real" implementation and a fake implementation used in unit testing. The interface tests ensure that these implementations all meet the same standards. This ensures consistency between implementations, and also ensures that the unit tests are testing against realistic fakes.
- Integration tests (buildbot.test.integration) - these test combinations of multiple units. Of necessity, integration tests are incomplete - they cannot test every condition; difficult to maintain - they tend to be complex and touch a lot of code; and slow - they usually require considerable setup and execute a lot of code. As such, use of integration tests is limited to a few, broad tests to act as a failsafe for the unit and interface tests.
- Regression tests (buildbot.test.regrssions) - these test to prevent re-occurrence of historical bugs. In most cases, a regression is better tested by a test in the other suites, or unlike to recur, so this suite tends to be small.
- Fuzz tests (buildbot.test.fuzz) - these tests run for a long time and apply randomization to try to reproduce rare or unusual failures. The Buildbot project does not currently have a framework to run fuzz tests regularly.
Unit Tests
Every code module should have corresponding unit tests. This is not currently true of Buildbot, due to a large body of legacy code, but is a goal of the project. All new code must meet this requirement.
Unit test modules are be named after the package or class they test, replacing . with _ and omitting the buildbot_. For example, test_status_web_authz_Authz.py tests the Authz class in buildbot/status/web/authz.py. Modules with only one class, or a few trivial classes, can be tested in a single test module. For more complex situations, prefer to use multiple test modules.
Interface Tests
Interface tests exist to verify that multiple implementations of an interface meet the same requirements. Note that the name 'interface' should not be confused with the sparse use of Zope Interfaces in the Buildbot code -- in this context, an interface is any boundary between testable units.
Ideally, all interfaces, both public and private, should be tested. Certainly, any public interfaces need interface tests.
Interface test modules are named after the interface they are testing, e.g., test_mq.py. They generally begin as follows:
from buildbot.test.util import interfaces
from twistd.trial import unittest
class Tests(interfaces.InterfaceTests):
# define methods that must be overridden per implementation
def someSetupMethod(self):
raise NotImplementedError
# tests that all implementations must pass
def test_signature_someMethod(self):
@self.assertArgSpecMatches(self.systemUnderTest.someMethod)
def someMethod(self, arg1, arg2):
pass
def test_something(self):
pass # ...
class RealTests(Tests):
# tests that all *real* implementations must pass
def test_something_else(self):
pass # ...
All of the test methods are defined here, segregated into tests that all implementations must pass, and tests that the fake implementation is not expected to pass. The test_signature_someMethod test above illustrates the assertArgSpecMatches decorator, which can be used to compare the argument specification of a callable with a reference implementation conveniently written as a nested function.
At the bottom of the test module, a subclass is created for each implementation, implementing the setup methods that were stubbed out in the parent classes:
class TestFakeThing(unittest.TestCase, Tests):
def someSetupMethod(self):
pass # ...
class TestRealThing(unittest.TestCase, RealTests):
def someSetupMethod(self):
pass # ...
For implementations which require optional software, this is the appropriate place to signal that tests should be skipped when their prerequisites are not available.
Integration Tests
Integration test modules test several units at once, including their interactions. In general, they serve as a catch-all for failures and bugs that were not detected by the unit and interface tests. As such, they should not aim to be exhaustive, but merely representative.
Integration tests are very difficult to maintain if they reach into the internals of any part of Buildbot. Where possible, try to use the same means as a user would to set up, run, and check the results of an integration test. That may mean writing a master.cfg to be parsed, and checking the results by examining the database (or fake DB API) afterward.
Regression Tests
Regression tests are even more rare in Buildbot than integration tests. In many cases, a regression test is not necessary -- either the test is better-suited as a unit or interface test, or the failure is so specific that a test will never fail again.
Regression tests tend to be closely tied to the code in which the error occurred. When that code is refactored, the regression test generally becomes obsolete, and is deleted.
Fuzz Tests
Fuzz tests generally run for a fixed amount of time, running randomized tests against a system. They do not run at all during normal runs of the Buildbot tests, unless BUILDBOT_FUZZ is defined. This is accomplished with something like the following at the end of each test module:
if 'BUILDBOT_FUZZ' not in os.environ:
del LRUCacheFuzzer
Mixins
Buildbot provides a number of purpose-specific mixin classes in master/buildbot/util. These generally define a set of utility functions as well as setUpXxx and tearDownXxx methods. These methods should be called explicitly from your subclass's setUp and tearDown methods. Note that some of these methods return Deferreds, which should be handled properly by the caller.
Fakes
Buildbot provides a number of pre-defined fake implementations of internal interfaces, in master/buildbot/fake. These are designed to be used in unit tests to limit the scope of the test. For example, the fake DB API eliminates the need to create a real database when testing code that uses the DB API, and isolates bugs in the system under test from bugs in the real DB implementation.
The danger of using fakes is that the fake interface and the real interface can differ. The interface tests exist to solve this problem. All fakes should be fully tested in an integration test, so that the fakes pass the same tests as the "real" thing. It is particularly important that the method signatures be compared.
Good Tests
Bad tests are worse than no tests at all, since they waste developers' time wondering "was that a spurious failure?" or "what the heck is this test trying to do?" Buildbot needs good tests. So what makes a good test?
Independent of Time
Tests that depend on wall time will fail. As a bonus, they run very slowly. Do not use reactor.callLater to wait "long enough" for something to happen.
For testing things that themselves depend on time, consider using twisted.internet.tasks.Clock. This may mean passing a clock instance to the code under test, and propagating that instance as necessary to ensure that all of the code using callLater uses it. Refactoring code for testability is difficult, but worthwhile.
For testing things that do not depend on time, but for which you cannot detect the "end" of an operation: add a way to detect the end of the operation!
Clean Code
Make your tests readable. This is no place to skimp on comments! Others will attempt to learn about the expected behavior of your class by reading the tests. As a side note, if you use a Deferred chain in your test, write the callbacks as nested functions, rather than using methods with funny names:
def testSomething(self):
d = doThisFirst()
def andThisNext(res):
pass # ...
d.addCallback(andThisNext)
return d
This isolates the entire test into one indented block. It is OK to add methods for common functionality, but give them real names and explain in detail what they do.
Good Name
Test method names should follow the pattern test_METHOD_CONDITION where METHOD is the method being tested, and CONDITION is the condition under which it's tested. Since we can't always test a single method, this is not a hard-and-fast rule.
Assert Only One Thing
Where practical, each test should have a single assertion. This may require a little bit of work to get several related pieces of information into a single Python object for comparison. The problem with multiple assertions is that, if the first assertion fails, the remainder are not tested. The test results then do not tell the entire story.
Prefer Fakes to Mocks
Mock objects are too "compliant", and this often masks errors in the system under test. For example, a mis-spelled method name on a mock object will not raise an exception.
Where possible, use one of the pre-written fake objects (see Fakes) instead of a mock object. Fakes themselves should be well-tested using interface tests.
Where they are appropriate, Mock objects can be constructed easily using the aptly-named mock module, which is a requirement for Buildbot's tests.
Small Tests
The shorter each test is, the better. Test as little code as possible in each test.
It is fine, and in fact encouraged, to write the code under test in such a way as to facilitate this. As an illustrative example, if you are testing a new Step subclass, but your tests require instantiating a BuildMaster, you're probably doing something wrong!
This also applies to test modules. Several short, easily-digested test modules are preferred over a 1000-line monster.
Isolation
Each test should be maximally independent of other tests. Do not leave files laying around after your test has finished, and do not assume that some other test has run beforehand. It's fine to use caching techniques to avoid repeated, lengthy setup times.
Be Correct
Tests should be as robust as possible, which at a basic level means using the available frameworks correctly. All Deferreds should have callbacks and be chained properly. Error conditions should be checked properly. Race conditions should not exist (see Independent of Time, above).
Be Helpful
Note that tests will pass most of the time, but the moment when they are most useful is when they fail.
When the test fails, it should produce output that is helpful to the person chasing it down. This is particularly important when the tests are run remotely, in which case the person chasing down the bug does not have access to the system on which the test fails. A test which fails sporadically with no more information than "AssertionFailed" is a prime candidate for deletion if the error isn't obvious. Making the error obvious also includes adding comments describing the ways a test might fail.
Keeping State
Python does not allow assignment to anything but the innermost local scope or the global scope with the global keyword. This presents a problem when creating nested functions:
def test_localVariable(self):
cb_called = False
def cb():
cb_called = True
cb()
self.assertTrue(cb_called) # will fail!
The cb_called = True assigns to a different variable than cb_called = False. In production code, it's usually best to work around such problems, but in tests this is often the clearest way to express the behavior under test.
The solution is to change something in a common mutable object. While a simple list can serve as such a mutable object, this leads to code that is hard to read. Instead, use State:
from buildbot.test.state import State
def test_localVariable(self):
state = State(cb_called=False)
def cb():
state.cb_called = True
cb()
self.assertTrue(state.cb_called) # passes
This is almost as readable as the first example, but it actually works.
Configuration
Wherever possible, Buildbot components should access configuration information as needed from the canonical source, master.config, which is an instance of MasterConfig. For example, components should not keep a copy of the buildbotURL locally, as this value may change throughout the lifetime of the master.
Components which need to be notified of changes in the configuration should be implemented as services, subclassing ReconfigurableServiceMixin, as described in Reconfiguration.
- class buildbot.config.MasterConfig
The master object makes much of the configuration available from an object named master.config. Configuration is stored as attributes of this object. Where possible, other Buildbot components should access this configuration directly and not cache the configuration values anywhere else. This avoids the need to ensure that update-from-configuration methods are called on a reconfig.
Aside from validating the configuration, this class handles any backward-compatibility issues - renamed parameters, type changes, and so on - removing those concerns from other parts of Buildbot.
This class may be instantiated directly, creating an entirely default configuration, or via loadConfig, which will load the configuration from a config file.
The following attributes are available from this class, representing the current configuration. This includes a number of global parameters:
- buildbotURL
The URL of this buildmaster, for use in constructing WebStatus URLs; from buildbotURL.
- changeHorizon
The current change horizon, from changeHorizon.
- eventHorizon
The current event horizon, from eventHorizon.
- logHorizon
The current log horizon, from logHorizon.
- buildHorizon
The current build horizon, from buildHorizon.
- logCompressionLimit
The current log compression limit, from logCompressionLimit.
- logCompressionMethod
The current log compression method, from logCompressionMethod.
- logMaxSize
The current log maximum size, from logMaxSize.
- logMaxTailSize
The current log maximum size, from logMaxTailSize.
- properties
A Properties instance containing global properties, from properties.
- mergeRequests
A callable, or True or False, describing how to merge requests; from mergeRequests.
- prioritizeBuilders
A callable, or None, used to prioritize builders; from prioritizeBuilders.
- codebaseGenerator
A callable, or None, used to determine the codebase from an incoming Change, from codebaseGenerator
- slavePortnum
The strports specification for the slave (integer inputs are normalized to a string), or None; based on slavePortnum.
- multiMaster
If true, then this master is part of a cluster; based on multiMaster.
- debugPassword
The password for the debug client, or None; from debugPassword.
The remaining attributes contain compound configuration structures, usually dictionaries:
- validation
Validation regular expressions, a dictionary from validation. It is safe to assume that all expected keys are present.
- db
Database specification, a dictionary with keys db_url and db_poll_interval. It is safe to assume that both keys are present.
- caches
The cache configuration, from caches as well as the deprecated buildCacheSize and changeCacheSize parameters.
The keys Builds and Caches are always available; other keys should use config.caches.get(cachename, 1).
- schedulers
The dictionary of scheduler instances, by name, from schedulers.
- builders
The list of BuilderConfig instances from builders. Builders specified as dictionaries in the configuration file are converted to instances.
- change_sources
The list of IChangeSource providers from change_source.
- user_managers
The list of user managers providers from user_managers.
Loading of the configuration file is generally triggered by the master, using the following methods:
- classmethod loadConfig(basedir, filename)
Parameters: - basedir (string) -- directory to which config is relative
- filename (string) -- the configuration file to load
Raises : ConfigErrors if any errors occur
Returns: new MasterConfig instance
Load the configuration in the given file. Aside from syntax errors, this will also detect a number of semantic errors such as multiple schedulers with the same name.
The filename is treated as relative to the basedir, if it is not absolute.
Builder Configuration
- class buildbot.config.BuilderConfig([keyword args])
This class parameterizes configuration of builders; see Builder Configuration for its arguments. The constructor checks for errors and applies defaults, and sets the properties described here. Most are simply copied from the constructor argument of the same name.
Users may subclass this class to add defaults, for example.
- name
The builder's name.
- factory
The builder's factory.
- slavenames
The builder's slave names (a list, regardless of whether the names were specified with slavename or slavenames).
- builddir
The builder's builddir.
- slavebuilddir
The builder's slave-side builddir.
- category
The builder's category.
- nextSlave
The builder's nextSlave callable.
- nextBuild
The builder's nextBuild callable.
- canStartBuild
The builder's canStartBuild callable.
- locks
The builder's locks.
- env
The builder's environmnet variables.
- properties
The builder's properties, as a dictionary.
- mergeRequests
The builder's mergeRequests callable.
- description
The builder's description, displayed in the web status.
Error Handling
If any errors are encountered while loading the configuration buildbot.config.error should be called. This can occur both in the configuration-loading code, and in the constructors of any objects that are instantiated in the configuration - change sources, slaves, schedulers, build steps, and so on.
- buildbot.config.error(error)
Parameters: error -- error to report Raises : ConfigErrors if called at build-time This function reports a configuration error. If a config file is being loaded, then the function merely records the error, and allows the rest of the configuration to be loaded. At any other time, it raises ConfigErrors. This is done so all config errors can be reported, rather than just the first.
- exception buildbot.config.ConfigErrors([errors])
Parameters: errors (list) -- errors to report This exception represents errors in the configuration. It supports reporting multiple errors to the user simultaneously, e.g., when several consistency checks fail.
- errors
A list of detected errors, each given as a string.
- addError(msg)
Parameters: msg (string) -- the message to add Add another error message to the (presumably not-yet-raised) exception.
Reconfiguration
When the buildmaster receives a signal to begin a reconfig, it re-reads the configuration file, generating a new MasterConfig instance, and then notifies all of its child services via the reconfig mechanism described below. The master ensures that at most one reconfiguration is taking place at any time.
See Master Organization for the structure of the Buildbot service tree.
To simplify initialization, a reconfiguration is performed immediately on master startup. As a result, services only need to implement their configuration handling once, and can use startService for initialization.
See below for instructions on implementing configuration of common types of components in Buildbot.
Note
Because Buildbot uses a pure-Python configuration file, it is not possible to support all forms of reconfiguration. In particular, when the configuration includes custom subclasses or modules, reconfiguration can turn up some surprising behaviors due to the dynamic nature of Python. The reconfig support in Buildbot is intended for "intermediate" uses of the software, where there are fewer surprises.
Reconfigurable Services
Instances which need to be notified of a change in configuration should be implemented as Twisted services, and mix in the ReconfigurableServiceMixin class, overriding the reconfigService method.
- class buildbot.config.ReconfigurableServiceMixin
- reconfigService(new_config)
Parameters: new_config (MasterConfig) -- new master configuration Returns: Deferred This method notifies the service that it should make any changes necessary to adapt to the new configuration values given.
This method will be called automatically after a service is started.
It is generally too late at this point to roll back the reconfiguration, so if possible any errors should be detected in the MasterConfig implementation. Errors are handled as best as possible and communicated back to the top level invocation, but such errors may leave the master in an inconsistent state. ConfigErrors exceptions will be displayed appropriately to the user on startup.
Subclasses should always call the parent class's implementation. For MultiService instances, this will call any child services' reconfigService methods, as appropriate. This will be done sequentially, such that the Deferred from one service must fire before the next service is reconfigured.
- priority
Child services are reconfigured in order of decreasing priority. The default priority is 128, so a service that must be reconfigured before others should be given a higher priority.
Change Sources
When reconfiguring, there is no method by which Buildbot can determine that a new ChangeSource represents the same source as an existing ChangeSource, but with different configuration parameters. As a result, the change source manager compares the lists of existing and new change sources using equality, stops any existing sources that are not in the new list, and starts any new change sources that do not already exist.
ChangeSource inherits ComparableMixin, so change sources are compared based on the attributes described in their compare_attrs.
If a change source does not make reference to any global configuration parameters, then there is no need to inherit ReconfigurableServiceMixin, as a simple comparison and startService and stopService will be sufficient.
If the change source does make reference to global values, e.g., as default values for its parameters, then it must inherit ReconfigurableServiceMixin to support the case where the global values change.
Schedulers
Schedulers have names, so Buildbot can determine whether a scheduler has been added, removed, or changed during a reconfig. Old schedulers will be stopped, new schedulers will be started, and both new and existing schedulers will see a call to reconfigService, if such a method exists. For backward compatibility, schedulers which do not support reconfiguration will be stopped, and the new scheduler started, when their configuration changes.
If, during a reconfiguration, a new and old scheduler's fully qualified class names differ, then the old class will be stopped and the new class started. This supports the case when a user changes, for example, a Nightly scheduler to a Periodic scheduler without changing the name.
Because Buildbot uses BaseScheduler instances directly in the configuration file, a reconfigured scheduler must extract its new configuration information from another instance of itself. BaseScheduler implements a helper method, findNewSchedulerInstance, which will return the new instance of the scheduler in the given MasterConfig object.
Custom Subclasses
Custom subclasses are most often defined directly in the configuration file, or in a Python module that is reloaded with reload every time the configuration is loaded. Because of the dynamic nature of Python, this creates a new object representing the subclass every time the configuration is loaded -- even if the class definition has not changed.
Note that if a scheduler's class changes in a reconfig, but the scheduler's name does not, it will still be treated as a reconfiguration of the existing scheduler. This means that implementation changes in custom scheduler subclasses will not be activated with a reconfig. This behavior avoids stopping and starting such schedulers on every reconfig, but can make development difficult.
One workaround for this is to change the name of the scheduler before each reconfig - this will cause the old scheduler to be stopped, and the new scheduler (with the new name and class) to be started.
Slaves
Similar to schedulers, slaves are specified by name, so new and old configurations are first compared by name, and any slaves to be added or removed are noted. Slaves for which the fully-qualified class name has changed are also added and removed. All slaves have their reconfigService method called.
This method takes care of the basic slave attributes, including changing the PB registration if necessary. Any subclasses that add configuration parameters should override reconfigService and update those parameters. As with Schedulers, because the AbstractBuildSlave instance is given directly in the configuration, on reconfig instances must extract the configuration from a new instance. The findNewSlaveInstance method can be used to find the new instance.
User Managers
Since user managers are rarely used, and their purpose is unclear, they are always stopped and re-started on every reconfig. This may change in figure versions.
Status Receivers
At every reconfig, all status listeners are stopped and new versions started.
Utilities
Several small utilities are available at the top-level buildbot.util package.
- buildbot.util.naturalSort(list)
Parameters: list -- list of strings Returns: sorted strings This function sorts strings "naturally", with embedded numbers sorted numerically. This ordering is good for objects which might have a numeric suffix, e.g., winslave1, winslave2
- buildbot.util.formatInterval(interval)
Parameters: interval -- duration in seconds Returns: human-readable (English) equivalent This function will return a human-readable string describing a length of time, given a number of seconds.
- class buildbot.util.ComparableMixin
This mixin class adds comparability to a subclass. Use it like this:
class Widget(FactoryProduct, ComparableMixin): compare_attrs = [ 'radius', 'thickness' ] # ...
Any attributes not in compare_attrs will not be considered when comparing objects. This is particularly useful in implementing buildbot's reconfig logic, where a simple comparison between the new and existing objects can determine whether the new object should replace the existing object.
- buildbot.util.safeTranslate(str)
Parameters: str -- input string Returns: safe version of the input This function will filter out some inappropriate characters for filenames; it is suitable for adapting strings from the configuration for use as filenames. It is not suitable for use with strings from untrusted sources.
- buildbot.util.epoch2datetime(epoch)
Parameters: epoch -- an epoch time (integer) Returns: equivalent datetime object Convert a UNIX epoch timestamp to a Python datetime object, in the UTC timezone. Note that timestamps specify UTC time (modulo leap seconds and a few other minor details).
- buildbot.util.datetime2epoch(datetime)
Parameters: datetime -- a datetime object Returns: equivalent epoch time (integer) Convert an arbitrary Python datetime object into a UNIX epoch timestamp.
- buildbot.util.UTC
A datetime.tzinfo subclass representing UTC time. A similar class has finally been added to Python in version 3.2, but the implementation is simple enough to include here. This is mostly used in tests to create timezone-aware datetime objects in UTC:
dt = datetime.datetime(1978, 6, 15, 12, 31, 15, tzinfo=UTC)
- buildbot.util.diffSets(old, new)
Parameters: - old (set or iterable) -- old set
- new (set or iterable) -- new set
Returns: a tuple, (removed, added)
This function compares two sets of objects, returning elements that were added and elements that were removed. This is largely a convenience function for reconfiguring services.
- buildbot.util.makeList(input)
Parameters: input -- a thing Returns: a list of zero or more things This function is intended to support the many places in Buildbot where the user can specify either a string or a list of strings, but the implementation wishes to always consider lists. It converts any string to a single-element list, None to an empty list, and any iterable to a list. Input lists are copied, avoiding aliasing issues.
- buildbot.util.now()
Returns: epoch time (integer) Return the current time, using either reactor.seconds or time.time().
- buildbot.util.flatten(list)
Parameters: list -- potentially nested list Returns: flat list Flatten nested lists into a list containing no other lists. For example:
>>> flatten([ [ 1, 2 ], 3, [ [ 4 ] ] ]) [ 1, 2, 3, 4 ]
Note that this looks strictly for lists -- tuples, for example, are not flattened.
- buildbot.util.none_or_str(obj)
Parameters: obj -- input value Returns: string or None If obj is not None, return its string representation.
- buildbot.util.NotABranch
This is a sentinel value used to indicate that no branch is specified. It is necessary since schedulers and change sources consider None a valid name for a branch. This is generally used as a default value in a method signature, and then tested against with is:
if branch is NotABranch: pass # ...
- buildbot.util.in_reactor(fn)
This decorator will cause the wrapped function to be run in the Twisted reactor, with the reactor stopped when the function completes. It returns the result of the wrapped function. If the wrapped function fails, its traceback will be printed, the reactor halted, and None returned.
buildbot.util.lru
- LRUCache(miss_fn, max_size=50):
Parameters: - miss_fn -- function to call, with key as parameter, for cache misses. The function should return the value associated with the key argument, or None if there is no value associated with the key.
- max_size -- maximum number of objects in the cache.
This is a simple least-recently-used cache. When the cache grows beyond the maximum size, the least-recently used items will be automatically removed from the cache.
This cache is designed to control memory usage by minimizing duplication of objects, while avoiding unnecessary re-fetching of the same rows from the database.
All values are also stored in a weak valued dictionary, even after they have expired from the cache. This allows values that are used elsewhere in Buildbot to "stick" in the cache in case they are needed by another component. Weak references cannot be used for some types, so these types are not compatible with this class. Note that dictionaries can be weakly referenced if they are an instance of a subclass of dict.
If the result of the miss_fn is None, then the value is not cached; this is intended to avoid caching negative results.
This is based on Raymond Hettinger's implementation, licensed under the PSF license, which is GPL-compatiblie.
- buildbot.util.lru.hits
cache hits so far
- buildbot.util.lru.refhits
cache misses found in the weak ref dictionary, so far
- buildbot.util.lru.misses
cache misses leading to re-fetches, so far
- buildbot.util.lru.max_size
maximum allowed size of the cache
- buildbot.util.lru.get(key, **miss_fn_kwargs)
Parameters: - key -- cache key
- miss_fn_kwargs -- keyword arguments to the miss_fn
Returns: value via Deferred
Fetch a value from the cache by key, invoking miss_fn(key, **miss_fn_kwargs) if the key is not in the cache.
Any additional keyword arguments are passed to the miss_fn as keyword arguments; these can supply additional information relating to the key. It is up to the caller to ensure that this information is functionally identical for each key value: if the key is already in the cache, the miss_fn will not be invoked, even if the keyword arguments differ.
- buildbot.util.lru.put(key, value)
Parameters: - key -- key at which to place the value
- value -- value to place there
Update the cache with the given key and value, but only if the key is already in the cache. The purpose of this method is to insert a new value into the cache without invoking the miss_fn (e.g., to avoid unnecessary overhead).
- buildbot.util.lru.inv()
Check invariants on the cache. This is intended for debugging purposes.
- AsyncLRUCache(miss_fn, max_size=50):
Parameters: - miss_fn -- This is the same as the miss_fn for class LRUCache, with the difference that this function must return a Deferred.
- max_size -- maximum number of objects in the cache.
This class has the same functional interface as LRUCache, but asynchronous locking is used to ensure that in the common case of multiple concurrent requests for the same key, only one fetch is performed.
buildbot.util.bbcollections
This package provides a few useful collection objects.
Note
This module used to be named collections, but without absolute imports (PEP 328), this precluded using the standard library's collections module.
- class buildbot.util.bbcollections.defaultdict
This is a clone of the Python collections.defaultdict for use in Python-2.4. In later versions, this is simply a reference to the built-in defaultdict, so buildbot code can simply use buildbot.util.collections.defaultdict everywhere.
- class buildbot.util.bbcollections.KeyedSets
This is a collection of named sets. In principal, it contains an empty set for every name, and you can add things to sets, discard things from sets, and so on.
>>> ks = KeyedSets() >>> ks['tim'] # get a named set set([]) >>> ks.add('tim', 'friendly') # add an element to a set >>> ks.add('tim', 'dexterous') >>> ks['tim'] set(['friendly', 'dexterous']) >>> 'tim' in ks # membership testing True >>> 'ron' in ks False >>> ks.discard('tim', 'friendly')# discard set element >>> ks.pop('tim') # return set and reset to empty set(['dexterous']) >>> ks['tim'] set([])
This class is careful to conserve memory space - empty sets do not occupy any space.
buildbot.util.eventual
This function provides a simple way to say "please do this later". For example:
from buildbot.util.eventual import eventually
def do_what_I_say(what, where):
# ...
return d
eventually(do_what_I_say, "clean up", "your bedroom")
The package defines "later" as "next time the reactor has control", so this is a good way to avoid long loops that block other activity in the reactor.
- buildbot.util.eventual.eventually(cb, *args, **kwargs)
Parameters: - cb -- callable to invoke later
- args -- args to pass to cb
- kwargs -- kwargs to pass to cb
Invoke the callable cb in a later reactor turn.
Callables given to eventually are guaranteed to be called in the same order as the calls to eventually -- writing eventually(a); eventually(b) guarantees that a will be called before b.
Any exceptions that occur in the callable will be logged with log.err(). If you really want to ignore them, provide a callable that catches those exceptions.
This function returns None. If you care to know when the callable was run, be sure to provide a callable that notifies somebody.
- buildbot.util.eventual.fireEventually(value=None)
Parameters: value -- value with which the Deferred should fire Returns: Deferred This function returns a Deferred which will fire in a later reactor turn, after the current call stack has been completed, and after all other Deferreds previously scheduled with eventually. The returned Deferred will never fail.
- buildbot.util.eventual.flushEventualQueue()
Returns: Deferred This returns a Deferred which fires when the eventual-send queue is finally empty. This is useful for tests and other circumstances where it is useful to know that "later" has arrived.
buildbot.util.json
This package is just an import of the best available JSON module. Use it instead of a more complex conditional import of simplejson or json:
from buildbot.util import json
buildbot.util.maildir
Several Buildbot components make use of maildirs to hand off messages between components. On the receiving end, there's a need to watch a maildir for incoming messages and trigger some action when one arrives.
- class buildbot.util.maildir.MaildirService(basedir)
param basedir: (optional) base directory of the maildir A MaildirService instance watches a maildir for new messages. It should be a child service of some MultiService instance. When running, this class uses the linux dirwatcher API (if available) or polls for new files in the 'new' maildir subdirectory. When it discovers a new message, it invokes its messageReceived method.
To use this class, subclass it and implement a more interesting messageReceived function.
- setBasedir(basedir)
Parameters: basedir -- base directory of the maildir If no basedir is provided to the constructor, this method must be used to set the basedir before the service starts.
- messageReceived(filename)
Parameters: filename -- unqualified filename of the new message This method is called with the short filename of the new message. The full name of the new file can be obtained with os.path.join(maildir, 'new', filename). The method is un-implemented in the MaildirService class, and must be implemented in subclasses.
- moveToCurDir(filename)
Parameters: filename -- unqualified filename of the new message Returns: open file object Call this from messageReceived to start processing the message; this moves the message file to the 'cur' directory and returns an open file handle for it.
buildbot.util.misc
- buildbot.util.misc.deferredLocked(lock)
Parameters: lock -- a twisted.internet.defer.DeferredLock instance or a string naming an instance attribute containing one This is a decorator to wrap an event-driven method (one returning a Deferred) in an acquire/release pair of a designated DeferredLock. For simple functions with a static lock, this is as easy as:
someLock = defer.DeferredLock() @util.deferredLocked(someLock) def someLockedFunction(): # .. return d
For class methods which must access a lock that is an instance attribute, the lock can be specified by a string, which will be dynamically resolved to the specific instance at runtime:
def __init__(self): self.someLock = defer.DeferredLock() @util.deferredLocked('someLock') def someLockedFunction(): # .. return d
- class buildbot.util.misc.SerializedInvocation(method)
This is a method wrapper that will serialize calls to an asynchronous method. If a second call occurs while the first call is still executing, it will not begin until the first call has finished. If multiple calls queue up, they will be collapsed into a single call. The effect is that the underlying method is guaranteed to be called at least once after every call to the wrapper.
Note that if this class is used as a decorator on a method, it will serialize invocations across all class instances. For synchronization specific to each instance, wrap the method in the constructor:
def __init__(self): self.someMethod = SerializedInovcation(self.someMethod)
Tests can monkey-patch the _quiet method of the class to be notified when all planned invocations are complete.
buildbot.util.netstrings
Similar to maildirs, netstrings are used occasionally in Buildbot to encode data for interchange. While Twisted supports a basic netstring receiver protocol, it does not have a simple way to apply that to a non-network situation.
- class buildbot.util.netstrings.NetstringParser
This class parses strings piece by piece, either collecting the accumulated strings or invoking a callback for each one.
- feed(data)
Parameters: data -- a portion of netstring-formatted data Raises : twisted.protocols.basic.NetstringParseError Add arbitrarily-sized data to the incoming-data buffer. Any complete netstrings will trigger a call to the stringReceived method.
Note that this method (like the Twisted class it is based on) cannot detect a trailing partial netstring at EOF - the data will be silently ignored.
- stringReceived(string):
Parameters: string -- the decoded string This method is called for each decoded string as soon as it is read completely. The default implementation appends the string to the strings attribute, but subclasses can do anything.
- strings
The strings decoded so far, if stringReceived is not overridden.
buildbot.util.sautils
This module contains a few utilities that are not included with SQLAlchemy.
- class buildbot.util.sautils.InsertFromSelect(table, select)
Parameters: - table -- table into which insert should be performed
- select -- select query from which data should be drawn
This class is taken directly from SQLAlchemy's compiler.html, and allows a Pythonic representation of INSERT INTO .. SELECT .. queries.
- buildbot.util.sautils.sa_version()
Return a 3-tuple representing the SQLAlchemy version. Note that older versions that did not have a __version__ attribute are represented by (0,0,0).
buildbot.util.subscription
The classes in the buildbot.util.subscription module are used for master-local subscriptions. In the near future, all uses of this module will be replaced with message-queueing implementations that allow subscriptions and subscribers to span multiple masters.
buildbot.util.croniter
This module is a copy of https://github.com/taichino/croniter, and provides support for converting cron-like time specifications into actual times.
buildbot.util.state
The classes in the buildbot.util.subscription module are used for dealing with object state stored in the database.
- class buildbot.util.state.StateMixin
This class provides helper methods for accessing the object state stored in the database.
- name
This must be set to the name to be used to identify this object in the database.
- master
This must point to the BuildMaster object.
- getState(name, default)
Parameters: - name -- name of the value to retrieve
- default -- (optional) value to return if name is not present
Returns: state value via a Deferred
Raises: - KeyError -- if name is not present and no default is given
- TypeError -- if JSON parsing fails
Get a named state value from the object's state.
- getState(name, value)
Parameters: - name -- the name of the value to change
- value -- the value to set - must be a JSONable object
- returns -- Deferred
Raises TypeError: if JSONification fails
Set a named state value in the object's persistent state. Note that value must be json-able.
Database
As of version 0.8.0, Buildbot has used a database as part of its storage backend. This section describes the database connector classes, which allow other parts of Buildbot to access the database. It also describes how to modify the database schema and the connector classes themselves.
Note
Buildbot is only half-migrated to a database backend. Build and builder status information is still stored on disk in pickle files. This is difficult to fix, although work is underway.
Database Overview
All access to the Buildbot database is mediated by database connector classes. These classes provide a functional, asynchronous interface to other parts of Buildbot, and encapsulate the database-specific details in a single location in the codebase.
The connector API, defined below, is a stable API in Buildbot, and can be called from any other component. Given a master master, the root of the database connectors is available at master.db, so, for example, the state connector's getState method is master.db.state.getState.
The connectors all use SQLAlchemy Core to achieve (almost) database-independent operation. Note that the SQLAlchemy ORM is not used in Buildbot. Database queries are carried out in threads, and report their results back to the main thread via Twisted Deferreds.
Schema
The database schema is maintained with SQLAlchemy-Migrate. This package handles the details of upgrading users between different schema versions.
The schema itself is considered an implementation detail, and may change significantly from version to version. Users should rely on the API (below), rather than performing queries against the database itself.
API
buildrequests
- exception buildbot.db.buildrequests.AlreadyClaimedError
Raised when a build request is already claimed, usually by another master.
- exception buildbot.db.buildrequests.NotClaimedError
Raised when a build request is not claimed by this master.
- class buildbot.db.buildrequests.BuildRequestsConnectorComponent
This class handles the complex process of claiming and unclaiming build requests, based on a polling model: callers poll for unclaimed requests with getBuildRequests, then attempt to claim the requests with claimBuildRequests. The claim can fail if another master has claimed the request in the interim.
An instance of this class is available at master.db.buildrequests.
Build requests are indexed by an ID referred to as a brid. The contents of a request are represented as build request dictionaries (brdicts) with keys
- brid
- buildsetid
- buildername
- priority
- claimed (boolean, true if the request is claimed)
- claimed_at (datetime object, time this request was last claimed)
- mine (boolean, true if the request is claimed by this master)
- complete (boolean, true if the request is complete)
- complete_at (datetime object, time this request was completed)
- getBuildRequest(brid)
Parameters: brid -- build request id to look up Returns: brdict or None, via Deferred Get a single BuildRequest, in the format described above. This method returns None if there is no such buildrequest. Note that build requests are not cached, as the values in the database are not fixed.
- getBuildRequests(buildername=None, complete=None, claimed=None, bsid=None, branch=None, repository=None))
Parameters: - buildername (string) -- limit results to buildrequests for this builder
- complete -- if true, limit to completed buildrequests; if false, limit to incomplete buildrequests; if None, do not limit based on completion.
- claimed -- see below
- bsid -- see below
- repository -- the repository associated with the sourcestamps originating the requests
- branch -- the branch associated with the sourcestamps originating the requests
Returns: list of brdicts, via Deferred
Get a list of build requests matching the given characteristics.
Pass all parameters as keyword parameters to allow future expansion.
The claimed parameter can be None (the default) to ignore the claimed status of requests; True to return only claimed builds, False to return only unclaimed builds, or "mine" to return only builds claimed by this master instance. A request is considered unclaimed if its claimed_at column is either NULL or 0, and it is not complete. If bsid is specified, then only build requests for that buildset will be returned.
A build is considered completed if its complete column is 1; the complete_at column is not consulted.
- claimBuildRequests(brids[, claimed_at=XX])
Parameters: - brids (list) -- ids of buildrequests to claim
- claimed_at (datetime) -- time at which the builds are claimed
Returns: Deferred
Raises : Try to "claim" the indicated build requests for this buildmaster instance. The resulting deferred will fire normally on success, or fail with AlreadyClaimedError if any of the build requests are already claimed by another master instance. In this case, none of the claims will take effect.
If claimed_at is not given, then the current time will be used.
As of 0.8.5, this method can no longer be used to re-claim build requests. All given ID's must be unclaimed. Use reclaimBuildRequests to reclaim.
Note
On database backends that do not enforce referential integrity (e.g., SQLite), this method will not prevent claims for nonexistent build requests. On database backends that do not support transactions (MySQL), this method will not properly roll back any partial claims made before an AlreadyClaimedError is generated.
- reclaimBuildRequests(brids)
Parameters: brids (list) -- ids of buildrequests to reclaim Returns: Deferred Raises : AlreadyClaimedError Re-claim the given build requests, updating the timestamp, but checking that the requests are owned by this master. The resulting deferred will fire normally on success, or fail with AlreadyClaimedError if any of the build requests are already claimed by another master instance, or don't exist. In this case, none of the reclaims will take effect.
- unclaimBuildRequests(brids)
Parameters: brids (list) -- ids of buildrequests to unclaim Returns: Deferred Release this master's claim on all of the given build requests. This will not unclaim requests that are claimed by another master, but will not fail in this case. The method does not check whether a request is completed.
- completeBuildRequests(brids, results[, complete_at=XX])
Parameters: - brids (integer) -- build request IDs to complete
- results (integer) -- integer result code
- complete_at (datetime) -- time at which the buildset was completed
Returns: Deferred
Raises : Complete a set of build requests, all of which are owned by this master instance. This will fail with NotClaimedError if the build request is already completed or does not exist. If complete_at is not given, the current time will be used.
- unclaimExpiredRequests(old)
Parameters: old (int) -- number of seconds after which a claim is considered old Returns: Deferred Find any incomplete claimed builds which are older than old seconds, and clear their claim information.
This is intended to catch builds that were claimed by a master which has since disappeared. As a side effect, it will log a message if any requests are unclaimed.
builds
- class buildbot.db.builds.BuildsConnectorComponent
This class handles a little bit of information about builds.
Note
The interface for this class will change - the builds table duplicates some information available in pickles, without including all such information. Do not depend on this API.
An instance of this class is available at master.db.builds.
Builds are indexed by bid and their contents represented as bdicts (build dictionaries), with keys
- bid (the build ID, globally unique)
- number (the build number, unique only within this master and builder)
- brid (the ID of the build request that caused this build)
- start_time
- finish_time (datetime objects, or None).
- getBuild(bid)
Parameters: bid (integer) -- build id Returns: Build dictionary as above or None, via Deferred Get a single build, in the format described above. Returns None if there is no such build.
- getBuildsForRequest(brid)
Parameters: brids -- list of build request ids Returns: List of build dictionaries as above, via Deferred Get a list of builds for the given build request. The resulting build dictionaries are in exactly the same format as for getBuild.
- addBuild(brid, number)
Parameters: - brid -- build request id
- number -- build number
Returns: build ID via Deferred
Add a new build to the db, recorded as having started at the current time.
- finishBuilds(bids)
Parameters: bids (list) -- build ids Returns: Deferred Mark the given builds as finished, with finish_time set to the current time. This is done unconditionally, even if the builds are already finished.
buildsets
- class buildbot.db.buildsets.BuildsetsConnectorComponent
This class handles getting buildsets into and out of the database. Buildsets combine multiple build requests that were triggered together.
An instance of this class is available at master.db.buildsets.
Buildsets are indexed by bsid and their contents represented as bsdicts (buildset dictionaries), with keys
- bsid
- external_idstring (arbitrary string for mapping builds externally)
- reason (string; reason these builds were triggered)
- sourcestampsetid (source stamp set for this buildset)
- submitted_at (datetime object; time this buildset was created)
- complete (boolean; true if all of the builds for this buildset are complete)
- complete_at (datetime object; time this buildset was completed)
- results (aggregate result of this buildset; see Build Result Codes)
- addBuildset(sourcestampsetid, reason, properties, builderNames, external_idstring=None)
Parameters: - sourcestampsetid (integer) -- id of the SourceStampSet for this buildset
- reason (short unicode string) -- reason for this buildset
- properties (dictionary, where values are tuples of (value, source)) -- properties for this buildset
- builderNames (list of strings) -- builders specified by this buildset
- external_idstring (unicode string) -- external key to identify this buildset; defaults to None
Returns: buildset ID and buildrequest IDs, via a Deferred
Add a new Buildset to the database, along with BuildRequests for each named builder, returning the resulting bsid via a Deferred. Arguments should be specified by keyword.
The return value is a tuple (bsid, brids) where bsid is the inserted buildset ID and brids is a dictionary mapping buildernames to build request IDs.
- completeBuildset(bsid, results[, complete_at=XX])
Parameters: - bsid (integer) -- buildset ID to complete
- results (integer) -- integer result code
- complete_at (datetime) -- time the buildset was completed
Returns: Deferred
Raises : KeyError if the buildset does not exist or is already complete
Complete a buildset, marking it with the given results and setting its completed_at to the current time, if the complete_at argument is omitted.
- getBuildset(bsid)
Parameters: bsid -- buildset ID Returns: bsdict, or None, via Deferred Get a bsdict representing the given buildset, or None if no such buildset exists.
Note that buildsets are not cached, as the values in the database are not fixed.
- getBuildsets(complete=None)
Parameters: complete -- if true, return only complete buildsets; if false, return only incomplete buildsets; if None or omitted, return all buildsets Returns: list of bsdicts, via Deferred Get a list of bsdicts matching the given criteria.
- getRecentBuildsets(count, branch=None, repository=None,
- complete=None):
Parameters: - count -- maximum number of buildsets to retrieve.
- branch (string) -- optional branch name. If specified, only buildsets affecting such branch will be returned.
- repository (string) -- optional repository name. If specified, only buildsets affecting such repository will be returned.
- complete (Boolean) -- if true, return only complete buildsets; if false, return only incomplete buildsets; if None or omitted, return all buildsets
Returns: list of bsdicts, via Deferred
- getBuildsetProperties(buildsetid)
Parameters: buildsetid -- buildset ID Returns: dictionary mapping property name to value, source, via Deferred Return the properties for a buildset, in the same format they were given to addBuildset.
Note that this method does not distinguish a nonexistent buildset from a buildset with no properties, and returns {} in either case.
changes
- class buildbot.db.changes.ChangesConnectorComponent
This class handles changes in the buildbot database, including pulling information from the changes sub-tables.
An instance of this class is available at master.db.changes.
Changes are indexed by changeid, and are represented by a chdict, which has the following keys:
- changeid (the ID of this change)
- author (unicode; the author of the change)
- files (list of unicode; source-code filenames changed)
- comments (unicode; user comments)
- is_dir (deprecated)
- links (list of unicode; links for this change, e.g., to web views, review)
- revision (unicode string; revision for this change, or None if unknown)
- when_timestamp (datetime instance; time of the change)
- branch (unicode string; branch on which the change took place, or None for the "default branch", whatever that might mean)
- category (unicode string; user-defined category of this change, or None)
- revlink (unicode string; link to a web view of this change)
- properties (user-specified properties for this change, represented as a dictionary mapping keys to (value, source))
- repository (unicode string; repository where this change occurred)
- project (unicode string; user-defined project to which this change corresponds)
- addChange(author=None, files=None, comments=None, is_dir=0, links=None, revision=None, when_timestamp=None, branch=None, category=None, revlink='', properties={}, repository='', project='', uid=None)
Parameters: - author (unicode string) -- the author of this change
- files -- a list of filenames that were changed
- comments -- user comments on the change
- is_dir -- deprecated
- links (list of unicode strings) -- a list of links related to this change, e.g., to web viewers or review pages
- revision (unicode string) -- the revision identifier for this change
- when_timestamp (datetime instance or None) -- when this change occurred, or the current time if None
- branch (unicode string) -- the branch on which this change took place
- category (unicode string) -- category for this change (arbitrary use by Buildbot users)
- revlink (unicode string) -- link to a web view of this revision
- properties (dictionary) -- properties to set on this change, where values are tuples of (value, source). At the moment, the source must be 'Change', although this may be relaxed in later versions.
- repository (unicode string) -- the repository in which this change took place
- project (unicode string) -- the project this change is a part of
- uid (integer) -- uid generated for the change author
Returns: new change's ID via Deferred
Add a Change with the given attributes to the database, returning the changeid via a Deferred. All arguments should be given as keyword arguments.
The project and repository arguments must be strings; None is not allowed.
- getChange(changeid, no_cache=False)
Parameters: - changeid -- the id of the change instance to fetch
- no_cache (boolean) -- bypass cache and always fetch from database
Returns: chdict via Deferred
Get a change dictionary for the given changeid, or None if no such change exists.
- getChangeUids(changeid)
Parameters: changeid -- the id of the change instance to fetch Returns: list of uids via Deferred Get the userids associated with the given changeid.
- getRecentChanges(count)
Parameters: count -- maximum number of instances to return Returns: list of dictionaries via Deferred, ordered by changeid Get a list of the count most recent changes, represented as dictionaries; returns fewer if that many do not exist.
Note
For this function, "recent" is determined by the order of the changeids, not by when_timestamp. This is most apparent in DVCS's, where the timestamp of a change may be significantly earlier than the time at which it is merged into a repository monitored by Buildbot.
- getLatestChangeid()
Returns: changeid via Deferred Get the most-recently-assigned changeid, or None if there are no changes at all.
schedulers
- class buildbot.db.schedulers.SchedulersConnectorComponent
This class manages the state of the Buildbot schedulers. This state includes classifications of as-yet un-built changes.
An instance of this class is available at master.db.changes.
Schedulers are identified by a their objectid - see StateConnectorComponent.
- classifyChanges(objectid, classifications)
Parameters: - objectid -- scheduler classifying the changes
- classifications (dictionary) -- mapping of changeid to boolean, where the boolean is true if the change is important, and false if it is unimportant
Returns: Deferred
Record the given classifications. This method allows a scheduler to record which changes were important and which were not immediately, even if the build based on those changes will not occur for some time (e.g., a tree stable timer). Schedulers should be careful to flush classifications once they are no longer needed, using flushChangeClassifications.
- getChangeClassifications(objectid[, branch])
Parameters: - objectid (integer) -- scheduler to look up changes for
- branch (string or None (for default branch)) -- (optional) limit to changes with this branch
Returns: dictionary via Deferred
Return the classifications made by this scheduler, in the form of a dictionary mapping changeid to a boolean, just as supplied to classifyChanges.
If branch is specified, then only changes on that branch will be given. Note that specifying branch=None requests changes for the default branch, and is not the same as omitting the branch argument altogether.
sourcestamps
- class buildbot.db.sourcestamps.SourceStampsConnectorComponent
This class manages source stamps, as stored in the database. Source stamps are linked to changes. Source stamps with the same sourcestampsetid belong to the same sourcestampset. Buildsets link to one or more source stamps via a sourcestampset id.
An instance of this class is available at master.db.sourcestamps.
Source stamps are identified by a ssid, and represented internally as a ssdict, with keys
- ssid
- sourcestampsetid (set to which the sourcestamp belongs)
- branch (branch, or None for default branch)
- revision (revision, or None to indicate the latest revision, in which case this is a relative source stamp)
- patch_body (body of the patch, or None)
- patch_level (directory stripping level of the patch, or None)
- patch_subdir (subdirectory in which to apply the patch, or None)
- patch_author (author of the patch, or None)
- patch_comment (comment for the patch, or None)
- repository (repository containing the source; never None)
- project (project this source is for; never None)
- changeids (list of changes, by id, that generated this sourcestamp)
Note
Presently, no attempt is made to ensure uniqueness of source stamps, so multiple ssids may correspond to the same source stamp. This may be fixed in a future version.
- addSourceStamp(branch, revision, repository, project, patch_body=None, patch_level=0, patch_author="", patch_comment="", patch_subdir=None, changeids=[])
Parameters: - branch (unicode string) --
- revision (unicode string) --
- repository (unicode string) --
- project (string) --
- patch_body (string) -- (optional)
- patch_level (int) -- (optional)
- patch_author (unicode string) -- (optional)
- patch_comment (unicode string) -- (optional)
- patch_subdir (unicode string) -- (optional)
- changeids (list of ints) --
Returns: ssid, via Deferred
Create a new SourceStamp instance with the given attributes, and return its ssid. The arguments all have the same meaning as in an ssdict. Pass them as keyword arguments to allow for future expansion.
- getSourceStamp(ssid)
Parameters: - ssid -- sourcestamp to get
- no_cache (boolean) -- bypass cache and always fetch from database
Returns: ssdict, or None, via Deferred
Get an ssdict representing the given source stamp, or None if no such source stamp exists.
- getSourceStamps(sourcestampsetid)
Parameters: sourcestampsetid (integer) -- identification of the set, all returned sourcestamps belong to this set Returns: sslist of ssdict Get a set of sourcestamps identified by a set id. The set is returned as a sslist that contains one or more sourcestamps (represented as ssdicts). The list is empty if the set does not exist or no sourcestamps belong to the set.
sourcestampset
- class buildbot.db.sourcestampsets.SourceStampSetsConnectorComponent
This class is responsible for adding new sourcestampsets to the database. Build sets link to sourcestamp sets, via their (set) id's.
An instance of this class is available at master.db.sourcestampsets.
Sourcestamp sets are identified by a sourcestampsetid.
- addSourceStampSet()
Returns: new sourcestampsetid as integer, via Deferred Add a new (empty) sourcestampset to the database. The unique identification of the set is returned as integer. The new id can be used to add new sourcestamps to the database and as reference in a buildset.
state
- class buildbot.db.state.StateConnectorComponent
This class handles maintaining arbitrary key/value state for Buildbot objects. Each object can store arbitrary key/value pairs, where the values are any JSON-encodable value. Each pair can be set and retrieved atomically.
Objects are identified by their (user-visible) name and their class. This allows, for example, a nightly_smoketest object of class NightlyScheduler to maintain its state even if it moves between masters, but avoids cross-contaminating state between different classes of objects with the same name.
Note that "class" is not interpreted literally, and can be any string that will uniquely identify the class for the object; if classes are renamed, they can continue to use the old names.
An instance of this class is available at master.db.state.
Objects are identified by objectid.
- getObjectId(name, class_name)
Parameters: - name -- name of the object
- class_name -- object class name
Returns: the objectid, via a Deferred.
Get the object ID for this combination of a name and a class. This will add a row to the 'objects' table if none exists already.
- getState(objectid, name[, default])
Parameters: - objectid -- objectid on which the state should be checked
- name -- name of the value to retrieve
- default -- (optional) value to return if C{name} is not present
Returns: state value via a Deferred
Raises KeyError: if name is not present and no default is given
Raises : TypeError if JSON parsing fails
Get the state value for key name for the object with id objectid.
- setState(objectid, name, value)
Parameters: - objectid -- the objectid for which the state should be changed
- name -- the name of the value to change
- value (JSON-able value) -- the value to set
- returns -- Deferred
Raises : TypeError if JSONification fails
Set the state value for name for the object with id objectid, overwriting any existing value.
users
- class buildbot.db.users.UsersConnectorComponent
This class handles Buildbot's notion of users. Buildbot tracks the usual information about users -- username and password, plus a display name.
The more complicated task is to recognize each user across multiple interfaces with Buildbot. For example, a user may be identified as 'djmitche' in Subversion, 'dustin@v.igoro.us' in Git, and 'dustin' on IRC. To support this functionality, each user as a set of attributes, keyed by type. The findUserByAttr method uses these attributes to match users, adding a new user if no matching user is found.
Users are identified canonically by uid, and are represented by usdicts (user dictionaries) with keys
- uid
- identifier (display name for the user)
- bb_username (buildbot login username)
- bb_password (hashed login password)
All attributes are also included in the dictionary, keyed by type. Types colliding with the keys above are ignored.
- findUserByAttr(identifier, attr_type, attr_data)
Parameters: - identifier -- identifier to use for a new user
- attr_type -- attribute type to search for and/or add
- attr_data -- attribute data to add
Returns: userid via Deferred
Get an existing user, or add a new one, based on the given attribute.
This method is intended for use by other components of Buildbot to search for a user with the given attributes.
Note that identifier is not used in the search for an existing user. It is only used when creating a new user. The identifier should be based deterministically on the attributes supplied, in some fashion that will seem natural to users.
For future compatibility, always use keyword parameters to call this method.
- getUser(uid)
Parameters: - uid -- user id to look up
- no_cache (boolean) -- bypass cache and always fetch from database
Returns: usdict via Deferred
Get a usdict for the given user, or None if no matching user is found.
- getUserByUsername(username)
Parameters: username (string) -- username portion of user credentials Returns: usdict or None via deferred Looks up the user with the bb_username, returning the usdict or None if no matching user is found.
- getUsers()
Returns: list of partial usdicts via Deferred Get the entire list of users. User attributes are not included, so the results are not full userdicts.
- updateUser(uid=None, identifier=None, bb_username=None, bb_password=None, attr_type=None, attr_data=None)
Parameters: - uid (int) -- the user to change
- identifier (string) -- (optional) new identifier for this user
- bb_username (string) -- (optional) new buildbot username
- bb_password (string) -- (optional) new hashed buildbot password
- attr_type (string) -- (optional) attribute type to update
- attr_data (string) -- (optional) value for attr_type
Returns: Deferred
Update information about the given user. Only the specified attributes are updated. If no user with the given uid exists, the method will return silently.
Note that bb_password must be given if bb_username appears; similarly, attr_type requires attr_data.
- removeUser(uid)
Parameters: uid (int) -- the user to remove Returns: Deferred Remove the user with the given uid from the database. This will remove the user from any associated tables as well.
- identifierToUid(identifier)
Parameters: identifier (string) -- identifier to search for Returns: uid or None, via Deferred Fetch a uid for the given identifier, if one exists.
Writing Database Connector Methods
The information above is intended for developers working on the rest of Buildbot, and treating the database layer as an abstraction. The remainder of this section describes the internals of the database implementation, and is intended for developers modifying the schema or adding new methods to the database layer.
Warning
It's difficult to change the database schema significantly after it has been released, and very disruptive to users to change the database API. Consider very carefully the future-proofing of any changes here!
The DB Connector and Components
- class buildbot.db.connector.DBConnector
The root of the database connectors, master.db, is a DBConnector instance. Its main purpose is to hold reference to each of the connector components, but it also handles timed cleanup tasks.
If you are adding a new connector component, import its module and create an instance of it in this class's constructor.
- class buildbot.db.base.DBConnectorComponent
This is the base class for connector components.
There should be no need to override the constructor defined by this base class.
- db
A reference to the DBConnector, so that connector components can use e.g., self.db.pool or self.db.model. In the unusual case that a connector component needs access to the master, the easiest path is self.db.master.
Direct Database Access
The connectors all use SQLAlchemy Core as a wrapper around database client drivers. Unfortunately, SQLAlchemy is a synchronous library, so some extra work is required to use it in an asynchronous context like Buildbot. This is accomplished by deferring all database operations to threads, and returning a Deferred. The Pool class takes care of the details.
A connector method should look like this:
def myMethod(self, arg1, arg2):
def thd(conn):
q = ... # construct a query
for row in conn.execute(q):
... # do something with the results
return ... # return an interesting value
return self.db.pool.do(thd)
Picking that apart, the body of the method defines a function named thd taking one argument, a Connection object. It then calls self.db.pool.do, passing the thd function. This function is called in a thread, and can make blocking calls to SQLAlchemy as desired. The do method will return a Deferred that will fire with the return value of thd, or with a failure representing any exceptions raised by thd.
The return value of thd must not be an SQLAlchemy object - in particular, any ResultProxy objects must be parsed into lists or other data structures before they are returned.
Warning
As the name thd indicates, the function runs in a thread. It should not interact with any other part of Buildbot, nor with any of the Twisted components that expect to be accessed from the main thread -- the reactor, Deferreds, etc.
Queries can be constructed using any of the SQLAlchemy core methods, using tables from Model, and executed with the connection object, conn.
- class buildbot.db.pool.DBThreadPool
- do(callable, ...)
Returns: Deferred Call callable in a thread, with a Connection object as first argument. Returns a deferred that will fire with the results of the callable, or with a failure representing any exception raised during its execution.
Any additional positional or keyword arguments are passed to callable.
Database Schema
Database connector methods access the database through SQLAlchemy, which requires access to Python objects representing the database tables. That is handled through the model.
- class buildbot.db.model.Model
This class contains the canonical description of the buildbot schema, It is presented in the form of SQLAlchemy Table instances, as class variables. At runtime, the model is available at master.db.model, so for example the buildrequests table can be referred to as master.db.model.buildrequests, and columns are available in its c attribute.
The source file, master/buildbot/db/model.py, contains comments describing each table; that information is not replicated in this documentation.
Note that the model is not used for new installations or upgrades of the Buildbot database. See Modifying the Database Schema for more information.
- metadata
The model object also has a metadata attribute containing a MetaData instance. Connector methods should not need to access this object. The metadata is not bound to an engine.
The Model class also defines some migration-related methods:
- is_current()
Returns: boolean via Deferred Returns true if the current database's version is current.
- upgrade()
Returns: Deferred Upgrades the database to the most recent schema version.
Caching
Connector component methods that get an object based on an ID are good candidates for caching. The cached decorator makes this automatic:
- buildbot.db.base.cached(cachename)
Parameters: cache_name -- name of the cache to use A decorator for "getter" functions that fetch an object from the database based on a single key. The wrapped method will only be called if the named cache does not contain the key.
The wrapped function must take one argument (the key); the wrapper will take a key plus an optional no_cache argument which, if true, will cause it to invoke the underlying method even if the key is in the cache.
The resulting method will have a cache attribute which can be used to access the underlying cache.
In most cases, getter methods return a well-defined dictionary. Unfortunately, Python does not handle weak references to bare dictionaries, so components must instantiate a subclass of dict. The whole assembly looks something like this:
class ThDict(dict):
pass
class ThingConnectorComponent(base.DBConnectorComponent):
@base.cached('thdicts')
def getThing(self, thid):
def thd(conn):
...
thdict = ThDict(thid=thid, attr=row.attr, ...)
return thdict
return self.db.pool.do(thd)
Tests
It goes without saying that any new connector methods must be fully tested!
You will also want to add an in-memory implementation of the methods to the fake classes in master/buildbot/test/fake/fakedb.py. Non-DB Buildbot code is tested using these fake implementations in order to isolate that code from the database code.
Modifying the Database Schema
Changes to the schema are accomplished through migration scripts, supported by SQLAlchemy-Migrate. In fact, even new databases are created with the migration scripts -- a new database is a migrated version of an empty database.
The schema is tracked by a version number, stored in the migrate_version table. This number is incremented for each change to the schema, and used to determine whether the database must be upgraded. The master will refuse to run with an out-of-date database.
To make a change to the schema, first consider how to handle any existing data. When adding new columns, this may not be necessary, but table refactorings can be complex and require caution so as not to lose information.
Create a new script in master/buildbot/db/migrate/versions, following the numbering scheme already present. The script should have an update method, which takes an engine as a parameter, and upgrades the database, both changing the schema and performing any required data migrations. The engine passed to this parameter is "enhanced" by SQLAlchemy-Migrate, with methods to handle adding, altering, and dropping columns. See the SQLAlchemy-Migrate documentation for details.
Next, modify master/buildbot/db/model.py to represent the updated schema. Buildbot's automated tests perform a rudimentary comparison of an upgraded database with the model, but it is important to check the details - key length, nullability, and so on can sometimes be missed by the checks. If the schema and the upgrade scripts get out of sync, bizarre behavior can result.
Also, adjust the fake database table definitions in master/buildbot/test/fake/fakedb.py according to your changes.
Your upgrade script should have unit tests. The classes in master/buildbot/test/util/migration.py make this straightforward. Unit test scripts should be named e.g., test_db_migrate_versions_015_remove_bad_master_objectid.py.
The master/buildbot/test/integration/test_upgrade.py also tests upgrades, and will confirm that the resulting database matches the model. If you encounter implicit indexes on MySQL, that do not appear on SQLite or Postgres, add them to implied_indexes in master/buidlbot/db/model.py.
Database Compatibility Notes
Or: "If you thought any database worked right, think again"
Because Buildbot works over a wide range of databases, it is generally limited to database features present in all supported backends. This section highlights a few things to watch out for.
In general, Buildbot should be functional on all supported database backends. If use of a backend adds minor usage restrictions, or cannot implement some kinds of error checking, that is acceptable if the restrictions are well-documented in the manual.
The metabuildbot tests Buildbot against all supported databases, so most compatibility errors will be caught before a release.
Index Length in MySQL
MySQL only supports about 330-character indexes. The actual index length is 1000 bytes, but MySQL uses 3-byte encoding for UTF8 strings. This is a longstanding bug in MySQL - see "Specified key was too long; max key length is 1000 bytes" with utf8. While this makes sense for indexes used for record lookup, it limits the ability to use unique indexes to prevent duplicate rows.
InnoDB has even more severe restrictions on key lengths, which is why the MySQL implementation requires a MyISAM storage engine.
Transactions in MySQL
Unfortunately, use of the MyISAM storage engine precludes real transactions in MySQL. transaction.commit() and transaction.rollback() are essentially no-ops: modifications to data in the database are visible to other users immediately, and are not reverted in a rollback.
Referential Integrity in SQLite and MySQL
Neither MySQL nor SQLite enforce referential integrity based on foreign keys. Postgres does enforce, however. If possible, test your changes on Postgres before committing, to check that tables are added and removed in the proper order.
Subqueries in MySQL
MySQL's query planner is easily confused by subqueries. For example, a DELETE query specifying id's that are IN a subquery will not work. The workaround is to run the subquery directly, and then execute a DELETE query for each returned id.
If this weakness has a significant performance impact, it would be acceptable to conditionalize use of the subquery on the database dialect.
Build Result Codes
Buildbot represents the status of a step, build, or buildset using a set of numeric constants. From Python, these constants are available in the module buildbot.status.results, but the values also appear in the database and in external tools, so the values are fixed.
- buildbot.status.results.SUCCESS
Value: 0; color: green; a successful run.
- buildbot.status.results.WARNINGS
Value: 1; color: orange; a successful run, with some warnings.
- buildbot.status.results.FAILURE
Value: 2; color: red; a failed run, due to problems in the build itself, as opposed to a Buildbot misconfiguration or bug.
- buildbot.status.results.SKIPPED
Value: 3; color: white; a run that was skipped -- usually a step skipped by doStepIf (see Common Parameters)
- buildbot.status.results.EXCEPTION
Value: 4; color: purple; a run that failed due to a problem in Buildbot itself.
- buildbot.status.results.RETRY
Value: 4; color: purple; a run that should be retried, usually due to a slave disconnection.
- buildbot.status.results.Results
A dictionary mapping result codes to their lowercase names.
- buildbot.status.results.worst_status(a, b)
This function takes two status values, and returns the "worst" status of the two. This is used (with exceptions) to aggregate step statuses into build statuses, and build statuses into buildset statuses.
File Formats
Log File Format
- class buildbot.status.logfile.LogFile
The master currently stores each logfile in a single file, which may have a standard compression applied.
The format is a special case of the netstrings protocol - see http://cr.yp.to/proto/netstrings.txt. The text in each netstring consists of a one-digit channel identifier followed by the data from that channel.
The formatting is implemented in the LogFile class in buildbot/status/logfile.py, and in particular by the merge method.
Web Status
Jinja Web Templates
Buildbot uses Jinja2 to render its web interface. The authoritative source for this templating engine is its own documentation, of course, but a few notes are in order for those who are making only minor modifications.
Whitespace
Jinja directives are enclosed in {% .. %}, and sometimes also have dashes. These dashes strip whitespace in the output. For example:
{% for entry in entries %}
<li>{{ entry }}</li>
{% endfor %}
will produce output with too much whitespace:
<li>pigs</li>
<li>cows</li>
But adding the dashes will collapse that whitespace completely:
{% for entry in entries -%}
<li>{{ entry }}</li>
{%- endfor %}
yields
<li>pigs</li><li>cows</li>
Web Authorization Framework
Whenever any part of the web framework wants to perform some action on the buildmaster, it should check the user's authorization first.
Always check authorization twice: once to decide whether to show the option to the user (link, button, form, whatever); and once before actually performing the action.
To check whether to display the option, you'll usually want to pass an authz object to the Jinja template in your HtmlResource subclass:
def content(self, req, cxt):
# ...
cxt['authz'] = self.getAuthz(req)
template = ...
return template.render(**cxt)
and then determine whether to advertise the action in the template:
{{ if authz.advertiseAction('myNewTrick') }}
<form action="{{ myNewTrick_url }}"> ...
{{ endif }}
Actions can optionally require authentication, so use needAuthForm to determine whether to require a 'username' and 'passwd' field in the generated form. These fields are usually generated by authFormIfNeeded:
{{ authFormIfNeeded(authz, 'myNewTrick') }}
Once the POST request comes in, it's time to check authorization again. This usually looks something like
res = yield self.getAuthz(req).actionAllowed('myNewTrick', req, someExtraArg)
if not res:
defer.returnValue(Redirect(path_to_authfail(req)))
return
The someExtraArg is optional (it's handled with *args, so you can have several if you want), and is given to the user's authorization function. For example, a build-related action should pass the build status, so that the user's authorization function could ensure that devs can only operate on their own builds.
Note that actionAllowed returns a Deferred instance, so you must wait for the Deferred and yield the Redirect instead of returning it.
The available actions are described in WebStatus.
Master-Slave API
This section describes the master-slave interface.
Connection
The interface is based on Twisted's Perspective Broker, which operates over TCP connections.
The slave connects to the master, using the parameters supplied to buildslave create-slave. It uses a reconnecting process with an exponential backoff, and will automatically reconnect on disconnection.
Once connected, the slave authenticates with the Twisted Cred (newcred) mechanism, using the username and password supplied to buildslave create-slave. The mind is the slave bot instance (class buildslave.bot.Bot).
On the master side, the realm is implemented by buildbot.master.Dispatcher, which examines the username of incoming avatar requests. There are special cases for change, debug, and statusClient, which are not discussed here. For all other usernames, the botmaster is consulted, and if a slave with that name is configured, its buildbot.buildslave.BuildSlave instance is returned as the perspective.
Build Slaves
At this point, the master-side BuildSlave object has a pointer to the remote, slave-side Bot object in its self.slave, and the slave-side Bot object has a reference to the master-side BuildSlave object in its self.perspective.
Bot methods
The slave-side Bot object has the following remote methods:
- remote_getCommands
- Returns a list of (name, version) for all commands the slave recognizes
- remote_setBuilderList
Given a list of builders and their build directories, ensures that those builders, and only those builders, are running. This can be called after the initial connection is established, with a new list, to add or remove builders.
This method returns a dictionary of SlaveBuilder objects - see below
- remote_print
- Adds a message to the slave logfile
- remote_getSlaveInfo
Returns the contents of the slave's info/ directory. This also contains the keys
- environ
- copy of the slaves environment
- system
- OS the slave is running (extracted from Python's os.name)
- basedir
- base directory where slave is running
- remote_getVersion
- Returns the slave's version
BuildSlave methods
The master-side object has the following method:
- perspective_keepalive
- Does nothing - used to keep traffic flowing over the TCP connection
Setup
After the initial connection and trading of a mind (Bot) for an avatar (BuildSlave), the master calls the Bot's setBuilderList method to set up the proper slave builders on the slave side. This method returns a reference to each of the new slave-side SlaveBuilder objects, described below. Each of these is handed to the corresponding master-side SlaveBuilder object.
This immediately calls the remote setMaster method, then the print method.
Pinging
To ping a remote SlaveBuilder, the master calls its print method.
Building
When a build starts, the master calls the slave's startBuild method. Each BuildStep instance will subsequently call the startCommand method, passing a reference to itself as the stepRef parameter. The startCommand method returns immediately, and the end of the command is signalled with a call to a method on the master-side BuildStep object.
Slave Builders
Each build slave has a set of builders which can run on it. These are represented by distinct classes on the master and slave, just like the BuildSlave and Bot objects described above.
On the slave side, builders are represented as instances of the buildslave.bot.SlaveBuilder class. On the master side, they are represented by the buildbot.process.slavebuilder.SlaveBuilder class. The identical names are a source of confusion. The following will refer to these as the slave-side and master-side SlaveBuilder classes. Each object keeps a reference to its opposite in self.remote.
Slave-Side SlaveBuilder Methods
- remote_setMaster
- Provides a reference to the master-side SlaveBuilder
- remote_print
- Adds a message to the slave logfile; used to check round-trip connectivity
- remote_startBuild
- Indicates that a build is about to start, and that any subsequent commands are part of that build
- remote_startCommand
- Invokes a command on the slave side
- remote_interruptCommand
- Interrupts the currently-running command
- remote_shutdown
- Shuts down the slave cleanly
Master-side SlaveBuilder Methods
The master side does not have any remotely-callable methods.
Commands
Actual work done by the slave is represented on the master side by a buildbot.process.buildstep.RemoteCommand instance.
The command instance keeps a reference to the slave-side buildslave.bot.SlaveBuilder, and calls methods like remote_startCommand to start new commands. Once that method is called, the SlaveBuilder instance keeps a reference to the command, and calls the following methods on it:
Master-Side RemoteCommand Methods
- remote_update
- Update information about the running command. See below for the format.
- remote_complete
- Signal that the command is complete, either successfully or with a Twisted failure.
Updates
Updates from the slave, sent via remote_update, are a list of individual update elements. Each update element is, in turn, a list of the form [data, 0] where the 0 is present for historical reasons. The data is a dictionary, with keys describing the contents. The updates are handled by remoteUpdate.
Updates with different keys can be combined into a single dictionary or delivered sequentially as list elements, at the slave's option.
To summarize, an updates parameter to remote_update might look like this:
[
[ { 'header' : 'running command..' }, 0 ],
[ { 'stdout' : 'abcd', 'stderr' : 'local modifications' }, 0 ],
[ { 'log' : ( 'cmd.log', 'cmd invoked at 12:33 pm\n' ) }, 0 ],
[ { 'rc' : 0 }, 0 ],
]
Defined Commands
The following commands are defined on the slaves.
shell
Runs a shell command on the slave. This command takes the following arguments:
command
The command to run. If this is a string, will be passed to the system shell as a string. Otherwise, it must be a list, which will be executed directly.
workdir
Directory in which to run the command, relative to the builder dir.
env
A dictionary of environment variables to augment or replace the existing environment on the slave. In this dictionary, PYTHONPATH is treated specially: it should be a list of path components, rather than a string, and will be prepended to the existing Python path.
initial_stdin
A string which will be written to the command's standard input before it is closed.
want_stdout
If false, then no updates will be sent for stdout.
want_stderr
If false, then no updates will be sent for stderr.
usePTY
If true, the command should be run with a PTY (POSIX only). This defaults to the value specified in the slave's buildbot.tac.
not_really
If true, skip execution and return an update with rc=0.
timeout
Maximum time without output before the command is killed.
maxTime
Maximum overall time from the start before the command is killed.
logfiles
A dictionary specifying logfiles other than stdio. Keys are the logfile names, and values give the workdir-relative filename of the logfile. Alternately, a value can be a dictionary; in this case, the dictionary must have a filename key specifying the filename, and can also have the following keys:
follow
Only follow the file from its current end-of-file, rather that starting from the beginning.
logEnviron
If false, the command's environment will not be logged.
The shell command sends the following updates:
- stdout
- The data is a bytestring which represents a continuation of the stdout stream. Note that the bytestring boundaries are not necessarily aligned with newlines.
- stderr
- Similar to stdout, but for the error stream.
- header
- Similar to stdout, but containing data for a stream of buildbot-specific metadata.
- rc
- The exit status of the command, where -- in keeping with UNIX tradition -- 0 indicates success and any nonzero value is considered a failure. No further updates should be sent after an rc.
- log
- This update contains data for a logfile other than stdio. The data associated with the update is a tuple of the log name and the data for that log. Note that non-stdio logs do not distinguish output, error, and header streams.
uploadFile
Upload a file from the slave to the master. The arguments are
workdir
The base directory for the filename, relative to the builder's basedir.
slavesrc
Name of the filename to read from., relative to the workdir.
writer
A remote reference to a writer object, described below.
maxsize
Maximum size, in bytes, of the file to write. The operation will fail if the file exceeds this size.
blocksize
The block size with which to transfer the file.
keepstamp
If true, preserve the file modified and accessed times.
The slave calls a few remote methods on the writer object. First, the write method is called with a bytestring containing data, until all of the data has been transmitted. Then, the slave calls the writer's close, followed (if keepstamp is true) by a call to upload(atime, mtime).
This command sends rc and stderr updates, as defined for the shell command.
uploadDirectory
Similar to uploadFile, this command will upload an entire directory to the master, in the form of a tarball. It takes the following arguments:
workdir slavesrc writer maxsize blocksize
See uploadFile
compress
Compression algorithm to use -- one of None, 'bz2', or 'gz'.
The writer object is treated similarly to the uploadFile command, but after the file is closed, the slave calls the master's unpack method with no arguments to extract the tarball.
This command sends rc and stderr updates, as defined for the shell command.
downloadFile
This command will download a file from the master to the slave. It takes the following arguments:
workdir
Base directory for the destination filename, relative to the builder basedir.
slavedest
Filename to write to, relative to the workdir.
reader
A remote reference to a reader object, described below.
maxsize
Maximum size of the file.
blocksize
The block size with which to transfer the file.
mode
Access mode for the new file.
The reader object's read(maxsize) method will be called with a maximum size, which will return no more than that number of bytes as a bytestring. At EOF, it will return an empty string. Once EOF is received, the slave will call the remote close method.
This command sends rc and stderr updates, as defined for the shell command.
mkdir
This command will create a directory on the slave. It will also create any intervening directories required. It takes the following argument:
dir
Directory to create.
The mkdir command produces the same updates as shell.
rmdir
This command will remove a directory or file on the slave. It takes the following arguments:
dir
Directory to remove.
timeout maxTime
See shell, above.
The rmdir command produces the same updates as shell.
cpdir
This command will copy a directory from place to place on the slave. It takes the following arguments:
fromdir
Source directory for the copy operation, relative to the builder's basedir.
todir
Destination directory for the copy operation, relative to the builder's basedir.
timeout maxTime
See shell, above.
The cpdir command produces the same updates as shell.
stat
This command returns status information about a file or directory. It takes a single parameter, file, specifying the filename relative to the builder's basedir.
It produces two status updates:
stat
The return value from Python's os.stat.
rc
0 if the file is found, otherwise 1.
Source Commands
The source commands (bk, cvs, darcs, git, repo, bzr, hg, p4, p4sync, and mtn) are deprecated. See the docstrings in the source code for more information.
String Encodings
Buildbot expects all strings used internally to be valid Unicode strings - not bytestrings.
Note that Buildbot rarely feeds strings back into external tools in such a way that those strings must match. For example, Buildbot does not attempt to access the filenames specified in a Change. So it is more important to store strings in a manner that will be most useful to a human reader (e.g., in logfiles, web status, etc.) than to store them in a lossless format.
Inputs
On input, strings should be decoded, if their encoding is known. Where necessary, the assumed input encoding should be configurable. In some cases, such as filenames, this encoding is not known or not well-defined (e.g., a utf-8 encoded filename in a latin-1 directory). In these cases, the input mechanisms should make a best effort at decoding, and use e.g., the errors='replace' option to fail gracefully on un-decodable characters.
Outputs
At most points where Buildbot outputs a string, the target encoding is known. For example, the web status can encode to utf-8. In cases where it is not known, it should be configurable, with a safe fallback (e.g., ascii with errors='replace'. For HTML/XML outputs, consider using errors='xmlcharrefreplace' instead.
Metrics
New in buildbot 0.8.4 is support for tracking various performance metrics inside the buildbot master process. Currently these are logged periodically according to the log_interval configuration setting of the @ref{Metrics Options} configuration.
If WebStatus is enabled, the metrics data is also available via /json/metrics.
The metrics subsystem is implemented in buildbot.process.metrics. It makes use of twisted's logging system to pass metrics data from all over buildbot's code to a central MetricsLogObserver object, which is available at BuildMaster.metrics or via Status.getMetrics().
Metric Events
MetricEvent objects represent individual items to monitor. There are three sub-classes implemented:
- MetricCountEvent
Records incremental increase or decrease of some value, or an absolute measure of some value.
from buildbot.process.metrics import MetricCountEvent # We got a new widget! MetricCountEvent.log('num_widgets', 1) # We have exactly 10 widgets MetricCountEvent.log('num_widgets', 10, absolute=True)
- MetricTimeEvent
Measures how long things take. By default the average of the last 10 times will be reported.
from buildbot.process.metrics import MetricTimeEvent # function took 0.001s MetricTimeEvent.log('time_function', 0.001)
- MetricAlarmEvent
Indicates the health of various metrics.
from buildbot.process.metrics import MetricAlarmEvent, ALARM_OK # num_slaves looks ok MetricAlarmEvent.log('num_slaves', level=ALARM_OK)
Metric Handlers
MetricsHandler objects are responsible for collecting MetricEvents of a specific type and keeping track of their values for future reporting. There are MetricsHandler classes corresponding to each of the MetricEvent types.
Metric Watchers
Watcher objects can be added to MetricsHandlers to be called when metric events of a certain type are received. Watchers are generally used to record alarm events in response to count or time events.
Metric Helpers
- countMethod(name)
A function decorator that counts how many times the function is called.
from buildbot.process.metrics import countMethod @countMethod('foo_called') def foo(): return "foo!"
- Timer(name)
Timer objects can be used to make timing events easier. When Timer.stop() is called, a MetricTimeEvent is logged with the elapsed time since timer.start() was called.
from buildbot.process.metrics import Timer def foo(): t = Timer('time_foo') t.start() try: for i in range(1000): calc(i) return "foo!" finally: t.stop()
Timer objects also provide a pair of decorators, startTimer/stopTimer to decorate other functions.
from buildbot.process.metrics import Timer t = Timer('time_thing') @t.startTimer def foo(): return "foo!" @t.stopTimer def bar(): return "bar!" foo() bar()
- timeMethod(name)
A function decorator that measures how long a function takes to execute. Note that many functions in buildbot return deferreds, so may return before all the work they set up has completed. Using an explicit Timer is better in this case.
from buildbot.process.metrics import timeMethod @timeMethod('time_foo') def foo(): for i in range(1000): calc(i) return "foo!"
Classes
The sections contained here document classes that can be used or subclassed.
Note
Some of this information duplicates information available in the source code itself. Consider this information authoritative, and the source code a demonstration of the current implementation which is subject to change.
BuildFactory
BuildFactory Implementation Note
The default BuildFactory, provided in the buildbot.process.factory module, contains an internal list of BuildStep specifications: a list of (step_class, kwargs) tuples for each. These specification tuples are constructed when the config file is read, by asking the instances passed to addStep for their subclass and arguments.
To support config files from buildbot-0.7.5 and earlier, addStep also accepts the f.addStep(shell.Compile, command=["make","build"]) form, although its use is discouraged because then the Compile step doesn't get to validate or complain about its arguments until build time. The modern pass-by-instance approach allows this validation to occur while the config file is being loaded, where the admin has a better chance of noticing problems.
When asked to create a Build, the BuildFactory puts a copy of the list of step specifications into the new Build object. When the Build is actually started, these step specifications are used to create the actual set of BuildSteps, which are then executed one at a time. This serves to give each Build an independent copy of each step.
Each step can affect the build process in the following ways:
- If the step's haltOnFailure attribute is True, then a failure in the step (i.e. if it completes with a result of FAILURE) will cause the whole build to be terminated immediately: no further steps will be executed, with the exception of steps with alwaysRun set to True. haltOnFailure is useful for setup steps upon which the rest of the build depends: if the CVS checkout or ./configure process fails, there is no point in trying to compile or test the resulting tree.
- If the step's alwaysRun attribute is True, then it will always be run, regardless of if previous steps have failed. This is useful for cleanup steps that should always be run to return the build directory or build slave into a good state.
- If the flunkOnFailure or flunkOnWarnings flag is set, then a result of FAILURE or WARNINGS will mark the build as a whole as FAILED. However, the remaining steps will still be executed. This is appropriate for things like multiple testing steps: a failure in any one of them will indicate that the build has failed, however it is still useful to run them all to completion.
- Similarly, if the warnOnFailure or warnOnWarnings flag is set, then a result of FAILURE or WARNINGS will mark the build as having WARNINGS, and the remaining steps will still be executed. This may be appropriate for certain kinds of optional build or test steps. For example, a failure experienced while building documentation files should be made visible with a WARNINGS result but not be serious enough to warrant marking the whole build with a FAILURE.
In addition, each Step produces its own results, may create logfiles, etc. However only the flags described above have any effect on the build as a whole.
The pre-defined BuildSteps like CVS and Compile have reasonably appropriate flags set on them already. For example, without a source tree there is no point in continuing the build, so the CVS class has the haltOnFailure flag set to True. Look in buildbot/steps/*.py to see how the other Steps are marked.
Each Step is created with an additional workdir argument that indicates where its actions should take place. This is specified as a subdirectory of the slave builder's base directory, with a default value of build. This is only implemented as a step argument (as opposed to simply being a part of the base directory) because the CVS/SVN steps need to perform their checkouts from the parent directory.
RemoteCommands
Most of the action in build steps consists of performing operations on the slave. This is accomplished via RemoteCommand and its subclasses. Each represents a single operation on the slave.
Most data is returned to a command via updates. These updates are described in detail in Updates.
RemoteCommand
- class buildbot.process.buildstep.RemoteCommand(remote_command, args, collectStdout=False, ignore_updates=False, decodeRC=dict(0))
Parameters: - remote_command (string) -- command to run on the slave
- args (dictionary) -- arguments to pass to the command
- collectStdout -- if True, collect the command's stdout
- ignore_updates -- true to ignore remote updates
- decodeRC -- dictionary associating rc values to buildsteps results constants (e.g. SUCCESS, FAILURE, WARNINGS)
This class handles running commands, consisting of a command name and a dictionary of arguments. If true, ignore_updates will suppress any updates sent from the slave.
This class handles updates for stdout, stderr, and header by appending them to a stdio logfile, if one is in use. It handles updates for rc by recording the value in its rc attribute.
Most slave-side commands, even those which do not spawn a new process on the slave, generate logs and an rc, requiring this class or one of its subclasses. See Updates for the updates that each command may send.
- active
True if the command is currently running
- run(step, remote)
Parameters: - step -- the buildstep invoking this command
- remote -- a reference to the remote SlaveBuilder instance
Returns: Deferred
Run the command. Call this method to initiate the command; the returned Deferred will fire when the command is complete. The Deferred fires with the RemoteCommand instance as its value.
- interrupt(why)
Parameters: why (Twisted Failure) -- reason for interrupt Returns: Deferred This method attempts to stop the running command early. The Deferred it returns will fire when the interrupt request is received by the slave; this may be a long time before the command itself completes, at which time the Deferred returned from run will fire.
- results()
Returns: results constant This method checks the rc against the decodeRC dictionary, and returns results constant
- didFail()
Returns: bool This method returns True if the results() function returns FAILURE
The following methods are invoked from the slave. They should not be called directly.
- remote_update(updates)
Parameters: updates -- new information from the slave Handles updates from the slave on the running command. See Updates for the content of the updates. This class splits the updates out, and handles the ignore_updates option, then calls remoteUpdate to process the update.
- remote_complete(failure=None)
Parameters: failure -- the failure that caused the step to complete, or None for success Called by the slave to indicate that the command is complete. Normal completion (even with a nonzero rc) will finish with no failure; if failure is set, then the step should finish with status EXCEPTION.
These methods are hooks for subclasses to add functionality.
- remoteUpdate(update)
Parameters: update -- the update to handle Handle a single update. Subclasses must override this method.
- remoteComplete(failure)
Parameters: failure -- the failure that caused the step to complete, or None for success Returns: Deferred Handle command completion, performing any necessary cleanup. Subclasses should override this method. If failure is not None, it should be returned to ensure proper processing.
- logs
A dictionary of LogFile instances representing active logs. Do not modify this directly -- use useLog instead.
- rc
Set to the return code of the command, after the command has completed. For compatibility with shell commands, 0 is taken to indicate success, while nonzero return codes indicate failure.
- stdout
If the collectStdout constructor argument is true, then this attribute will contain all data from stdout, as a single string. This is helpful when running informational commands (e.g., svnversion), but is not appropriate for commands that will produce a large amount of output, as that output is held in memory.
To set up logging, use useLog or useLogDelayed before starting the command:
- useLog(log, closeWhenFinished=False, logfileName=None)
Parameters: - log -- the LogFile instance to add to.
- closeWhenFinished -- if true, call finish when the command is finished.
- logfileName -- the name of the logfile, as given to the slave. This is stdio for standard streams.
Route log-related updates to the given logfile. Note that stdio is not included by default, and must be added explicitly. The logfileName must match the name given by the slave in any log updates.
- useLogDelayed(log, logfileName, activateCallback, closeWhenFinished=False)
Parameters: - log -- the LogFile instance to add to.
- logfileName -- the name of the logfile, as given to the slave. This is stdio for standard streams.
- activateCallback -- callback for when the log is added; see below
- closeWhenFinished -- if true, call finish when the command is finished.
Similar to useLog, but the logfile is only actually added when an update arrives for it. The callback, activateCallback, will be called with the RemoteCommand instance when the first update for the log is delivered.
With that finished, run the command using the inherited run method. During the run, you can inject data into the logfiles with any of these methods:
- addStdout(data)
Parameters: data -- data to add to the logfile
Add stdout data to the stdio log.
- addStderr(data)
Parameters: data -- data to add to the logfile
Add stderr data to the stdio log.
- addHeader(data)
Parameters: data -- data to add to the logfile
Add header data to the stdio log.
- addToLog(logname, data)
Parameters: - logname -- the logfile to receive the data
- data -- data to add to the logfile
Add data to a logfile other than stdio.
- class buildbot.process.buildstep.RemoteShellCommand(workdir, command, env=None, want_stdout=True, want_stderr=True, timeout=20*60, maxTime=None, logfiles={}, usePTY="slave-config", logEnviron=True, collectStdio=False)
Parameters: - workdir -- directory in which command should be executed, relative to the builder's basedir.
- command (string or list) -- shell command to run
- want_stdout -- If false, then no updates will be sent for stdout.
- want_stderr -- If false, then no updates will be sent for stderr.
- timeout -- Maximum time without output before the command is killed.
- maxTime -- Maximum overall time from the start before the command is killed.
- env -- A dictionary of environment variables to augment or replace the existing environment on the slave.
- logfiles -- Additional logfiles to request from the slave.
- usePTY -- True to use a PTY, false to not use a PTY; the default value uses the default configured on the slave.
- logEnviron -- If false, do not log the environment on the slave.
- collectStdout -- If True, collect the command's stdout.
Most of the constructor arguments are sent directly to the slave; see shell for the details of the formats. The collectStdout parameter is as described for the parent class.
This class is used by the ShellCommand step, and by steps that run multiple customized shell commands.
BuildSteps
There are a few parent classes that are used as base classes for real buildsteps. This section describes the base classes. The "leaf" classes are described in Build Steps.
BuildStep
- class buildbot.process.buildstep.BuildStep(name, locks, haltOnFailure, flunkOnWarnings, flunkOnFailure, warnOnWarnings, warnOnFailure, alwaysRun, progressMetrics, useProgress, doStepIf, hideStepIf)
All constructor arguments must be given as keyword arguments. Each constructor parameter is copied to the corresponding attribute.
- name
The name of the step.
- locks
List of locks for this step; see Interlocks.
- progressMetrics
List of names of metrics that should be used to track the progress of this build, and build ETA's for users. This is generally set in the
- useProgress
If true (the default), then ETAs will be calculated for this step using progress metrics. If the step is known to have unpredictable timing (e.g., an incremental build), then this should be set to false.
- doStepIf
A callable or bool to determine whether this step should be executed. See Common Parameters for details.
- hideStepIf
A callable or bool to determine whether this step should be shown in the waterfall and build details pages. See Common Parameters for details.
The following attributes affect the behavior of the containing build:
- haltOnFailure
If true, the build will halt on a failure of this step, and not execute subsequent tests (except those with alwaysRun).
- flunkOnWarnings
If true, the build will be marked as a failure if this step ends with warnings.
- flunkOnFailure
If true, the build will be marked as a failure if this step fails.
- warnOnWarnings
If true, the build will be marked as warnings, or worse, if this step ends with warnings.
- warnOnFailure
If true, the build will be marked as warnings, or worse, if this step fails.
- alwaysRun
If true, the step will run even if a previous step halts the build with haltOnFailure.
A few important pieces of information are not available when a step is constructed, and are added later. These are set by the following methods; the order in which these methods are called is not defined.
- setBuild(build)
Parameters: build -- the Build instance controlling this step. This method is called during setup to set the build instance controlling this slave. Subclasses can override this to get access to the build object as soon as it is available. The default implementation sets the build attribute.
- build
The build object controlling this step.
- setBuildSlave(build)
Parameters: build -- the BuildSlave instance on which this step will run. Similarly, this method is called with the build slave that will run this step. The default implementation sets the buildslave attribute.
- buildslave
The build slave that will run this step.
- setDefaultWorkdir(workdir)
Parameters: workdir -- the default workdir, from the build This method is called at build startup with the default workdir for the build. Steps which allow a workdir to be specified, but want to override it with the build's default workdir, can use this method to apply the default.
- setStepStatus(status)
Parameters: status (BuildStepStatus) -- step status This method is called to set the status instance to which the step should report. The default implementation sets step_status.
- step_status
The BuildStepStatus object tracking the status of this step.
- setupProgress()
This method is called during build setup to give the step a chance to set up progress tracking. It is only called if the build has useProgress set. There is rarely any reason to override this method.
- progress
If the step is tracking progress, this is a StepProgress instance performing that task.
Execution of the step itself is governed by the following methods and attributes.
- startStep(remote)
Parameters: remote -- a remote reference to the slave-side SlaveBuilder instance Returns: Deferred Begin the step. This is the build's interface to step execution. Subclasses should override start to implement custom behaviors.
The method returns a Deferred that fires when the step finishes. It fires with a tuple of (result, [extra text]), where result is one of the constants from buildbot.status.builder. The extra text is a list of short strings which should be appended to the Build's text results. For example, a test step may add 17 failures to the Build's status by this mechanism.
The deferred will errback if the step encounters an exception, including an exception on the slave side (or if the slave goes away altogether). Normal build/test failures will not cause an errback.
- start()
Returns: None or SKIPPED, optionally via a Deferred. Begin the step. Subclasses should override this method to do local processing, fire off remote commands, etc. The parent method raises NotImplementedError.
When the step is done, it should call finished, with a result -- a constant from buildbot.status.results. The result will be handed off to the Build.
If the step encounters an exception, it should call failed with a Failure object. This method automatically fails the whole build with an exception. A common idiom is to add failed as an errback on a Deferred:
cmd = RemoteCommand(args) d = self.runCommand(cmd) def suceed(_): self.finished(results.SUCCESS) d.addCallback(succeed) d.addErrback(self.failed)
If the step decides it does not need to be run, start can return the constant SKIPPED. In this case, it is not necessary to call finished directly.
- finished(results)
Parameters: results -- a constant from results A call to this method indicates that the step is finished and the build should analyze the results and perhaps proceed to the next step. The step should not perform any additional processing after calling this method.
- failed(failure)
Parameters: failure -- a Failure instance Similar to finished, this method indicates that the step is finished, but handles exceptions with appropriate logging and diagnostics.
This method handles BuildStepFailed specially, by calling finished(FAILURE). This provides subclasses with a shortcut to stop execution of a step by raising this failure in a context where failed will catch it.
- interrupt(reason)
Parameters: reason (string or Failure) -- why the build was interrupted This method is used from various control interfaces to stop a running step. The step should be brought to a halt as quickly as possible, by cancelling a remote command, killing a local process, etc. The step must still finish with either finished or failed.
The reason parameter can be a string or, when a slave is lost during step processing, a ConnectionLost failure.
The parent method handles any pending lock operations, and should be called by implementations in subclasses.
- stopped
If false, then the step is running. If true, the step is not running, or has been interrupted.
This method provides a convenient way to summarize the status of the step for status displays:
- describe(done=False)
Parameters: done -- If true, the step is finished. Returns: list of strings Describe the step succinctly. The return value should be a sequence of short strings suitable for display in a horizontally constrained space.
Note
Be careful not to assume that the step has been started in this method. In relatively rare circumstances, steps are described before they have started. Ideally, unit tests should be used to ensure that this method is resilient.
Build steps support progress metrics - values that increase roughly linearly during the execution of the step, and can thus be used to calculate an expected completion time for a running step. A metric may be a count of lines logged, tests executed, or files compiled. The build mechanics will take care of translating this progress information into an ETA for the user.
- setProgress(metric, value)
Parameters: - metric (string) -- the metric to update
- value (integer) -- the new value for the metric
Update a progress metric. This should be called by subclasses that can provide useful progress-tracking information.
The specified metric name must be included in progressMetrics.
The following methods are provided as utilities to subclasses. These methods should only be invoked after the step is started.
- slaveVersion(command, oldVersion=None)
Parameters: - command (string) -- command to examine
- oldVersion -- return value if the slave does not specify a version
Returns: string
Fetch the version of the named command, as specified on the slave. In practice, all commands on a slave have the same version, but passing command is still useful to ensure that the command is implemented on the slave. If the command is not implemented on the slave, slaveVersion will return None.
Versions take the form x.y where x and y are integers, and are compared as expected for version numbers.
Buildbot versions older than 0.5.0 did not support version queries; in this case, slaveVersion will return oldVersion. Since such ancient versions of Buildbot are no longer in use, this functionality is largely vestigial.
- slaveVersionIsOlderThan(command, minversion)
Parameters: - command (string) -- command to examine
- minversion -- minimum version
Returns: boolean
This method returns true if command is not implemented on the slave, or if it is older than minversion.
- getSlaveName()
Returns: string Get the name of the buildslave assigned to this step.
- runCommand(command)
Returns: Deferred This method connects the given command to the step's buildslave and runs it, returning the Deferred from run.
- addURL(name, url)
Parameters: - name -- URL name
- url -- the URL
Add a link to the given url, with the given name to displays of this step. This allows a step to provide links to data that is not available in the log files.
The BuildStep class provides minimal support for log handling, that is extended by the LoggingBuildStep class. The following methods provide some useful behaviors. These methods can be called while the step is running, but not before.
- addLog(name)
Parameters: name -- log name Returns: LogFile instance Add a new logfile with the given name to the step, and return the log file instance.
- getLog(name)
Parameters: name -- log name Returns: LogFile instance Raises : KeyError if the log is not found Get an existing logfile by name.
- addCompleteLog(name, text)
Parameters: - name -- log name
- text -- content of the logfile
This method adds a new log and sets text as its content. This is often useful to add a short logfile describing activities performed on the master. The logfile is immediately closed, and no further data can be added.
- addHTMLLog(name, html)
Parameters: - name -- log name
- html -- content of the logfile
Similar to addCompleteLog, this adds a logfile containing pre-formatted HTML, allowing more expressiveness than the text format supported by addCompleteLog.
- addLogObserver(logname, observer)
Parameters: - logname -- log name
- observer -- log observer instance
Add a log observer for the named log. The named log need not have been added already: the observer will be connected when the log is added.
See Adding LogObservers for more information on log observers.
LoggingBuildStep
- class buildbot.process.buildstep.LoggingBuildStep(logfiles, lazylogfiles, log_eval_func, name, locks, haltOnFailure, flunkOnWarnings, flunkOnFailure, warnOnWarnings, warnOnFailure, alwaysRun, progressMetrics, useProgress, doStepIf, hideStepIf)
Parameters: - logfiles -- see ShellCommand
- lazylogfiles -- see ShellCommand
- log_eval_func -- see ShellCommand
The remaining arguments are passed to the BuildStep constructor.
This subclass of BuildStep is designed to help its subclasses run remote commands that produce standard I/O logfiles. It:
- tracks progress using the length of the stdout logfile
- provides hooks for summarizing and evaluating the command's result
- supports lazy logfiles
- handles the mechanics of starting, interrupting, and finishing remote commands
- detects lost slaves and finishes with a status of RETRY
- logfiles
The logfiles to track, as described for ShellCommand. The contents of the class-level logfiles attribute are combined with those passed to the constructor, so subclasses may add log files with a class attribute:
class MyStep(LoggingBuildStep): logfiles = dict(debug='debug.log')
Note that lazy logfiles cannot be specified using this method; they must be provided as constructor arguments.
- startCommand(command)
Parameters: command -- the RemoteCommand instance to start Note
This method permits an optional errorMessages parameter, allowing errors detected early in the command process to be logged. It will be removed, and its use is deprecated.Handle all of the mechanics of running the given command. This sets up all required logfiles, keeps status text up to date, and calls the utility hooks described below. When the command is finished, the step is finished as well, making this class is unsuitable for steps that run more than one command in sequence.
Subclasses should override start and, after setting up an appropriate command, call this method.
def start(self): cmd = RemoteShellCommand(..) self.startCommand(cmd, warnings)
To refine the status output, override one or more of the following methods. The LoggingBuildStep implementations are stubs, so there is no need to call the parent method.
- commandComplete(command)
Parameters: command -- the just-completed remote command This is a general-purpose hook method for subclasses. It will be called after the remote command has finished, but before any of the other hook functions are called.
- createSummary(stdio)
Parameters: stdio -- stdio LogFile This hook is designed to perform any summarization of the step, based either on the contents of the stdio logfile, or on instance attributes set earlier in the step processing. Implementations of this method often call e.g., addURL.
- evaluateCommand(command)
Parameters: command -- the just-completed remote command Returns: step result from buildbot.status.results This hook should decide what result the step should have. The default implementation invokes log_eval_func if it exists, and looks at rc to distinguish SUCCESS from FAILURE.
The remaining methods provide an embarrassment of ways to set the summary of the step that appears in the various status interfaces. The easiest way to affect this output is to override describe. If that is not flexible enough, override getText and/or getText2.
- getText(command, results)
Parameters: - command -- the just-completed remote command
- results -- step result from evaluateCommand
Returns: a list of short strings
This method is the primary means of describing the step. The default implementation calls describe, which is usually the easiest method to override, and then appends a string describing the step status if it was not successful.
- getText2(command, results)
Parameters: - command -- the just-completed remote command
- results -- step result from evaluateCommand
Returns: a list of short strings
Like getText, this method summarizes the step's result, but it is only called when that result affects the build, either by making it halt, flunk, or end with warnings.
Exceptions
- exception buildbot.process.buildstep.BuildStepFailed
This exception indicates that the buildstep has failed. It is useful as a way to skip all subsequent processing when a step goes wrong. It is handled by BuildStep.failed.
ForceScheduler
The force scheduler has a symbiotic relationship with the web status, so it deserves some further description.
Parameters
The force scheduler comes with a fleet of parameter classes. This section contains information to help users or developers who are interested in adding new parameter types or hacking the existing types.
- class buildbot.schedulers.forceshed.BaseParameter(name, label, regex, **kwargs)
This is the base implementation for most parameters, it will check validity, ensure the arg is present if the required attribute is set, and implement the default value. It will finally call updateFromKwargs to process the string(s) from the HTTP POST.
The BaseParameter constructor converts all keyword arguments into instance attributes, so it is generally not necessary for subclasses to implement a constructor.
For custom parameters that set properties, one simple customization point is getFromKwargs:
- getFromKwargs(kwargs)
Parameters: kwargs -- a dictionary of the posted values Given the passed-in POST parameters, return the value of the property that should be set.
For more control over parameter parsing, including modifying sourcestamps or changeids, override the updateFromKwargs function, which is the function that ForceScheduler invokes for processing:
- updateFromKwargs(master, properties, changes, sourcestamps, kwargs)
Parameters: - master -- the BuildMaster instance
- properties -- a dictionary of properties
- changes -- a list of changeids that will be used to build the SourceStamp for the forced builds
- sourcestamps -- the SourceStamp dictionary that will be passed to the build; some parameters modify sourcestamps rather than properties.
- kwargs -- a dictionary of the posted values
This method updates properties, changes, and/or sourcestamps according to the request. The default implementation is good for many simple uses, but can be overridden for more complex purposes.
When overriding this function, take all parameters by name (not by position), and include an **unused catch-all to guard against future changes.
The remaining attributes and methods should be overridden by subclasses, although BaseParameter provides appropriate defaults.
- name
The name of the parameter. This corresponds to the name of the property that your parameter will set. This name is also used internally as identifier for http POST arguments
- label
The label of the parameter, as displayed to the user. This value can contain raw HTML.
- fullName()
A fully-qualified name that uniquely identifies the parameter in the scheduler. This name is used internally as the identifier for HTTP POST arguments. It is a mix of name and the parent's name (in the case of nested parameters). This field is not modifiable.
- type
A list of types that the parameter conforms to. These are used by the jinja template to create appropriate html form widget. The available values are visible in master/buildbot/status/web/template/forms.html in the force_build_one_scheduler macro.
- default
The default value to use if there is no user input. This is also used to fill in the form presented to the user.
- required
If true, an error will be shown to user if there is no input in this field
- multiple
If true, this parameter represents a list of values (e.g. list of tests to run)
- regex
A string that will be compiled as a regex and used to validate the string value of this parameter. If None, then no validation will take place.
- parse_from_args(l)
return the list of object corresponding to the list or string passed default function will just call parse_from_arg with the first argument
- parse_from_arg(s)
return the object corresponding to the string passed default function will just return the unmodified string
Nested Parameters
The NestedParameter class is a container for parameters. The motivating purpose for this feature is the multiple-codebase configuration, which needs to provide the user with a form to control the branch (et al) for each codebase independently. Each branch parameter is a string field with name 'branch' and these must be disambiguated.
Each of the child parameters mixes in the parent's name to create the fully qualified fullName. This allows, for example, each of the 'branch' fields to have a unique name in the POST request. The NestedParameter handles adding this extra bit to the name to each of the children. When the kwarg dictionary is posted back, this class also converts the flat POST dictionary into a richer structure that represents the nested structure.
As illustration, if the nested parameter has the name 'foo', and has children 'bar1' and 'bar2', then the POST will have entries like "foo-bar1" and "foo-bar2". The nested parameter will translate this into a dictionary in the 'kwargs' structure, resulting in something like:
kwargs = {
# ...
'foo': {
'bar1': '...',
'bar2': '...'
}
}
Arbitrary nesting is allowed and results in a deeper dictionary structure.
Nesting can also be used for presentation purposes. If the name of the NestedParameter is empty, the nest is "anonymous" and does not mangle the child names. However, in the HTML layout, the nest will be presented as a logical group.
IRenderable
- buildbot.interfaces.IRenderable::
Providers of this class can be "rendered", based on available properties, when a build is started.
- getRenderingFor(iprops)
Parameters: iprops -- the IProperties provider supplying the properties of the build. Returns the interpretation of the given properties, optionally in a Deferred.
IProperties
- buildbot.interfaces.IProperties::
Providers of this interface allow get and set access to a build's properties.
- getProperty(propname, default=None)
Get a named property, returning the default value if the property is not found.
- hasProperty(propname)
Determine whether the named property exists.
- setProperty(propname, value, source)
Set a property's value, also specifying the source for this value.
- getProperties()
Get a buildbot.process.properties.Properties instance. The interface of this class is not finalized; where possible, use the other IProperties methods.
Release Notes for Buildbot v0.8.8
The following are the release notes for Buildbot v0.8.8 Buildbot v0.8.8 was released on August 22, 2013
Master
Features
- The MasterShellCommand step now correctly handles environment variables passed as list.
- The master now poll the database for pending tasks when running buildbot in multi-master mode.
- The algorithm to match build requests to slaves has been rewritten in pull request 615. The new algorithm automatically takes locks into account, and will not schedule a build only to have it wait on a lock. The algorithm also introduces a canStartBuild builder configuration option which can be used to prevent a build request being assigned to a slave.
- buildbot stop and buildbot restart now accept --clean to stop or restart the master cleanly (allowing all running builds to complete first).
- The IRC bot now supports clean shutdown and immediate shutdown by using the command 'shutdown'. To allow the command to function, you must provide allowShutdown=True.
- CopyDirectory has been added.
- BuildslaveChoiceParameter has been added to provide a way to explicitly choose a buildslave for a given build.
- default.css now wraps preformatted text by default.
- Slaves can now be paused through the web status.
- The latent buildslave support is less buggy, thanks to pull request 646.
- The treeStableTimer for AnyBranchScheduler now maintains separate timers for separate branches, codebases, projects, and repositories.
- SVN has a new option preferLastChangedRev=True to use the last changed revision for got_revision
- The build request DB connector method getBuildRequests can now filter by branch and repository.
- A new SetProperty step has been added in buildbot.steps.master which can set a property directly without accessing the slave.
- The new LogRenderable step logs Python objects, which can contain renderables, to the logfile. This is helpful for debugging property values during a build.
- 'buildbot try' now has an additional --property option to set properties. Unlike the existing --properties option, this new option supports setting only a single property and therefore allows commas to be included in the property name and value.
- The Git step has a new config option, which accepts a dict of git configuration options to pass to the low-level git commands. See Git for details.
- In ShellCommand ShellCommand now validates its arguments during config and will identify any invalid arguments before a build is started.
- The list of force schedulers in the web UI is now sorted by name.
- OpenStack-based Latent Buildslave support was added. See pull request 666.
- Master-side support for P4 is available, and provides a great deal more flexibility than the old slave-side step. See pull request 596.
- Master-side support for Repo is available. The step parameters changed to camelCase. repo_downloads, and manifest_override_url properties are no longer hardcoded, but instead consult as default values via renderables. Renderable are used in favor of callables for syncAllBranches and updateTarball.
- Builder configurations can now include a description, which will appear in the web UI to help humans figure out what the builder does.
- GNUAutoconf and other pre-defined factories now work correctly (bug #2402)
- The pubDate in RSS feeds is now rendered correctly (bug #2530)
Deprecations, Removals, and Non-Compatible Changes
- The split_file function for SVNPoller may now return a dictionary instead of a tuple. This allows it to add extra information about a change (such as project or repository).
- The workdir build property has been renamed to builddir. This change accurately reflects its content; the term "workdir" means something different. workdir is currently still supported for backwards compatability, but will be removed eventually.
- The Blocker step has been removed.
- Several polling ChangeSources are now documented to take a pollInterval argument, instead of pollinterval. The old name is still supported.
- StatusReceivers' checkConfig method should no longer take an errors parameter. It should indicate errors by calling error.
- Build steps now require that their name be a string. Previously, they would accept anything, but not behave appropriately.
- The web status no longer displays a potentially misleading message, indicating whether the build can be rebuilt exactly.
- The SetProperty step in buildbot.steps.shell has been renamed to SetPropertyFromCommand.
- The EC2 and libvirt latent slaves have been moved to buildbot.buildslave.ec2 and buildbot.buildslave.libirt respectively.
- Pre v0.8.7 versions of buildbot supported passing keyword arguments to buildbot.process.BuildFactory.addStep, but this was dropped. Support was added again, while still being deprecated, to ease transition.
Changes for Developers
- Added an optional build start callback to buildbot.status.status_gerrit.GerritStatusPush This release includes the fix for bug #2536.
- An optional startCB callback to GerritStatusPush can be used to send a message back to the committer. See the linked documentation for details.
- bb:sched:ChoiceStringParameter has a new method getChoices that can be used to generate content dynamically for Force scheduler forms.
Slave
Features
- The fix for Twisted bug #5079 is now applied on the slave side, too. This fixes a perspective broker memory leak in older versions of Twisted. This fix was added on the master in Buildbot-0.8.4 (see bug #1958).
- The --nodaemon option to buildslave start now correctly prevents the slave from forking before running.
Deprecations, Removals, and Non-Compatible Changes
Details
For a more detailed description of the changes made in this version, see the git log itself:
git log v0.8.7..v0.8.8
Older Versions
Release notes for older versions of Buildbot are available in the master/docs/relnotes/ directory of the source tree. Newer versions are also available here:
Release Notes for Buildbot v0.8.7
The following are the release notes for Buildbot v0.8.7. Buildbot v0.8.7 was released on September 22, 2012. Buildbot 0.8.7p1 was released on November 21, 2012.
0.8.7p1
In addition to what's listed below, the 0.8.7p1 release adds the following.
- The SetPropertiesFromEnv step now correctly gets environment variables from the slave, rather than those set on the master. Also, it logs the changes made to properties.
- The master-side Git source step now doesn't try to clone a branch called HEAD. This is what git does by default, and specifying it explicitly doesn't work as expected.
- The Git step properly deals with the case when there is a file called FETCH_HEAD in the checkout.
- Buildbot no longer forks when told not to daemonize.
- Buildbot's startup is now more robust. See bug #1992.
- The Trigger step uses the provided list of source stamps exactly, if given, instead of adding them to the sourcestamps of the current build. In 0.8.7, they were combined with the source stamps for the current build.
- The Trigger step again completely ignores the source stamp of the current build, if alwaysUseLatest is set. In 0.8.7, this was mistakenly changed to only ignore the specified revision of the source stamp.
- The Triggerable scheduler is again properly passing changes through to the scheduled builds. See bug #2376.
- Web change hooks log errors, allowing debugging.
- The base change hook now properly decodes the provided date.
- CVSMailDir has been fixed.
- Importing buildbot.test no longer causes python to exit, if mock insn't installed. The fixes pydoc -k when buildbot is installed.
- Mercurial properly updates to the correct branch, when using inrepo branches.
- Buildbot now doesn't fail on invalid UTF-8 in a number of places.
- Many documenation updates and fixes.
Master
Features
- Buildbot now supports building projects composed of multiple codebases. New
schedulers can aggregate changes to multiple codebases into source stamp sets
(with one source stamp for each codebase). Source steps then check out each
codebase as required, and the remainder of the build process proceeds
normally. See the Multiple-Codebase Builds for details.
- The format of the got_revision property has changed for multi-codebase builds. It is now a dictionary keyed by codebase.
- Source and ShellCommand steps now have an optional descriptionSuffix, a suffix to the description/descriptionDone values. For example this can help distinguish between multiple Compile steps that are applied to different codebases.
- The Git step has a new getDescription option, which will run git describe after checkout normally. See Git for details.
- A new interpolation placeholder Interpolate, with more regular syntax, is available.
- A new ternary substitution operator :? and :#? is available with the Interpolate class.
- IRenderable.getRenderingFor can now return a deferred.
- The Mercurial hook now supports multiple masters. See pull request 436.
- There's a new poller for Mercurial: HgPoller.
- The new HTPasswdAprAuth uses libaprutil (through ctypes) to validate the password against the hash from the .htpasswd file. This adds support for all hash types htpasswd can generate.
- GitPoller has been rewritten. It now supports multiple branches and can share a directory between multiple pollers. It is also more resilient to changes in configuration, or in the underlying repository.
- Added a new property httpLoginUrl to buildbot.status.web.authz.Authz to render a nice Login link in WebStatus for unauthenticated users if useHttpHeader and httpLoginUrl are set.
- ForceScheduler has been updated:
- support for multiple codebases via the codebases parameter
- NestedParameter to provide a logical grouping of parameters.
- CodebaseParameter to set the branch/revision/repository/project for a codebase
- new HTML/CSS customization points. Each parameter is contained in a row with multiple 'class' attributes associated with them (eg, 'force-string' and 'force-nested') as well as a unique id to use with Javascript. Explicit line-breaks have been removed from the HTML generator and are now controlled using CSS.
- The SVNPoller now supports multiple projects and codebases. See pull request 443.
- The MailNotifier now takes a callable to calculate the "previous" build for purposes of determining status changes. See pull request 489.
- The copy_properties parameter, given a list of properties to copy into the new build request, has been deprecated in favor of explicit use of set_properties.
Deprecations, Removals, and Non-Compatible Changes
Buildbot master now requires at least Python-2.5 and Twisted-9.0.0.
Passing a BuildStep subclass (rather than instance) to addStep is no longer supported. The addStep method now takes exactly one argument.
Buildbot master requires python-dateutil version 1.5 to support the Nightly scheduler.
ForceScheduler has been updated to support multiple codebases. The branch/revision/repository/project are deprecated; if you have customized these values, simply provide them as codebases=[CodebaseParameter(name='', ...)].
- The POST URL names for AnyPropertyParameter fields have changed. For example, 'property1name' is now 'property1_name', and 'property1value' is now 'property1_value'. Please update any bookmarked or saved URL's that used these fields.
- forcesched.BaseParameter API has changed quite a bit and is no longer backwards
compatible. Updating guidelines:
- get_from_post is renamed to getFromKwargs
- update_from_post is renamed to updateFromKwargs. This function's parameters are now called via named parameters to allow subclasses to ignore values it doesnt use. Subclasses should add **unused for future compatibility. A new parameter sourcestampset is provided to allow subclasses to modify the sourcestamp set, and will probably require you to add the **unused field.
The parameters to the callable version of build.workdir have changed. Instead of a single sourcestamp, a list of sourcestamps is passed. Each sourcestamp in the list has a different codebase
The undocumented renderable _ComputeRepositoryURL is no longer imported to buildbot.steps.source. It is still available at buildbot.steps.source.oldsource.
IProperties.render now returns a deferred, so any code rendering properties by hand will need to take this into account.
baseURL has been removed in SVN to use just repourl - see bug #2066. Branch info should be provided with Interpolate.
from buildbot.steps.source.svn import SVN factory.append(SVN(baseURL="svn://svn.example.org/svn/"))
can be replaced with
from buildbot.process.properties import Interpolate from buildbot.steps.source.svn import SVN factory.append(SVN(repourl=Interpolate("svn://svn.example.org/svn/%(src::branch)s")))
and
from buildbot.steps.source.svn import SVN factory.append(SVN(baseURL="svn://svn.example.org/svn/%%BRANCH%%/project"))
can be replaced with
from buildbot.process.properties import Interpolate from buildbot.steps.source.svn import SVN factory.append(SVN(repourl=Interpolate("svn://svn.example.org/svn/%(src::branch)s/project")))
and
from buildbot.steps.source.svn import SVN factory.append(SVN(baseURL="svn://svn.example.org/svn/", defaultBranch="branches/test"))
can be replaced with
from buildbot.process.properties import Interpolate from buildbot.steps.source.svn import SVN factory.append(SVN(repourl=Interpolate("svn://svn.example.org/svn/%(src::branch:-branches/test)s")))
The P4Sync step, deprecated since 0.8.5, has been removed. The P4 step remains.
The fetch_spec argument to GitPoller is no longer supported. GitPoller now only downloads branches that it is polling, so specifies a refspec itself.
The format of the changes produced by SVNPoller has changed: directory pathnames end with a forward slash. This allows the split_file function to distinguish between files and directories. Customized split functions may need to be adjusted accordingly.
WithProperties has been deprecated in favor of Interpolate. Interpolate doesn't handle functions as keyword arguments. The following code using WithProperties
from buildbot.process.properties import WithProperties def determine_foo(props): if props.hasProperty('bar'): return props['bar'] elif props.hasProperty('baz'): return props['baz'] return 'qux' WithProperties('%(foo)s', foo=determine_foo)
can be replaced with
from zope.interface import implementer from buildbot.interfaces import IRenderable from buildbot.process.properties import Interpolate @implementer(IRenderable) class determineFoo(object): def getRenderingFor(self, props): if props.hasProperty('bar'): return props['bar'] elif props.hasProperty('baz'): return props['baz'] return 'qux' Interpolate('%s(kw:foo)s', foo=determineFoo())
Changes for Developers
- BuildStep.start can now optionally return a deferred and any errback will be handled gracefully. If you use inlineCallbacks, this means that unexpected exceptions and failures raised will be captured and logged and the build shut down normally.
- The helper methods getState and setState from BaseScheduler have been factored into buildbot.util.state.StateMixin for use elsewhere.
Slave
Features
Deprecations, Removals, and Non-Compatible Changes
- The P4Sync step, deprecated since 0.8.5, has been removed. The P4 step remains.
Details
For a more detailed description of the changes made in this version, see the Git log itself:
git log v0.8.6..v0.8.7
Older Versions
Release notes for older versions of Buildbot are available in the master/docs/relnotes/ directory of the source tree. Starting with version 0.8.6, they are also available under the appropriate version at http://buildbot.net/buildbot/docs.
Release Notes for Buildbot v0.8.6p1
The following are the release notes for Buildbot v0.8.6p1. Buildbot v0.8.6 was released on March 11, 2012. Buildbot v0.8.6p1 was released on March 25, 2012.
0.8.6p1
In addition to what's listed below, the 0.8.6p1 release adds the following.
- Builders are no longer displayed in the order they were configured. This was never intended behavior, and will become impossible in the distributed architecture planned for Buildbot-0.9.x. As of 0.8.6p1, builders are sorted naturally: lexically, but with numeric segments sorted numerically.
- Slave properties in the configuration are now handled correctly.
- The web interface buttons to cancel individual builds now appear when configured.
- The ForceScheduler's properties are correctly updated on reconfig - bug #2248.
- If a slave is lost while waiting for locks, it is properly cleaned up - bug #2247.
- Crashes when adding new steps to a factory in a reconfig are fixed - bug #2252.
- MailNotifier AttributeErrors are fixed - bug #2254.
- Cleanup from failed builds is improved - bug #2253.
Master
- If you are using the GitHub hook, carefully consider the security implications of allowing un-authenticated change requests, which can potentially build arbitrary code. See bug #2186.
Deprecations, Removals, and Non-Compatible Changes
Forced builds now require that a ForceScheduler be defined in the Buildbot configuration. For compatible behavior, this should look like:
from buildbot.schedulers.forcesched import ForceScheduler c['schedulers'].append(ForceScheduler( name="force", builderNames=["b1", "b2", ... ]))
Where all of the builder names in the configuration are listed. See the documentation for the much more flexiblie configuration options now available.
This is the last release of Buildbot that will be compatible with Python 2.4. The next version will minimally require Python-2.5. See bug #2157.
This is the last release of Buildbot that will be compatible with Twisted-8.x.y. The next version will minimally require Twisted-9.0.0. See bug #2182.
buildbot start no longer invokes make if a Makefile.buildbot exists. If you are using this functionality, consider invoking make directly.
The buildbot sendchange option --username has been removed as promised in bug #1711.
StatusReceivers' checkConfig method should now take an additional errors parameter and call its addError method to indicate errors.
The gerrit status callback now gets an additional parameter (the master status). If you use this callback, you will need to adjust its implementation.
SQLAlchemy-Migrate version 0.6.0 is no longer supported. See Buildmaster Requirements.
Older versions of SQLite which could limp along for previous versions of Buildbot are no longer supported. The minimum version is 3.4.0, and 3.7.0 or higher is recommended.
The master-side Git step now checks out 'HEAD' by default, rather than master, which translates to the default branch on the upstream repository. See pull request 301.
The format of the repository strings created by hgbuildbot has changed to contain the entire repository URL, based on the web.baseurl value in hgrc. To continue the old (incorrect) behavior, set hgbuildbot.baseurl to an empty string as suggested in the Buildbot manual.
Master Side SVN Step has been corrected to properly use --revision when alwaysUseLatest is set to False when in the full mode. See bug #2194
Master Side SVN Step paramater svnurl has been renamed repourl, to be consistent with other master-side source steps.
Master Side Mercurial step parameter baseURL has been merged with repourl parameter. The behavior of the step is already controled by branchType parameter, so just use a single argument to specify the repository.
Passing a buildbot.process.buildstep.BuildStep subclass (rather than instance) to buildbot.process.factory.BuildFactory.addStep has long been deprecated, and will be removed in version 0.8.7.
The hgbuildbot tool now defaults to the 'inrepo' branch type. Users who do not explicitly set a branch type would previously have seen empty branch strings, and will now see a branch string based on the branch in the repository (e.g., default).
Changes for Developers
- The interface for runtime access to the master's configuration has changed considerably. See Configuration for more details.
- The DB connector methods completeBuildset, completeBuildRequest, and claimBuildRequest now take an optional complete_at parameter to specify the completion time explicitly.
- Buildbot now sports sourcestamp sets, which collect multiple sourcestamps used to generate a single build, thanks to Harry Borkhuis. See pull request 287.
- Schedulers no longer have a schedulerid, but rather an objectid. In a related change, the schedulers table has been removed, along with the buildbot.db.schedulers.SchedulersConnectorComponent.getSchedulerId method.
- The Dependent scheduler tracks its upstream buildsets using buildbot.db.schedulers.StateConnectorComponent, so the scheduler_upstream_buildsets table has been removed, along with corresponding (undocumented) buildbot.db.buildsets.BuildsetsConnector methods.
- Errors during configuration (in particular in BuildStep constructors), should be reported by calling buildbot.config.error.
Features
The IRC status bot now display build status in colors by default. It is controllable and may be disabled with useColors=False in constructor.
Buildbot can now take advantage of authentication done by a front-end web server - see pull request 266.
Buildbot supports a simple cookie-based login system, so users no longer need to enter a username and password for every request. See the earlier commits in pull request 278.
The master-side SVN step now has an export method which is similar to copy, but the build directory does not contain Subversion metdata. (bug #2078)
Property instances will now render any properties in the default value if necessary. This makes possible constructs like
command=Property('command', default=Property('default-command'))
Buildbot has a new web hook to handle push notifications from Google Code - see pull request 278.
Revision links are now generated by a flexible runtime conversion configured by revlink - see pull request 280.
Shell command steps will now "flatten" nested lists in the command argument. This allows substitution of multiple command-line arguments using properties. See bug #2150.
Steps now take an optional hideStepIf parameter to suppress the step from the waterfall and build details in the web. (bug #1743)
Trigger steps with waitForFinish=True now receive a URL to all the triggered builds. This URL is displayed in the waterfall and build details. See bug #2170.
The master/contrib/fakemaster.py` script allows you to run arbitrary commands on a slave by emulating a master. See the file itself for documentation.
MailNotifier allows multiple notification modes in the same instance. See bug #2205.
SVNPoller now allows passing extra arguments via argument extra_args. See bug #1766
Slave
Deprecations, Removals, and Non-Compatible Changes
- BitKeeper support is in the "Last-Rites" state, and will be removed in the next version unless a maintainer steps forward.
Features
Details
For a more detailed description of the changes made in this version, see the Git log itself:
git log buildbot-0.8.5..buildbot-0.8.6
Older Versions
Release notes for older versions of Buildbot are available in the master/docs/release-notes/ directory of the source tree, or in the archived documentation for those versions at http://buildbot.net/buildbot/docs.
Indices and Tables
Copyright
This documentation is part of Buildbot.
Buildbot is free software: you can redistribute it and/or modify it under the terms of the GNU General Public License as published by the Free Software Foundation, version 2.
This program is distributed in the hope that it will be useful, but WITHOUT ANY WARRANTY; without even the implied warranty of MERCHANTABILITY or FITNESS FOR A PARTICULAR PURPOSE. See the GNU General Public License for more details.
You should have received a copy of the GNU General Public License along with this program; if not, write to the Free Software Foundation, Inc., 51 Franklin Street, Fifth Floor, Boston, MA 02110-1301 USA.
Copyright Buildbot Team Members